

Introduction
Unleash more creativity in your video using proDAD VitaScene which offers more than 100 powerful visual effects that can be used independently and are rendered at top speed by your GPU. This bonus plug-in for Corel VideoStudio Pro X5 Ultimate offers an easy and fast way to add high-quality transitions, text effects, filters, image enhancements and more to your videos.
What You Will Learn
- In this video tutorial, you will learn how to:
- Apply a sparkling filter effect on to an image
- Create a text bevel effect on to a Title
- Apply a torch light sweep transition effect between two images
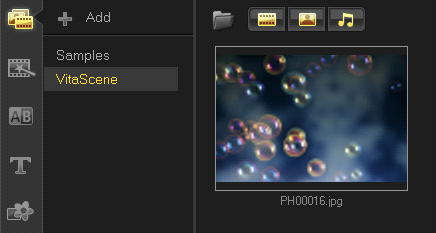
Adding a background image to your project
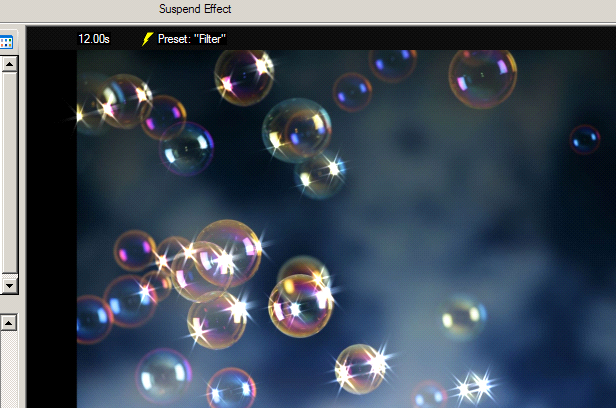
1. To begin, drag and drop a clip from your Media Library onto the main video track in the Timeline. This will serve as the background of your Title. For this example, I'll be using this bubble image.
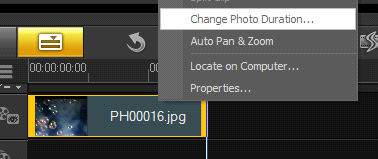
2. Next, right-click on it and select Change Photo Duration. In the Duration dialog box, set the value to 20 seconds (0:0:20:0) and click on OK.
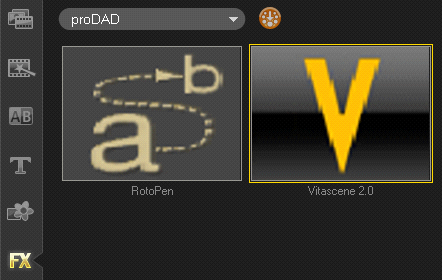
3. Then, go to the FX Library 4 ProDAD, and select the VitaScene 2.0 filter. You will be using this filter to add a sparkling effect on the background image.
4. Drag and drop this filter onto the clip on the Timeline; this filter effect will then be added on to your clip.
5. Now, double-click the clip to launch the Attribute tab where you can customize the VitaScene 2.0 filter.
6. In the Attribute tab, click on Customize Filter to launch the VitaScene 2.0 window.

Adding a Sparkling effect on the background image
1. In the VitaScene window, click on the Settings option and select Video Format. In the Format drop-down list, chooseNTSC DV 16:9 wide. This will change the frame size of the Preview Window according to the chosen video format.
2. Click on the Filter-Presets and select New... [from scratch] in the Filter Group #1 Presets drop-down list; next, double-click on the Filter option to apply the Filter effect on to the image.

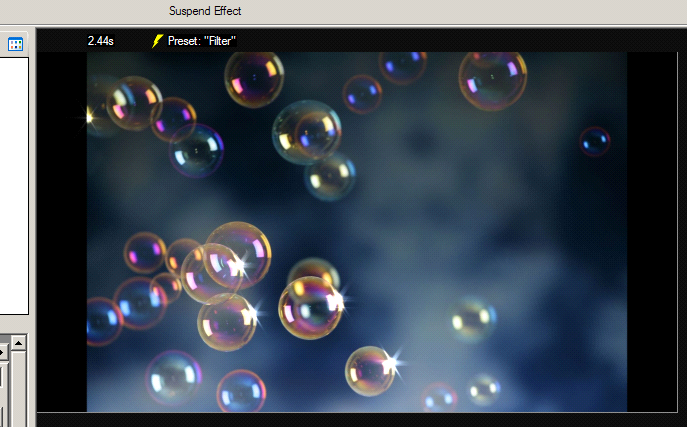
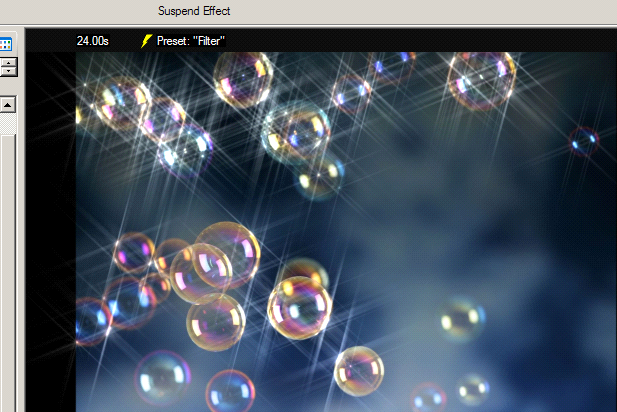
3. In the Specialization pane, go to the Filter tab and select Sparkle filter; this effect simulates light effects on the bright areas of an image.

4. Below the filter shows its dialogue box where you can adjust the various settings for the Sparkle filter in relation to the selected image.
5. Click on the Play button to see the Sparkle effect from the Preview window; you will notice that there hasn't been any change in the movement yet, since we did not modify any settings in this filter.
6. Below the Preview window is the timeline of the selected image. By default, the starting keyframe and the ending keyframe have the same values; that is why the sparkling effect is in static mode. The static movement will also be applied throughout the duration of the animation, once you uncheck the keyframes checkbox.
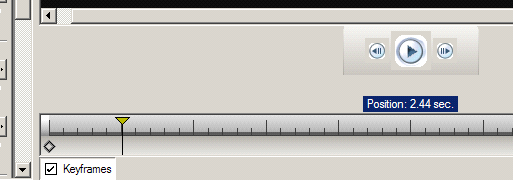
7. Keep the keyframes checkbox checked and the starting keyframe with its default settings.
8. Next, move the slider in the middle of the Timeline. A new keyframe will be placed in this current position once you change the settings in the Sparkle Dialog box.
9. To create a new keyframe, apply the following settings using either the controller or the field: Glow-Intensity = 70%, Spot-Intensity = 0%, Orientation = 60%, and reduce flicker = 54%

10. Select the starting keyframe and then click on the Play button to view the Sparkle effect on the image from the Preview window.
11. Now, move the slider between the middle keyframe and ending keyframe then apply the following settings to this new position on the Timeline: Length = 25, Erosion-Threshold = 91%, Glow-Intensity = 70%, Spot-Intensity = 0%, Orientation = 80%, and reduce flicker = 30%
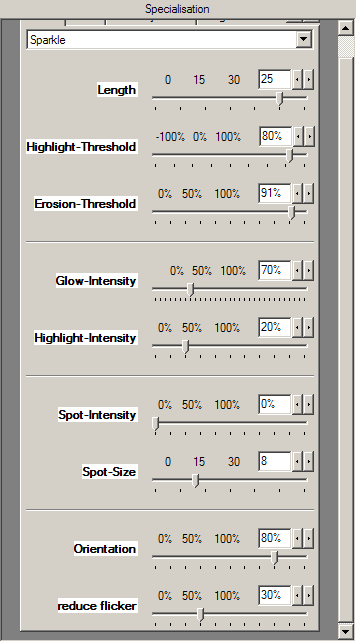
12. Finally, move the slider to the ending keyframe and then apply the following settings: Length = 20, Highlight-Threshold = 20%, Erosion-Threshold = 13%, Glow-Intensity = 30%, Spot-Intensity = 0%, Orientation = 90%, and reduce flicker = 20%

13. Start the preview to look at the effect by clicking the Play button again.
14. Normally, you can adjust a keyframe that you created within the Timeline by dragging it to a new position using the left mouse button. You can also delete keyframes by clicking on them and pressing the Delete key on your keyboard.
15. Now, press the Plug-in icon located below the Menu bar to save your VitaScene settings and to go back to the VideoStudio Timeline Editor.
Adding a Title to the scene
1. Now, you will be adding a Title to the scene. In the Timeline panel, move the slider to the very beginning of the Timeline (0:00:00.00) by pressing the Home key on your keyboard.
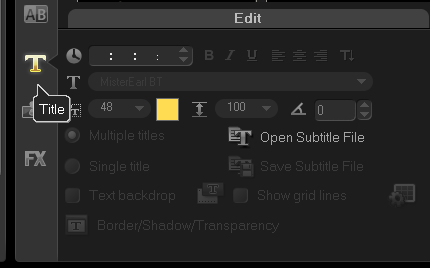
2. Next, go to the Title library by left-clicking the "T" icon between the Preview Window and Library Panel. Your preview screen will show the instructions on how you can add a text to your project.
3. Double-click on the Preview Window to activate the text box.
4. Type the text that you want to appear on your Preview window. For this example, type: "The Sparkling Effect". Click anywhere in the Preview window to apply the text.
5. In the Edit tab below the Library panel, change the Title duration to 20 seconds (0:00:20.00).
6. Double-click on the Title again on the Timeline, click on the "Select a Title style preset" drop-down list in the Edit tab and then choose your desired Title style. I will choose this preset.

7. While the Title is still selected, change its font size to 70 and align it to the center.

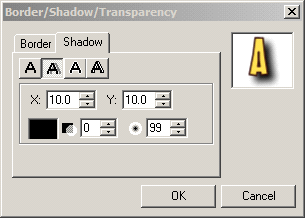
8. Click on the Border/Shadow/Transparency to launch its window; in the Shadow tab, keep the 2nd drop shadow option from the left selected and apply the following settings: X=10.0, Y=10.0, Drop shadow transparency=0, Drop shadow soft edge=99
9. Click OK.
Applying a Text Bevel Effect in a Title
1. Next, you will be applying a Text Bevel effect into your Title. To do this, go to the FX Library 4 ProDAD, and select the VitaScene 2.0 filter.
2. Drag and drop this filter onto the clip on the Timeline; this filter effect will then be added on to your clip.
3. Now, double-click the Title to launch the Options Panel of the Title.
4. In the Attribute tab, select the Filter radio button and click on Customize Filter to customize the VitaScene 2.0 filter.

5. In the VitaScene window, go to the Filter Group #1 Presets drop-down list and select New...[from scratch] next, double-click on the Filter option to apply the Filter effect on to the Title.

6. In the Specialization pane, go to the Filter tab, select Bevel and then apply the following settings to the starting keyframe: Azimuth=100%, Elevation=100%, Depth=3%, Concave=Gauss, 5; Source=Luminosity, Bevel Mode=Sin 45 degree, Low=0%, High=100%, Light Mode=Add, Light Level=50%, Dark Mode=Sub, Dark Level=50%

7. Now, press the Plug-in icon located below the Menu bar to save your VitaScene settings and to go back to the VideoStudio Timeline Editor.

8. Go back to the FX library 4 proDAD and add another VitaScene effect to your Title;
9. In the Attribute tab, select the 2nd VitaScene effect and click on the Customize Filter to customize it further.

10. This time, choose Starburst from the Filter Group #1 Presets drop-down list and double-click on the Basic Glitter Glow #479 effect option.

11. Select the starting keyframe from the Timeline.
12. In the Specialization pane, select the Checker B from the Length drop-down list.

13. Move the slider to the middle Timeline and set the second controller Length to 100%.

14. Press the Plug-in icon located below the Menu bar to save your VitaScene settings and to go back to the VideoStudio Timeline Editor.
15. In the Attribute tab, select the Animation radio button and check the Apply checkbox.
16. Choose the Moving path in the drop-down list of animation type and select the middle option in the second row.

17. While the Title is still selected, go to the Navigation Panel below the Preview window and adjust the In and Out markers of the Pause duration to your desired position. The blue line shows the time when the Title will appear static on the Preview window once you playback your project. Beyond the In and Out markers are the times that the selected animation will apply on the Title.

Adding VitaScene transition to your project
1. Now, you will be adding the VitaScene transition effect to your project. Select the image on the main video track;
2. Next, move the slider in the Timeline by left-clicking the Timecode below the Preview window and setting it to 10 seconds (00:00:10.00) to go to that specific timecode.

3. Click on the Scissor icon to cut the image into two segments. Doing this will reset the VitaScene settings of the second half of the image to the default settings.

4. Right-click on the first half of the image and select Copy Attributes.

5. Right-click on the second half of the image and select Paste All Attributes.

6. Go to the Transition Library 4 proDAD and then drag and drop the VitaScene effect between the two images in the main video track.


7. Click on the Options button to see the Transition tab; click on the Customize button to further customize the VitaScene transition effect.


8. In the Transition Group #1 Presets drop-down list, go to Light Wipes and double-click on Torch Light Sweep #616.

9. Press the Plug-in icon located below the Menu bar to save your VitaScene settings and to go back to the VideoStudio Timeline Editor.
10. In the Transition tab, extend the exposures of the VitaScene transition by setting the duration to 3 seconds (0:00:03.00).

11. Finally, match the duration of the Sparkling effect Title to the duration of the main video track by dragging the edge of it to the edge of the second clip in the main video track.

Press the Home key on your keyboard to return to the very beginning of your project. Next, click the Project Mode on the Preview window and then the Play button to view your project using proDAD VitaScene Filter.
And there you have it. You have now created a sparkling effect and bevel Title effect using the proDAD VitaScene Filter in Corel VideoStudio Pro X5 Ultimate.
Was this article helpful?
Tell us how we can improve it.