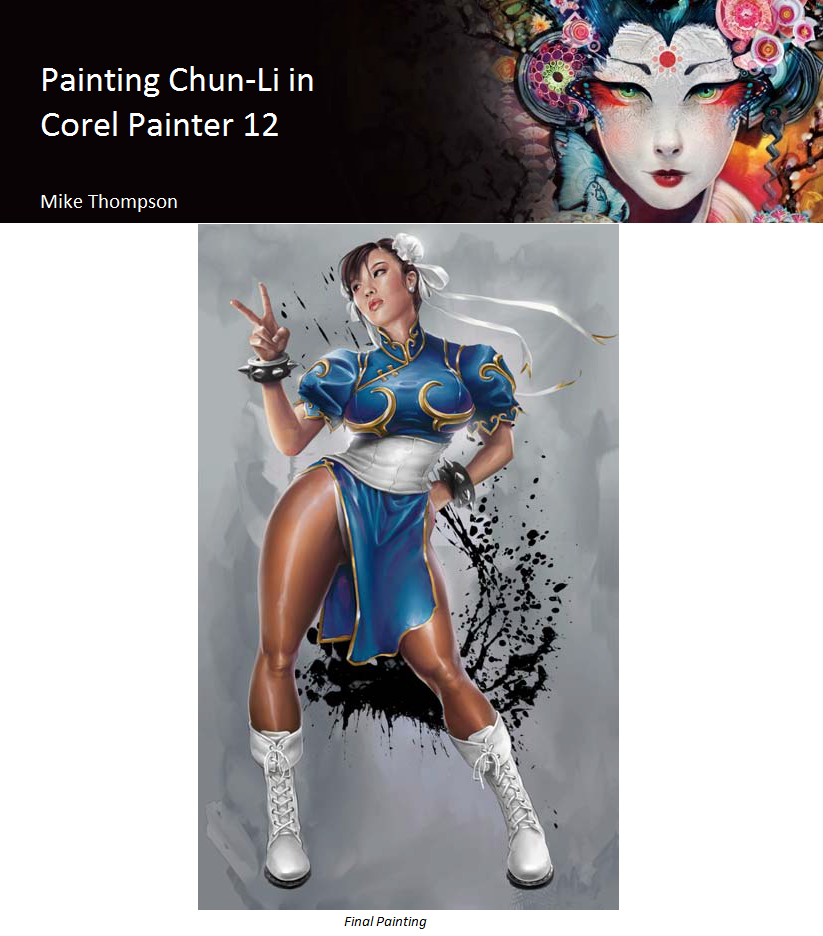
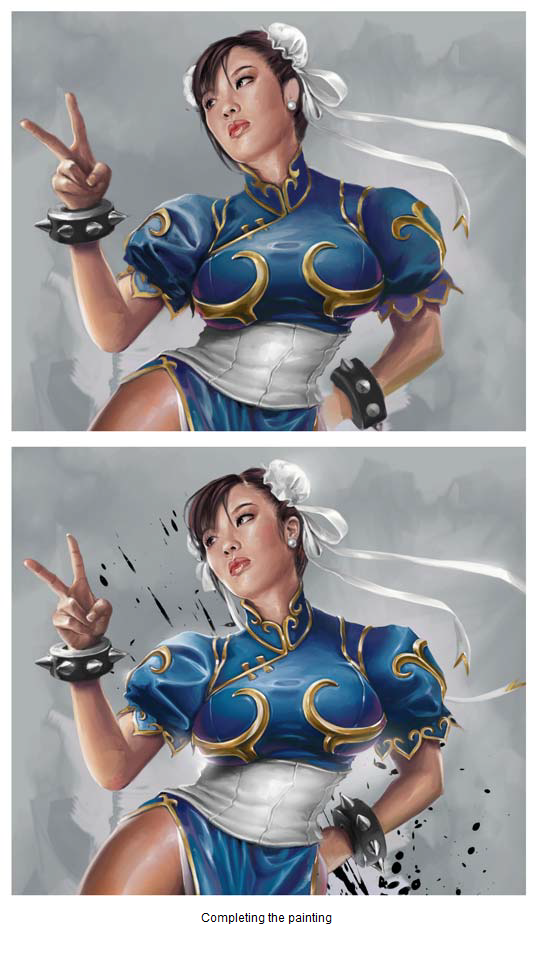
In this tutorial, I chose to paint Chun-Li from the popular Street Fighter® video game series, which is produced by Capcom®. I have always been a fan of this character and decided to paint this piece shortly after playing Street Fighter® IV.
Step 1: Creating the rough sketch
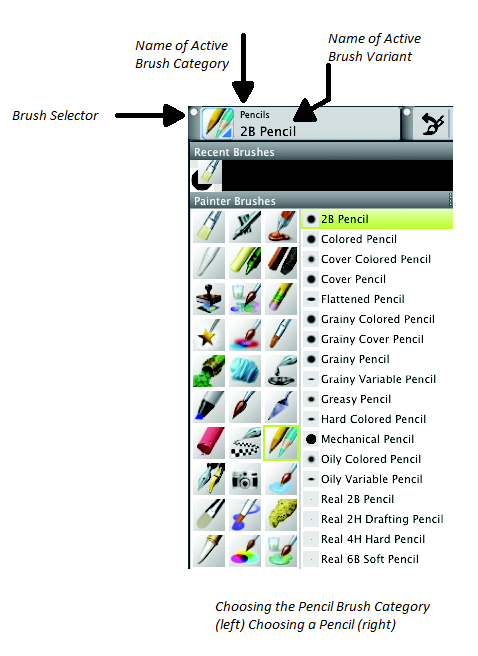
The reference image I chose shows the classic pose that Chun-Li strikes after winning a match. I want to pay homage to that, yet make her feel and look a little more adult. With that intention, I come up with the pose.
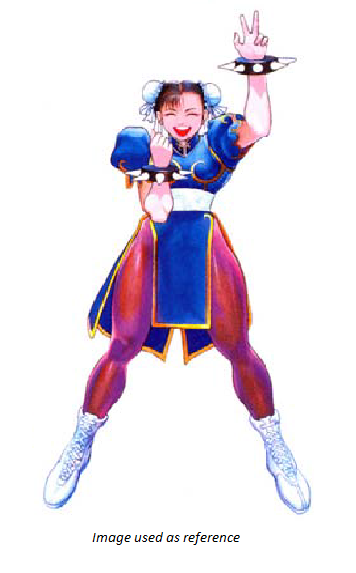
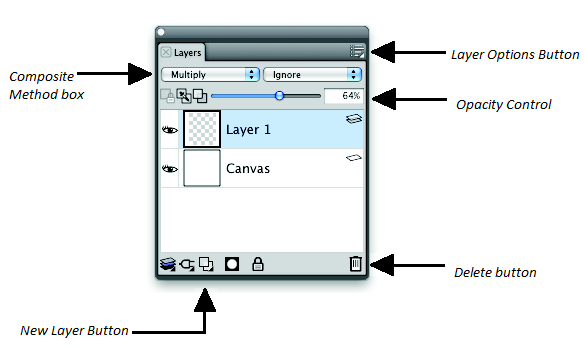
I set up a new 10" x 12" page in Corel® Painter™ at 200 dpi (File menu > New). Choosing the basic paper and a light blue color pencil as a brush tool, I create a new layer by clicking the New Layer button at the bottom of the Layers panel (Window menu > Layers) and quickly sketch my figure.
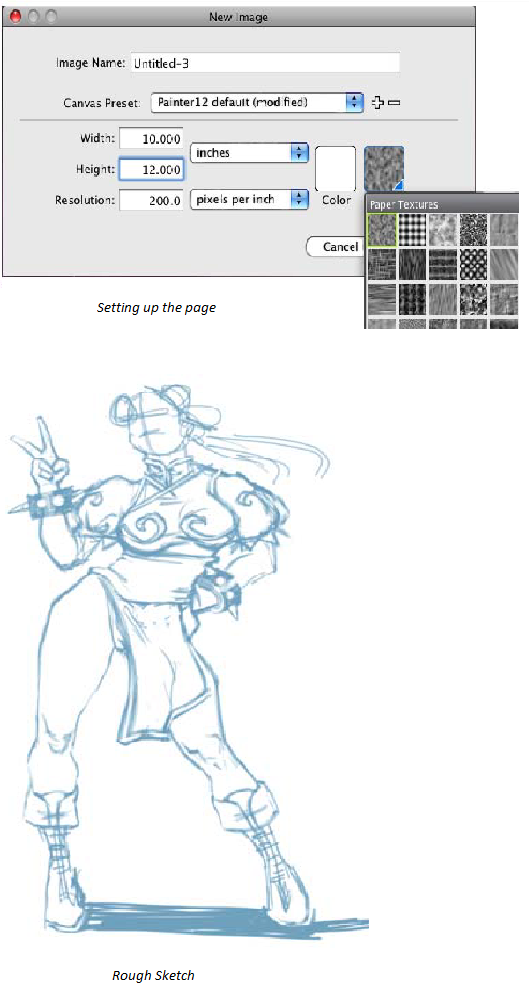
To choose a brush and change its color
1 From the Brush Selector bar, choose a brush category, and then choose a brush variant.
2 To change the color, on the Color panel, drag the hue ring to display the range of colors you want, and click the Saturation/Value triangle to specify the color.
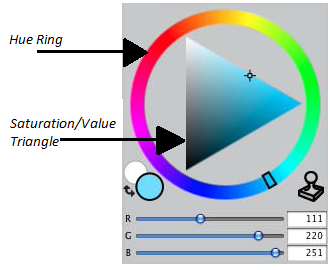
You can display the temporal colors palette and use it to change the color by pressing Option + Command +1 (Mac OS®) or Ctrl + Alt + 1 (Windows®). The temporal colors palette lets you view colors on screen, within the context of
the painting.
Step 2: Drawing with clean lines
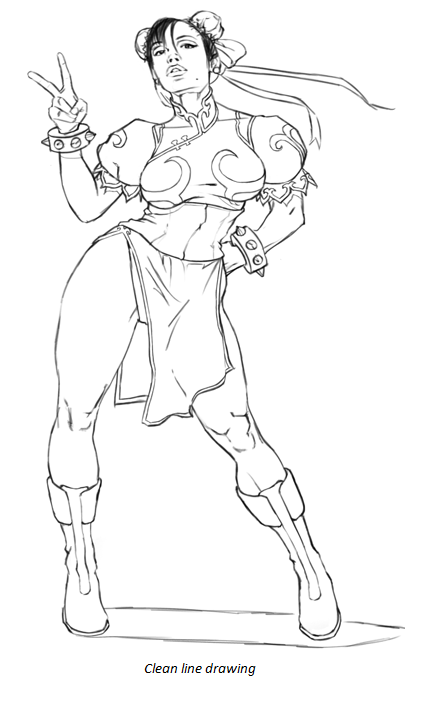
Using my rough sketch as a guide, I create a drawing with clean lines on this layer. I usually spend a few hours making sure my drawing is fairly tight
Step 3: Filling the line drawing
After my drawing is complete, I change the layer's name to Pencils on the Layers panel and then delete the layer that contains the rough sketch. Next, I enable the Preserve Transparency button on the Pencils layer, change the composite method (also known as blend mode) in the Composite Method box to Multiply, and decrease
When the Preserve Transparency setting is enabled, the transparent areas of the layer are locked. Any changes that you apply to the layer are confined to the areas that already contain brush strokes. The Composite Method setting determines how a layer interacts with the underlying layers. The Multiply composite method combines layer colors to
produce a darker color.
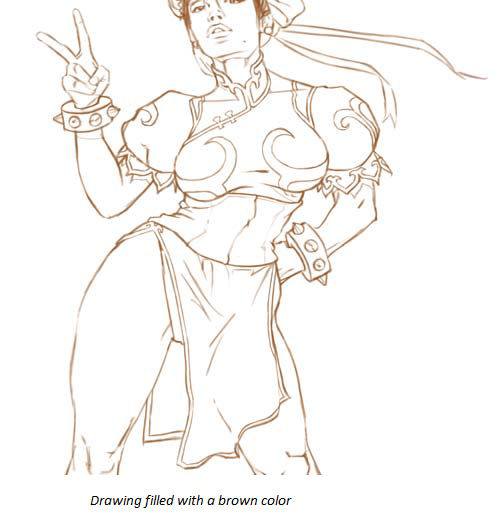
I choose a brown color on the Color panel, and then with the entire Pencils layer selected I fill my line drawing with this brown color (Edit menu > Fill).
To work with layers
• To rename a layer, double-click the layer on the Layers panel, and type a name.
• To change the layer’s opacity, specify a value between 1 and 100 in the Opacity box, or move the Opacity slider.
• To delete a layer, click the Delete button at the bottom of the Layers panel.
To fill a layer with the current color
1 Select the layer that you want to fill with color.
2 Choose Edit menu > Fill.
3 In the Fill dialog box, enable the Fill with Current Color option
Step 4: Creating the background
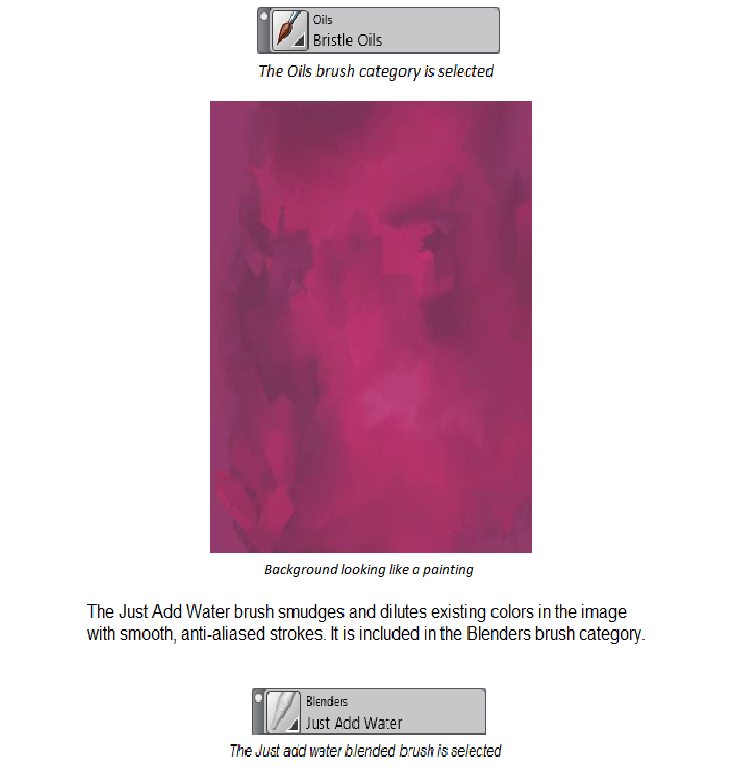
At this point, I'm not sure what I want to do with the background, but I know I want to give it a painterly feel. I choose a custom Mixer palette of bright pinks and paint on the canvas in various strokes using my Oils brushes and Just Add Water blender brush. I then save the file as an Adobe® Photoshop® (PSD) file (File > Save As).
Step 5: Color blocking
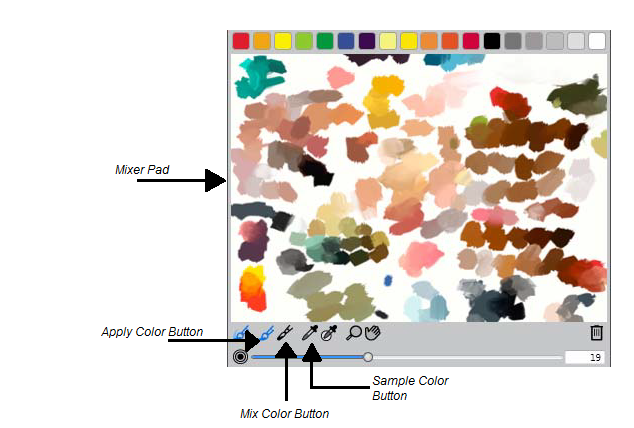
With my background complete, I create a third layer and place it between the canvas and the Pencils layer. This new layer is labeled Color. I use this layer to begin blocking in the rough tones of her skin and dress. I lay down daubs of color near my subject from the Mixer pad on the Mixer palette.
Now I can save time by using the Dropper tool from the toolbox to select these colors. The transitions are pretty harsh overall, but I'll worry about that later.
You can quickly sample a color from your painting by holding down Option (Mac OS®) or Alt (Windows®) and clicking a color on the canvas or layer. Release the key to switch back to the active brush.
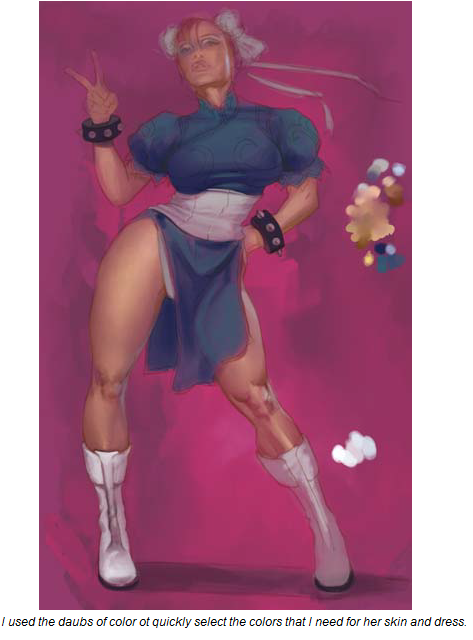
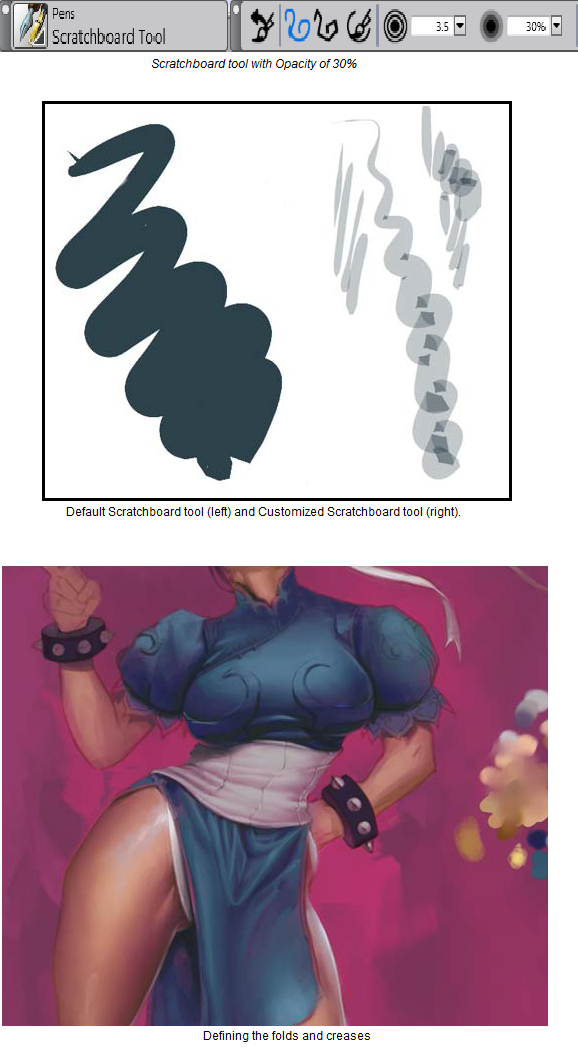
At this point, I am using a modified Scratchboard tool (Opacity 30%) and a simple Blender brush to work my colors. I define the folds and creases of her dress now by adding the darker shadows of the fabric.
The Scratchboard tool is a brush variant from the Pens brush category. When the opacity of the brush is decreased, irregular patterns are created where the brushstrokes overlap, making it ideal for adding texture.

To add and blend colors on the Mixer pad
1 On the Mixer panel, click the Apply Color tool , click a color swatch at the top of the panel, and paint on the Mixer pad.
2 Click another color swatch, and paint on the Mixer pad.
3 Click the Mix Color tool , and drag on the Mixer pad to blend colors.
To add colors from the Mixer pad to the painting
• Click the Sample Color tool on the Mixer palette, click a color on the Mixer pad, and paint on the active layer.
Step 6: Adding details
Next, I create a new layer above the Pencils layer and name it Details. I will use this layer to refine my painting. I further define the muscles of her legs, and then I decide to give her dress a vinyl appearance by adding some hard whites.
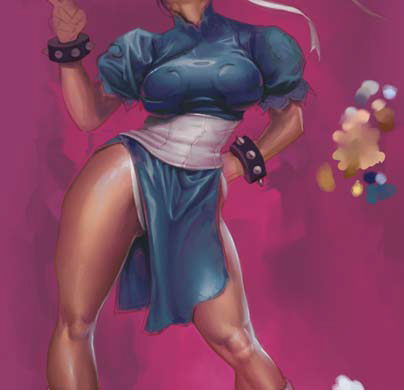
Step 7: Adding gold to the dress
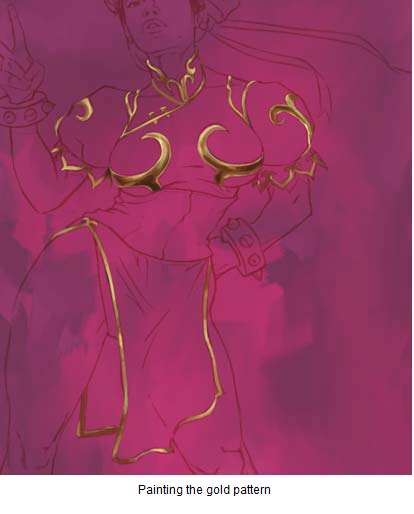
I create another layer above Details and name it Gold. I will paint the gold pattern on her dress on this layer. I select a yellow tone, increase the opacity of the layer to 80 percent, and fill in the areas with a flat tone. After the pattern is filled with yellow, I enable the Preserve Transparency button. Now I can detail the metallic gold piping without having to worry about painting outside the lines.
Step 8: Changing the background
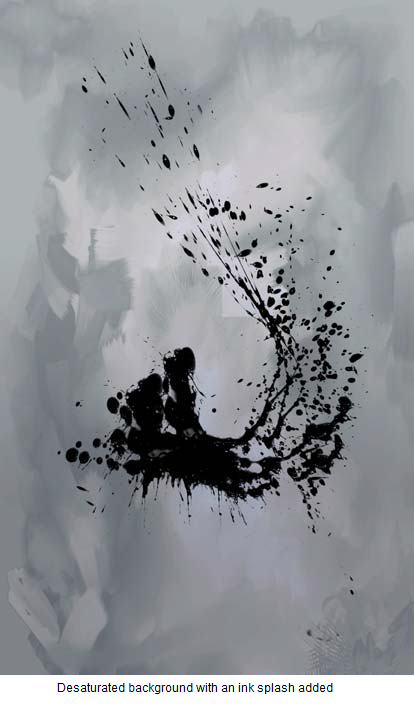
I don't really like the pink background any more so I decide to make it more neutral. I
choose Effects menu > Tonal Control > Adjust colors and desaturate the canvas layer
by using the Saturation slider. Then, I increase the brightness a little (Tonal control >
Brightness/Contrast). I also take another cue from the video game and add a large
black ink splash behind the figure. The ink splash is created from an actual India ink
splatter that I have scanned.
Step 9: Adding the final touches
I am almost done now. The gold embroidery is finalized to make it look well attached to the dress. The head is completely repainted because I decided I didn't like the original angle. I finish her boots and add the ribbons in her hair. Then, I add some rim lighting for a crisper outline of the figure, a few strategic glows, and call this
painting done.
Finally, I drop all the layers to the canvas (Layers menu > Drop All) to flatten the image and increase the resolution to 300 dpi (Canvas menu > Resize).
About the Author
Mike Thompson began his career painting hip-hop artists for various clothing companies.His work has been featured in several popular print, Web, and television advertising campaigns over the years. Best known for his celebrity portraits, Mike has painted artists Jay Z, Kid Rock, and the Roots, just to name a few. His client list includes companies such as NIKE®, Coca-Cola®, Warner Bros, Hasbro, and Dimension Films. You can view Mike’s work as well as a complete client list on his Website at www.miketartworks.com.

Was this article helpful?
Tell us how we can improve it.