

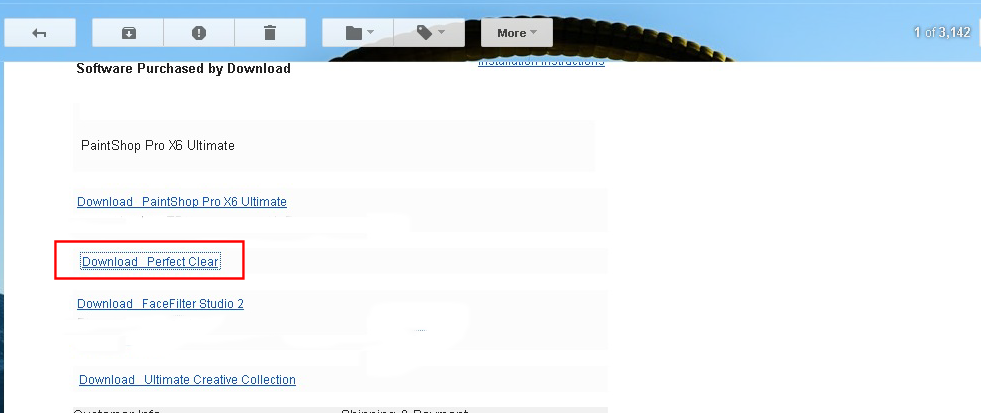
Step 1 - Click on the Download Perfect Clear link
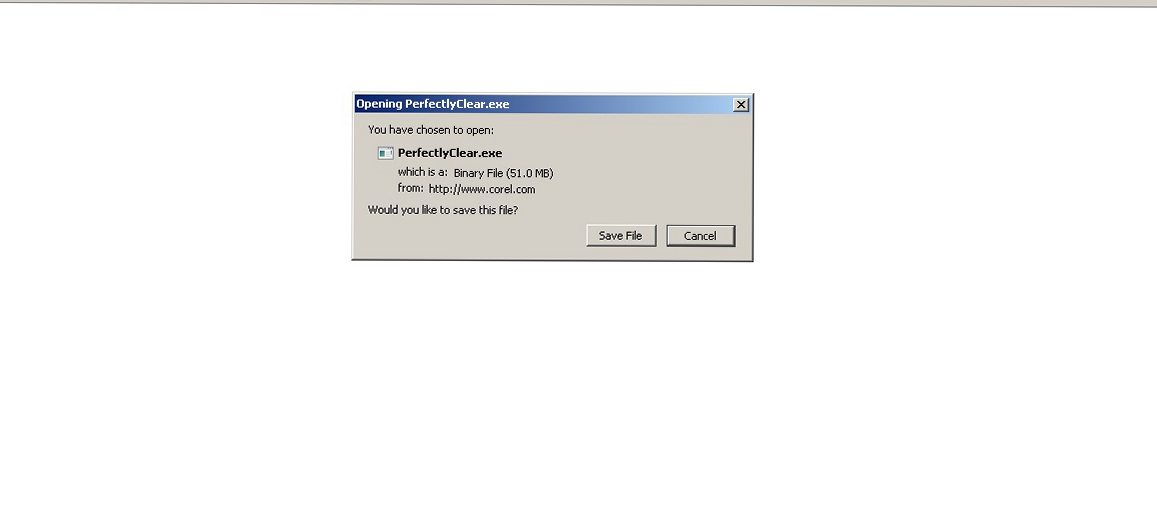
Step 2 - Click on the Save File button
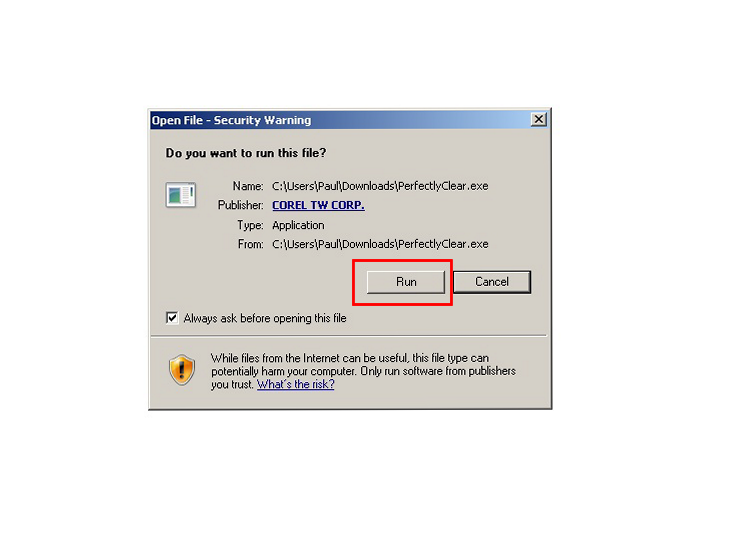
Step 3 - Run the download: PerfectlyClear.exe by double-clicking on the PerfectlyClear.exe file from the download list and then click the Run button.

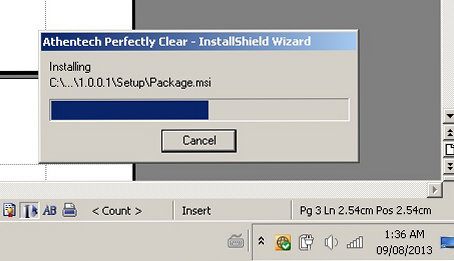
Step 4 - The Install Shield appears in the lower right hand corner of the screen.
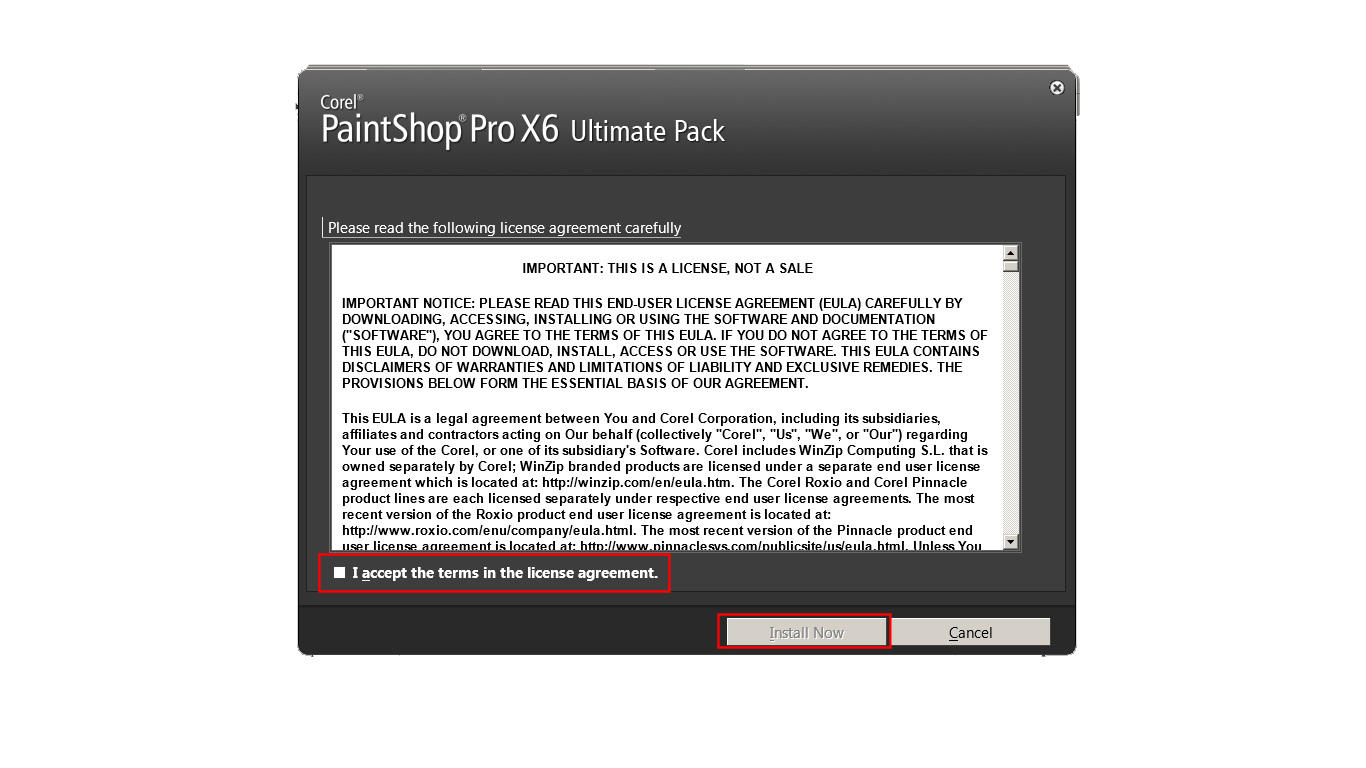
Step 5 - Accept the End User License Agreement by adding a checkmark in the empty box where it says "I accept the terms of the Service Agreement" and then click theInstall Now button
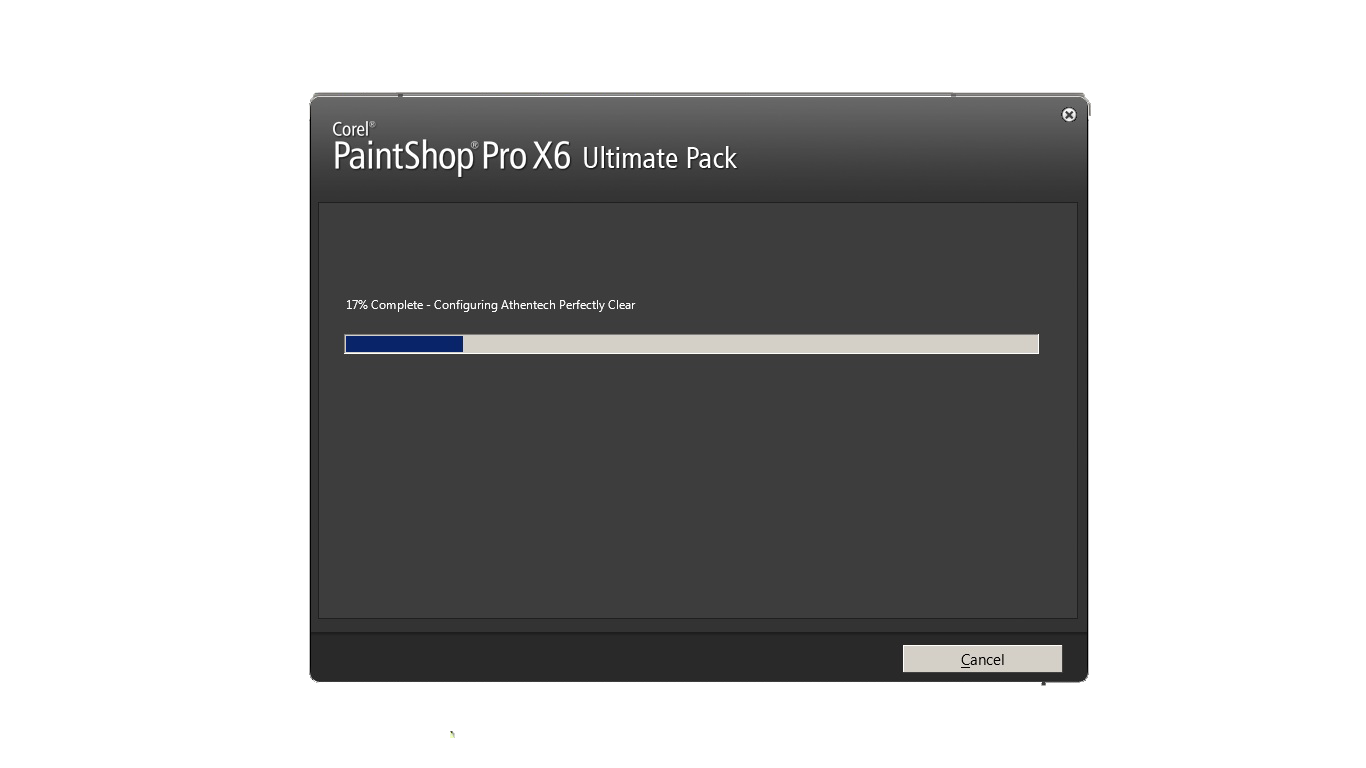
Step 6 - The Application Configuration is initiated
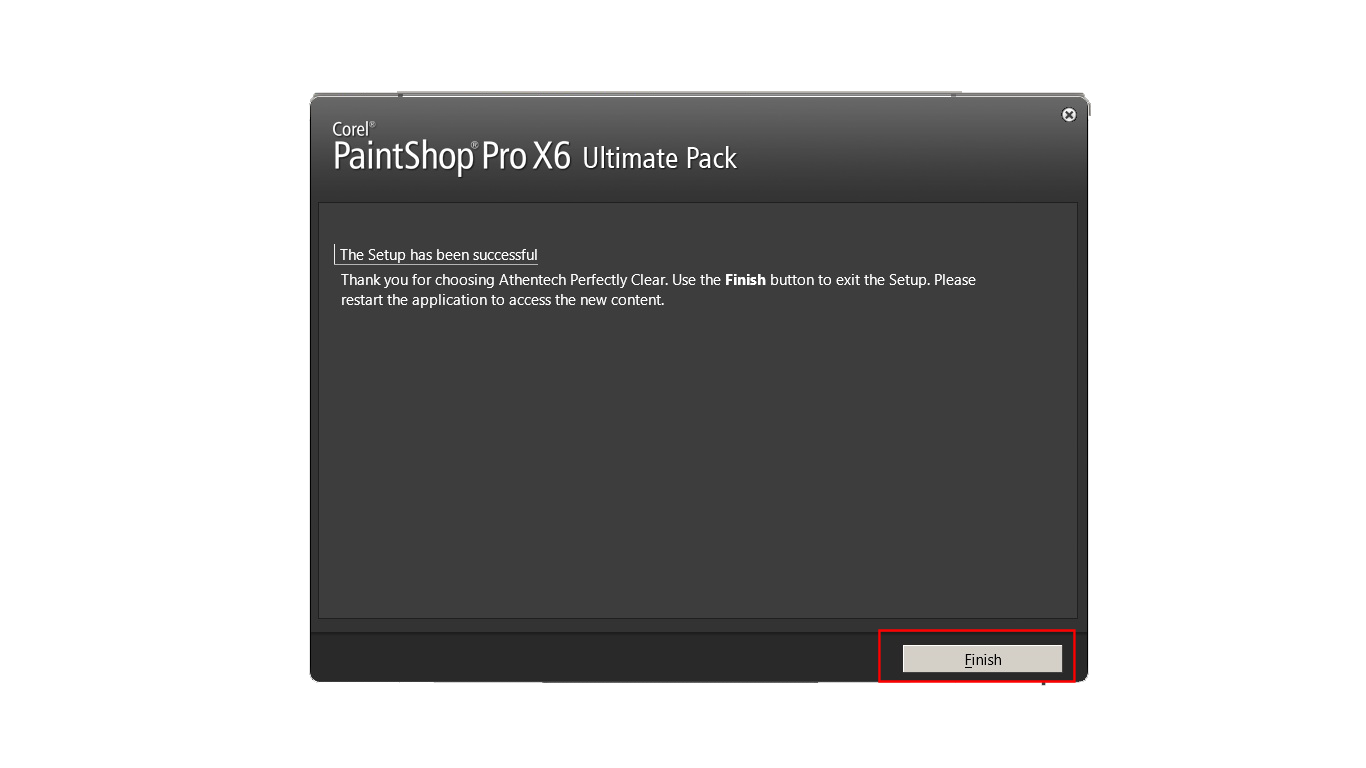
Step 7 - Click on the Finish button to end the setup
Was this article helpful?
Tell us how we can improve it.