The Disc image file: what it is and why create one
All the information in your DVD or Blu-ray project that is to be recorded to disc can also be saved to a single file called a disc image. A disc image file, which is saved on your hard drive, contains all the data and formatting information needed to create a DVD or Blu-ray disc. Image files contain all source data (as opposed to saved disc projects, which contain only references to the data).
A disc image file can be used to produce and reproduce multiple copies of the same disc much quicker than if you would be burning from a disc project, since all the encoding and multiplexing have already been done. All that you would be doing essentially is copying the contents to disc.
Mounted disc image files appear and behave like an actual disc in your computer. For example, you can create a disc image for a DVD-Video project and preview the output using the DVD player in your PC without having to burn it to disc. If you are satisfied with the results, you can then burn this image file to a disc. If not, you can simply delete the file and start again, and you have avoided wasting a disc.
By default, Creator NXT 9 disc image files are created in the most compatible format and can be recognized by the .iso file name extension.
How to create a disc image file
You can save your video disc project (e.g., DVD, Blu-ray, or AVCHD) to a .iso disc image file with these simple steps:
- In your MyDVD app, complete your video disc project;
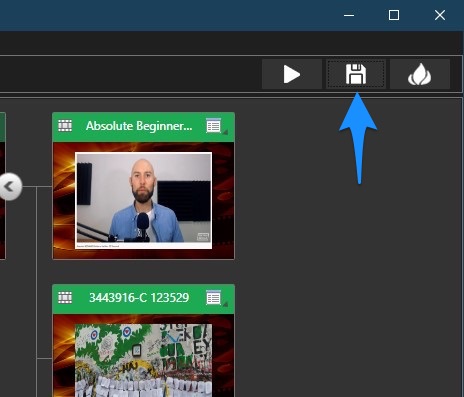
- Once you are satisfied with the project, click on the floppy disc icon on the top right-hand area, in between the Preview and Burn buttons;
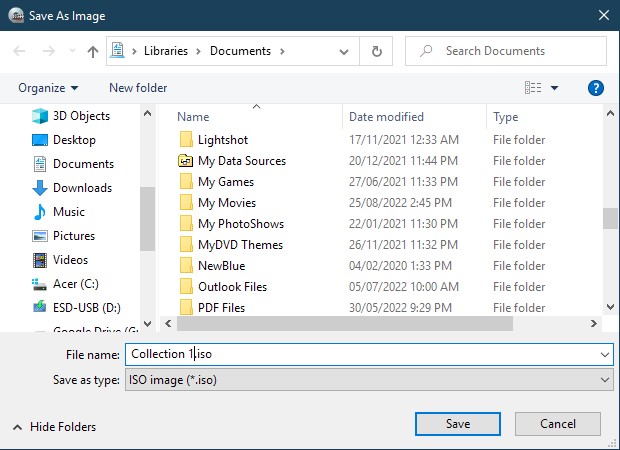
- In the window that comes up, select a save location, name your disc image file, then click the Save button;
- MyDVD will start creating the disc image. Once the disc image has been created successfully, it will say it.
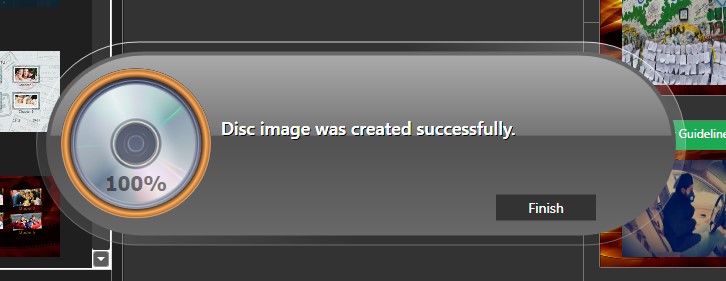
Click on the Finish button.
You now have a disc image file. But how do you use it?
How to use a disc image file
Before you can use the disc image file you created, you will first need to "mount" it. Mounted disc images will appear in File Explorer as another optical drive, complete with its own drive letter.
Windows 10 and 11 have native support for ISO disc image files. That means you need only double-click on the .iso file to mount it. You can also right-click on the ISO file and select "Mount" from the context menu that comes up.
Once your DVD, AVCHD or Blu-ray disc image has been mounted, you will need the correct media player software to play it, just like the actual physical disc would.
Unmounting the disc image
When you are done using the disc image, you can "unmount" it, which corresponds to ejecting a physical disc. To do so, locate the virtual drive (mounted disc image) in File Explorer, right-click on it, and select Eject from the context menu.
Was this article helpful?
Tell us how we can improve it.