

Welcome to this tutorial on how to create a photo collage in Corel PaintShop Pro.

In this tutorial we will show you how to create a fun summer holiday collage using photos and picture frames.
1. First, launch PaintShop Pro and in the Manage workspace, choose the images that you want to work with.

In this example, I’ve used a tray to collect all the images in one place. The tray is a like a virtual folder, so the images aren’t duplicated on my computer.
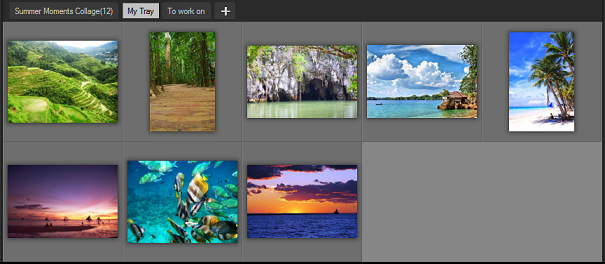
2. Next, go to the Edit workspace.

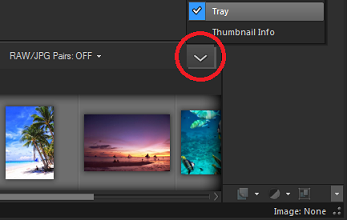
If you don’t see the tray in the Organizer palette, click the Show/Hide Toolbar Buttons arrow and enable Tray.
3. Since a collage uses multiple layers for images, picture frames and text, you need to have theLayers palette open for the remainder of this tutorial. To open the Layers palette, press the F8key on your keyboard.

4. Create a new image that will be used as the background. In this example we will set the size to 17 inches wide by 11 inches in height and a resolution of 300 pixels per inch.
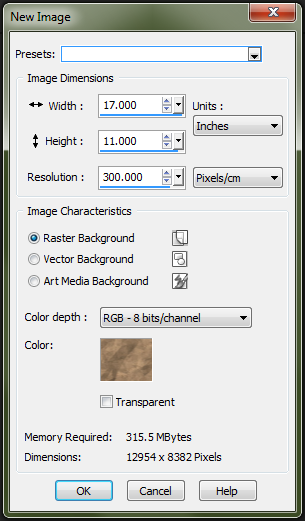
5. To select a Background, click the swatch beside Color.
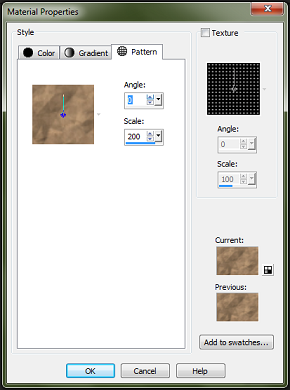
6. In the Material Properties window, select Pattern. In this example we have selected thePaper background and set the Scale to 200.
7. In the Organizer palette, select the images that you want to use and drag them to theLayers palette. Each image is added as a separate layer.
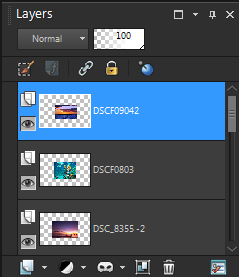
Next, we’ll add picture frames to the images.
8. Select the layer for the first photo, and then from the Image menu, choose Picture Frame.
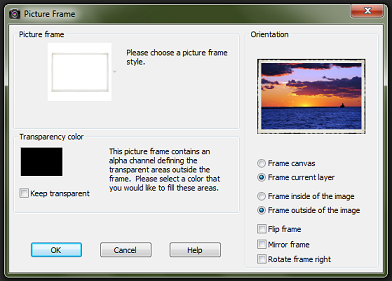
9. In the Picture Frame dialog box, select Frame current layer as well as Frame outside of the image. In this example we have used the Platinum frame with a black Transparency color.
10. After you click OK, the frame is added as a layer, above the image layer it was applied to.
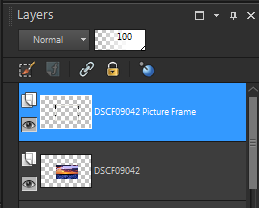
11. When you’re happy with the frames, you can combine the frame layer with the image layer to simplify the project. To do this, right-click the frame in the Layers palette and then selectMerge, and Merge Down. Repeat these steps for the other frame layers.

12. Rotating some images and having them overlap is a matter of artistic preference.To move an image, select the Pick tool from the Tools toolbar and click the image.

In the Image window, you can drag the image that is on that layer to a new position by clicking on it and holding down the left mouse button.
13. By clicking a second time, nodes appear at the corners and center of the image; you can resize by dragging any of the corner nodes and rotate by dragging the rotation handle that is connected to the center node.
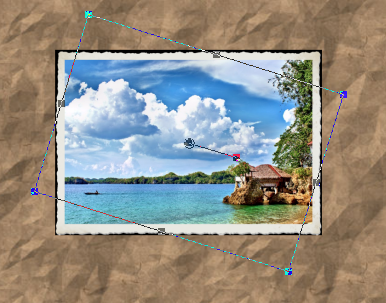
In this example we will leave some room in the middle for the title.
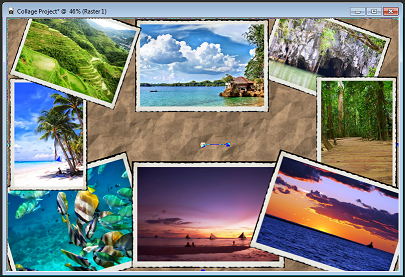
14. Click the Text tool in the Tools toolbar and then click where you want to place the text .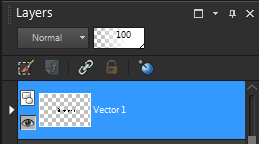
14. To fine-tune the position, click the Pick tool to move the text.

15. When the collage is complete, it is important to save a version as a PaintShop Pro Imagefile, this way, your layers remain intact. From the File menu click Save As and select thePSPImage file type.
16. Next, save a version that can be printed or shared online by going to File > Save As and selecting JPEG.
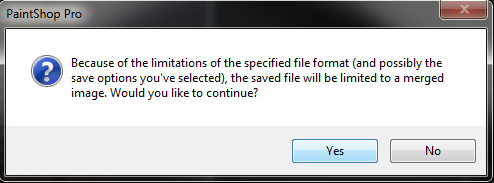
Note: When saving a multi-layer project as a JPEG file, you will get a warning message and this is because JPEGs can contain only a single layer. Click YES to continue.

If you have enjoyed this tutorial, be sure to check out the other tutorials that are available in the Discovery Center. If you have any ideas for tutorials or projects that you would like to see in the future, please leave us someFeedback.
Was this article helpful?
Tell us how we can improve it.