This article applies to Studio versions 12 and older.
To capture in Studio you need to know what type of device you will be capturing with.
There are 3 types
- USB devices (like the 710&510 USB, and the Dazzle DVC 150 etc)
- PCI cards (like the Movie Board, Movie Board Plus, 700&500 PCI)
- 1394 cards
All these devices are setup in the same place in Studio but you will need to know what you have so you can make the right selections in the Capture source settings window.
To get to the settings window, hit the capture tab at the top of the screen from anywhere in Studio.
Note: When you go to the capture tab, if you have not changed the settings you may get a message saying it does not detect a DV camcorder.

From the capture window, hit the settings button in the lower right hand corner.
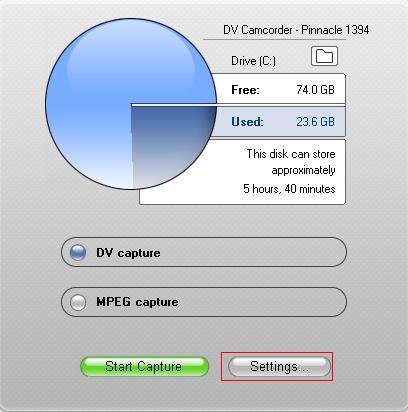
When you hit the Settings button it will bring up this screen. Hit the capture Source tab. This is the capture source screen. This screen allows you to change what device Studio will use to capture. Notice the default is DV camcorder.
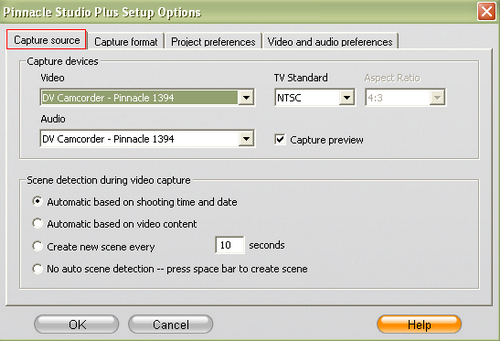
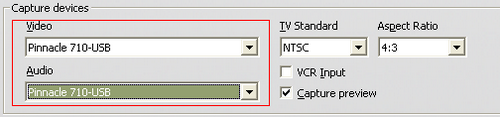
The next step is to change the pull down box to reflect the product you have. The hardware you have to work with Studio should show up in these pull down boxes. If not, the drivers may not be loaded correctly. Check to make sure it is detecting in the device manager. If not look for FAQs on the specific product for why it may not be loading correctly
You can now hit OK and it will take you back out to the capture window. Depending on the capture device you may get a message saying this. This message is telling you, you do not have whatever device you have hooked up to the capture device is not playing.
This screen is the screen you will control the capture device from. Note the file folder in the upper right hand part of the screen, this is the button you hit to change the location the video gets captured to. The default folder is your "My videos" folder in your "My documents" folder.
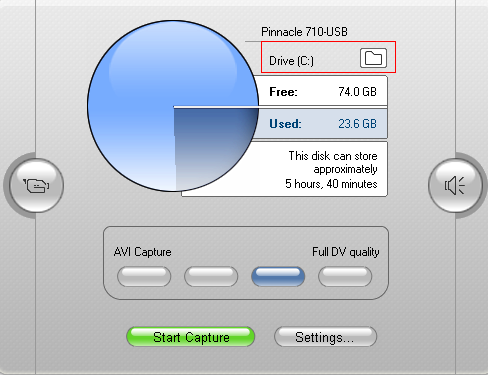
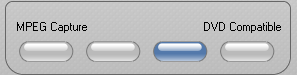
These are the quality setting controls. They will say AVI or MPEG capture depending on what you chose for the format in the capture format window. For more information about capture formats see pages 212-215 of the Studio 11 user manual. The left most button is the "good" setting then next from the is "better" The one that is blue in the "best" setting. The final button on the right will use any customer settings you have selected in the settings window.
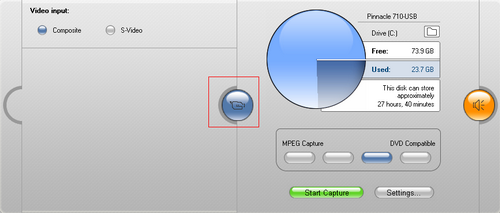
Notice the camcorder button to the right of the screen. If you hit this button you will see this window. This is the window you set what cables you are hooking up the device with. The default is composite. If you are using an S-video cable, you need to change the setting to S-Video. You may also have controls for adjust the colors etc. For more information on these audio and video controls see page 24 of the Studio 11 manual.
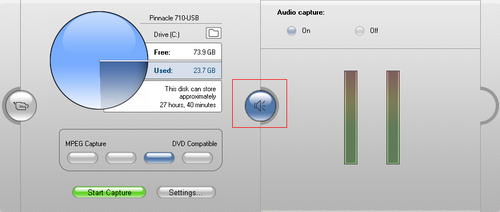
The other side of the discometer has a similar button. This button opens the audio settings window. Some devices have controls here, some do not.
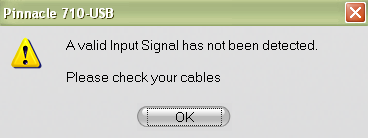
If you are capturing from a USB or PCI capture device and not using 1394, the final step is to make sure you have video playing in the preview window, before you hit start capture. If you do not have the video playing you will see this error. Just hit OK and make sure the source is playing and you have video in the preview window.

All you need to do now is hit the "start capture" button and you will be capturing video.

Note: Some modern camcorders use Hard drives or DVDs to store the recorded video. Most of these devices will use the import feature to bring video in from them.
Was this article helpful?
Tell us how we can improve it.