Note: This FAQ applies to Studio version 10 and higher. The images used were taken from Studio 10. The more recent Studio versions of the images used will look very similar.
It is often desirable to use more that one menu in a project. A common use for this is to have both a Main Menu and a Scene Selection Menu. This document will describe how this done.
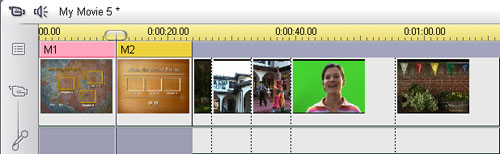
Step 1: Add menus and project contents to the timeline
In the image below, two standard menus have been added to the timeline, followed by some video clips.
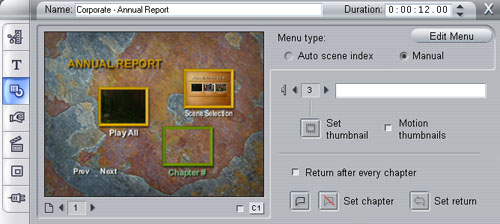
Step 2: Set chapter links for Menu 1
As seen in the image below, in this example, the first clip of the project has been set as Chapter 1. The second menu in the project has been set as Chapter 2.
A menu can be set as a chapter in the same was as video clip or still image would be. Either left-click on the menu and drag it to the desired button, or right-click on the menu in the timeline and select Set Disc Chapter. Once this has been completed, Menu 2 can be navigated to from Menu 1.
For this example, Chapter 1 is the Play All button and Chapter 2 is the Scene Selection button which links to Menu 2. The third button is left blank and will not appear on the final output.
Step 3: Set chapter links for Menu 2
In this step, simply set the chapters at the desired clips in the project. As can be seen in the image below, Chapter 1 for Menu 2 is in the same location as Chapter 1 for Menu 1. This allows the first clip to be seen by selecting the Play All button on Menu 1 or by selecting Chapter 1 in the Scene Selection menu.
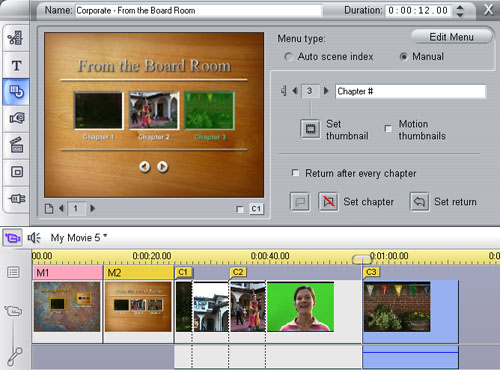
At this point, this simple project should be ready to output. If more menus are required in a project, they can be added in the same way as in this example.
Here are links to a couple of video tutorials to help with learning how to create menus:
DVD Menu Basics
Advanced DVD Menus
Was this article helpful?
Tell us how we can improve it.