Note: This FAQ applies to Studio version 10 and higher. The images used were taken from Studio 10.
How to create a menu
There are two ways to create a custom menu.
1. Edit one of the supplied menus.
2. Create a completely new menu.
To edit one of the supplied menus, begin by adding the menu to the timeline. Next, right-click on the menu in the timeline and select “Go to Title/Menu Editor.” This will open the Title/Menu Editor where the desired changes can be made.
To create a completely new menu, begin by opening the Video Toolbox. Next, select the “Create or edit a disc menu” button. Lastly, select the Create Menu button. This will bring up a window to either open the Menu Album or the Menu Editor. In this case, select the option to open the Menu Editor. An alternate method to begin creating a new menu is to right-click on a blank area of the timeline and select “Go to Title/Menu Editor.” This will also open the editor to create the menu.
Here is a very simple example of how to create a basic custom menu.
Step 1 – Go to the Title/Menu Editor.
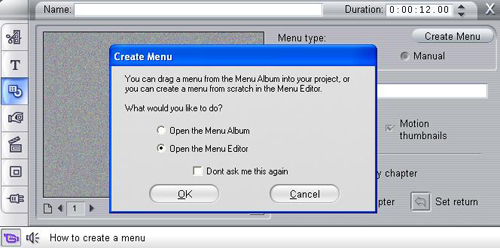
The following image shows how this was done. The button selected on the left of the image is the “Create or edit a disc menu” button. The Create Menu dialog box appears after selecting the Create Menu button in the upper-right of the image. Once the OK button is selected in the Create Menu dialog box, the Menu Editor will open where the menu will be created.
Step 2 – Add a background
The image below shows the section of the Menu Editor where the background is selected. Note that the Background button is selected, displaying all of the images within a given folder. To set the background for the menu, simply click on the desired image.

Step 3 – Add text
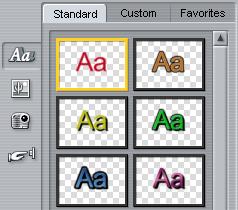
First, choose the way the text will look. The following image shows how this is done. For this example, as basic red style was selected.
Next, choose the font and size of the text.

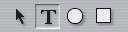
Lastly, select the “Add text field” button as seen below. Click on the menu where the text should go and type the desired text.
Step 4 – Add buttons
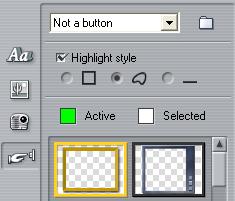
Buttons are what separate titles from menus. In order to add a button, select the “Buttons” button and the desired button style as seen below.
Select the desired button, left-click on it and drag it to the desired location in the menu. For this example two standard thumbnail buttons were used as well as Previous and Next buttons.
The final result after adding the background, text, and buttons for this example will look like this:
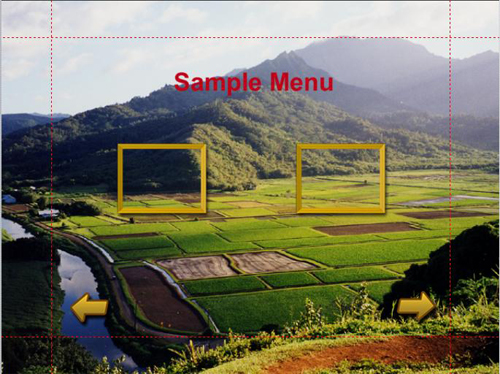
Once everything looks correct, click the OK button in the bottom-right of the Menu Editor to save the changes. The menu will automatically be added to the timeline.
For more information on creating menus, see the manual.
Was this article helpful?
Tell us how we can improve it.