You can use Roxio Video Copy & Convert 6 to convert an existing video file from one format to another format, say an MPEG-2 (.mpg file extension) video to an AVC or H.264 (.mp4 file extension) video for example. You can also use the application to convert a DVD video disc to a video file in the format of your choice.
Launching the Video Copy & Convert Application
Below are the instructions to follow to open Video Copy & Convert:
- Launch Roxio Video Copy & Convert 6 and click on the
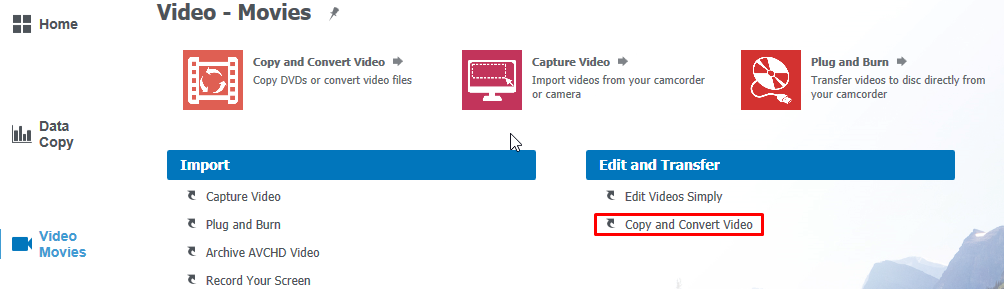
 tab on the left-hand side of the Home screen;
 - If you own Creator NXT 8 or older, it will be the same thing - click on the Video-Movies tab from the Home screen;
- In the Video-Movies screen, click "Copy & Convert Video" under the Edit and Transfer section;
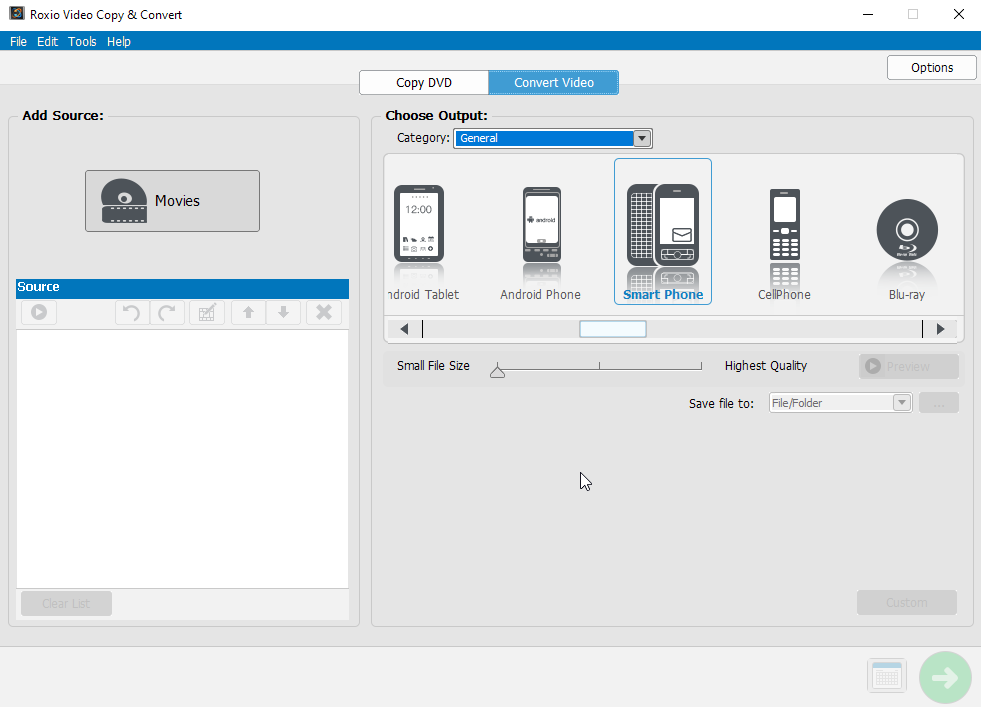
- The Video Copy & Convert application window should come up on your screen, similar to the one below;
- If you own the older Video Copy & Convert 5, simply launch the application and you will get the Video Copy & Convert window right off the bat as this is a stand-alone application, unlike the above two, which are actually Roxio software suites.
- Depending on whether you want to copy a DVD or convert a video, click on the corresponding tab
 at the top of the application window. This article focuses on converting video files to other formats.
Converting video from one format to another
Video Copy & Convert reformats and compiles movies or video clips for playback on your computer, television, iPad®, video iPod®, PSP™, video cell phone, and many other devices.
Depending on the output format you choose, Video Copy & Convert gives you the option to trim the beginning and end points of the movies, add a menu, and select a background style to give your video compilation a professional look.
To start adding and editing your videos, follow the steps below.
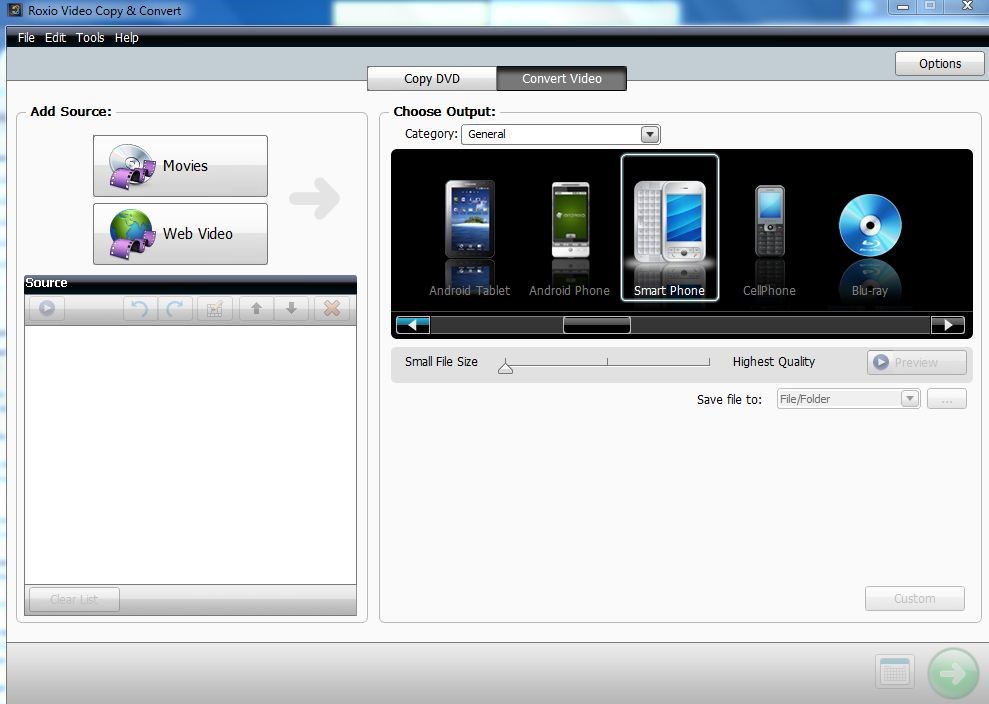
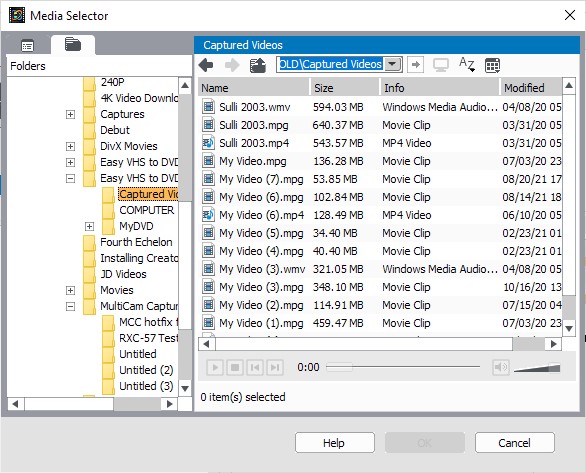
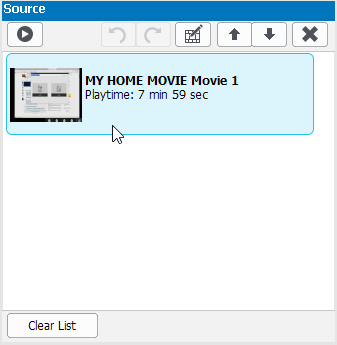
- To add a video that you want to convert, click on the "Movies" button. In the Media Selector window, browse for the video that you want to convert then add it. After adding videos, you’ll see them listed in the "Source" pane.
- You can choose from a variety of categories and file formats available for conversion in "Choose Output" box. In this example, we’ll convert it to an MPEG-2 video format. Select "General" from the category drop-down list, and select "Video" from the device profile selector.
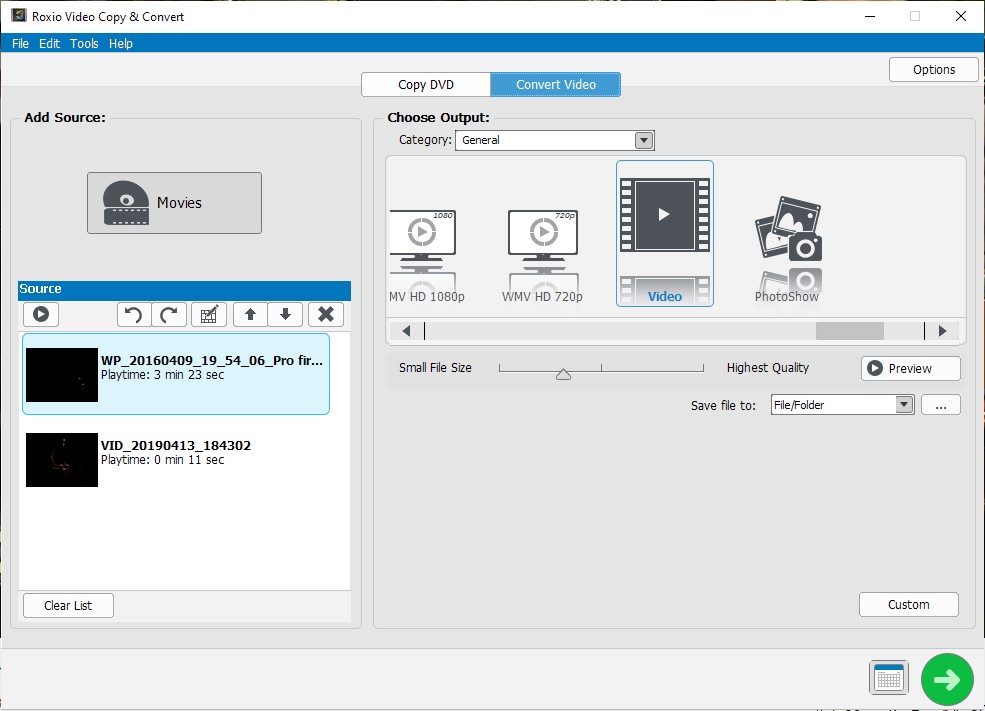
- You can change the video format configuration. Just click on the "Custom" button on the bottom right-hand area, and you will see various configurations for both video and audio. Click on the drop-down button for Compression and choose MPEG2 from the list.

- By default, all converted files are saved to Documents > My Movies. But you can select your own save location by clicking on the "Save file to" ellipsis button.

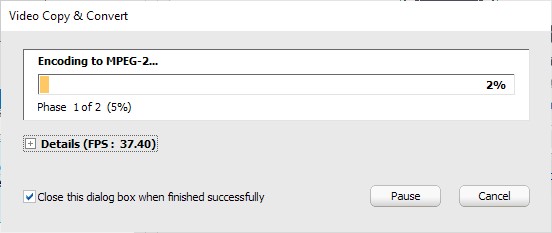
- When you’re done, click on the Big green button on the lower right of the screen to start converting. An "Encoding to MPEG-2" progress window will be displayed on the screen. Wait for it to complete.
Converting a DVD video disc to a video file
Converting, or "digitizing", your home-made DVD video disc allows you to share the video file by uploading to cloud storage sites, social media, or video streaming sites, such as YouTube.
To start converting your DVD video disc to a digital file in your preferred format, follow the steps below.
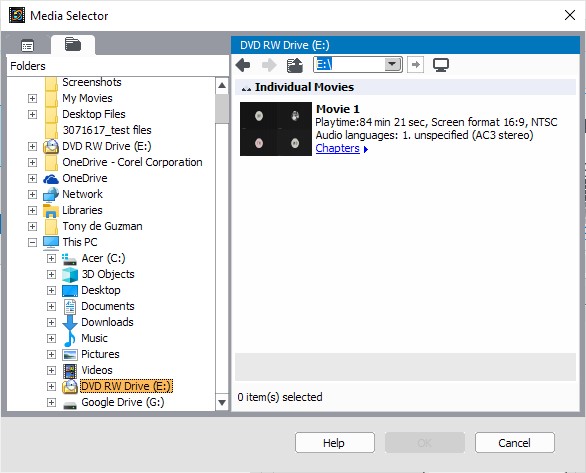
- Start by clicking on the "Movies" button and then scroll up or down the navigation pane on the left-hand side of the media selector window to locate your DVD drive.
- After clicking on the DVD drive containing your DVD video disc, the movie thumbnails will appear on the right-hand pane.
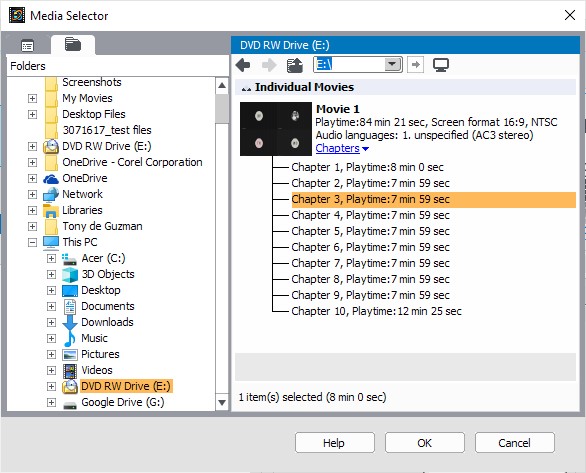
Note: If your DVD has chapters, you can click on the "Chapters" button and select individual chapters for conversion.
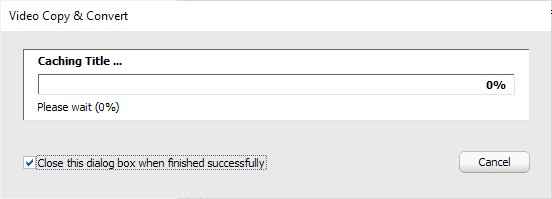
- The selected DVD movie, or chapter, will be copied to your hard drive. A "Caching Title" progress window will come up. Wait for the process to complete.
- Once caching is done, you will see the movie or chapter you selected listed in the Source pane.
- From here on out, follow the previous steps in the above section Converting video from one format to another.
Was this article helpful?
Tell us how we can improve it.