


Have you ever taken a photo that is nearly perfect, if only you could alter the coloring a little bit? Luckily, PaintShop Pro's Color Changer tool lets you realistically recolor any object or area on an image to bring it to perfection. You can use this tool to see what you might look like with a different eye color, imagine the style of your bedroom with a flashy new layer of paint, or simply add some flavor to an otherwise ordinary photo.
You will learn how to use:
- The Selection Tool
- The Materials Palette
- The Color Changer Tool
Changing The Eye Color
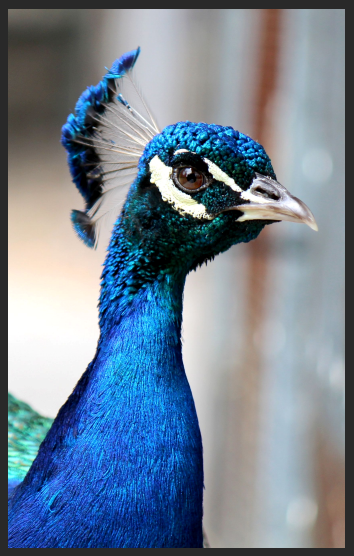
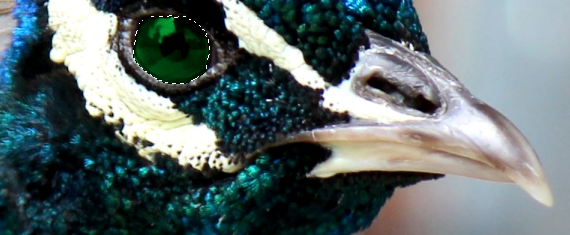
To begin, I will change the color of the eye of this peacock into a more vibrant one.
Notice the color shadings and gradients on the eye; while the Color Changer tool works best on solid colors, it can also work with gradients or patterns with a couple of extra steps.
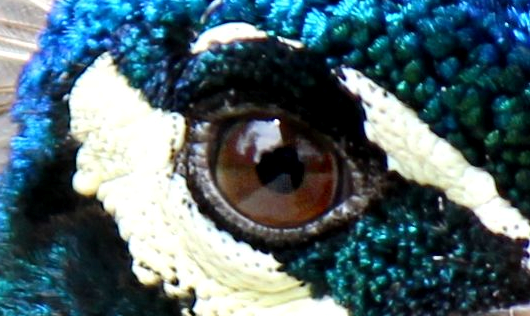
Before you begin, open PaintShop Pro and make sure that you are using the Edit Workspace. Isolate the area that you want to recolor using the Selection tool; in this example we will select the iris.
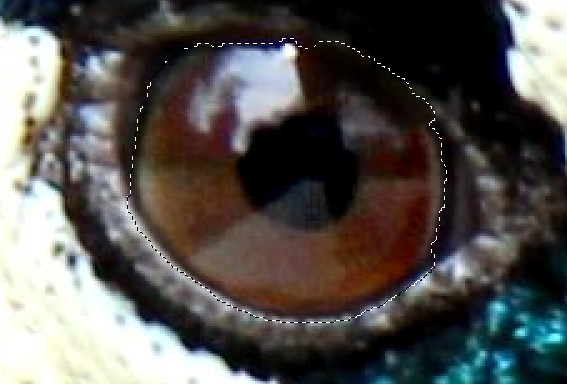
1. In the Standard toolbar, choose the Freehand Selection tool.
2. Next, on the Tools Options Palette, change the Selection type to Smart Edge and set the value of theFeather to "2".
3. Apply the selection to the iris.
4. You will need to have the Materials Palette open for the remainder of this tutorial. If it is not already open you can launch it by pressing the "F6" key on your keyboard or by selecting it from the Palettessection of the View Menu.
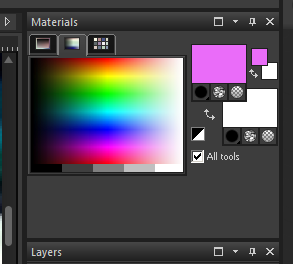
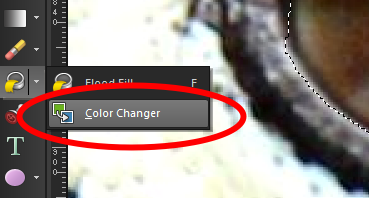
5. After you have selected a color from the Materials Palette, Click on the color changer tool and then start to click the areas inside the iris. You may have to click on a few areas in order to completely re-color the iris.
6. Once you have completely changed the color once, this tool makes it easy to view all sorts of colors.
7. With the color changer tool still selected, left click on various colors in the materials to see what the eye would look like in all sorts of shades.
8. Once you have found the color you like best, remove the selections by going to the Selections Menu> Select None, or by pressing Ctrl+Z on your keyboard.
9. Zoom out on the image to view the result.
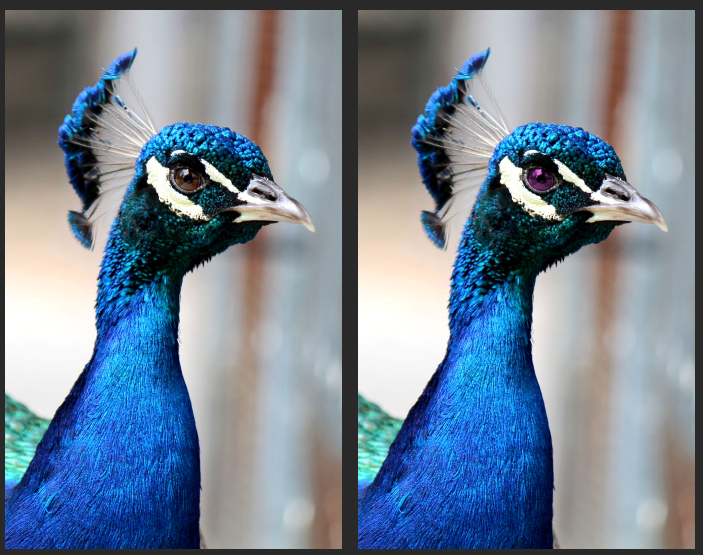
And that's how you change a color seamlessly in Corel PaintShop Pro. Thank you for watching.
If you have enjoyed this tutorial, be sure to check out the other tutorials that are available in theDiscovery Center. If you have any ideas for tutorials or projects that you would like to see in the future, please leave us some Feedback.
Was this article helpful?
Tell us how we can improve it.