Here is an easy project to bring your memories to life with some stunning effects that you can do yourself.
STEP 1
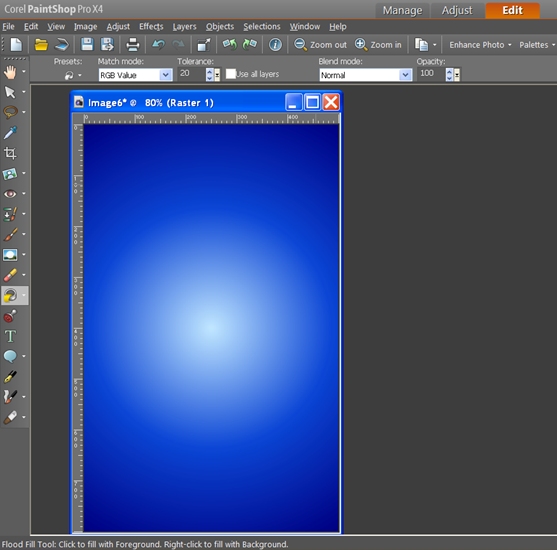
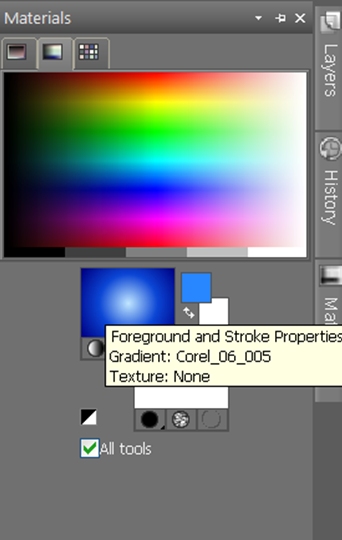
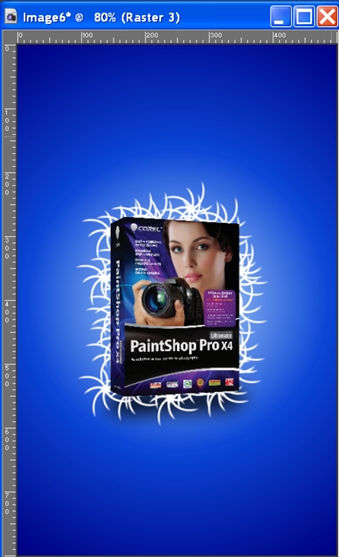
Create a new raster file (I used 500×800 here) and Gradient fill it with Duotone Dark Blue(Corel_06_005) and name this “Background” layer.
STEP 2
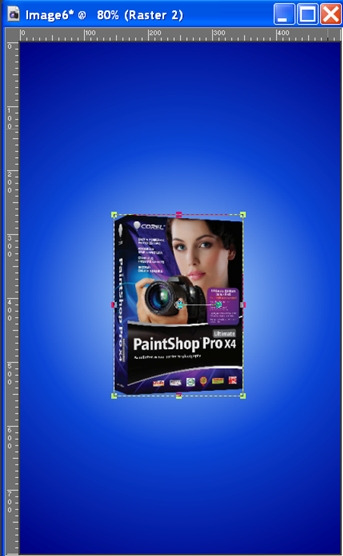
Now, Paste as New Layer any picture you want (be sure to clean up any white part around the image). For this tutorial, I used an image of the Paint Shop Pro X4 box. I will name this “Image” layer. Resize the picture and place it at the center to look like this:
STEP 3
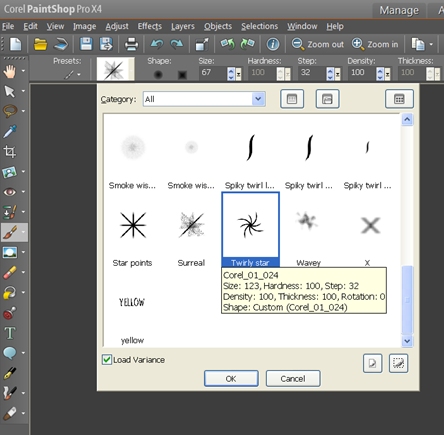
Create a new Raster Layer, name this “Pattern” and place it under Image layer.

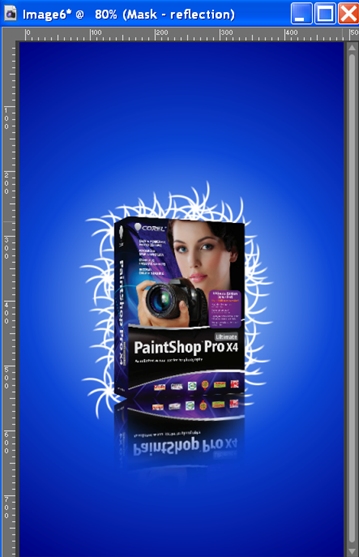
Now, select the Brush Tool  from the Tools toolbar then choose Twirly Stars (you can use any custom brush like splatter or grunge for this) as your brush tip then paint between the image and the background to get the result similar to this:
Stroke Properties: white
Fill Properties: white
STEP 4
Duplicate the Image Layer and name this as Reflection layer, and flip it vertical and place it like the image:
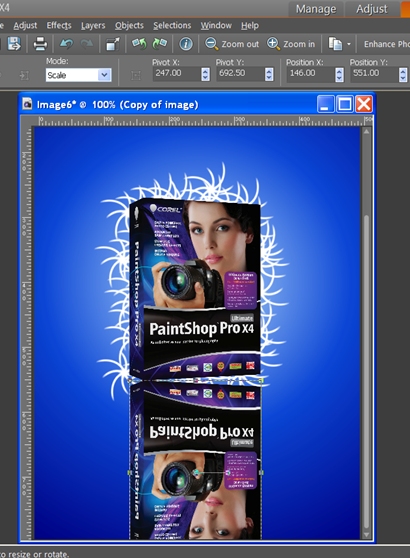
STEP 5
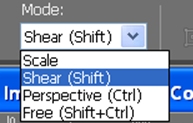
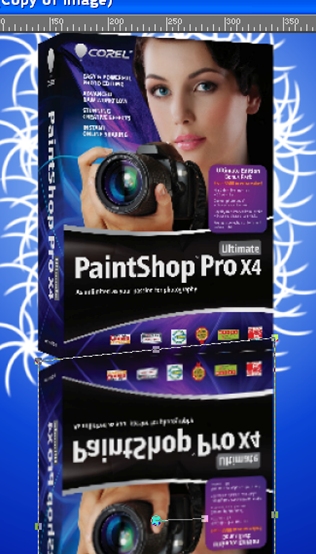
Use the Pick tool  and choose Shear mode(hold Shift key) from the Tools options palette then pull the top-right corner upwards (image).
Your image should look something like this:
STEP 6
Add a new Mask layer (hide all), press B or choose Brush from tools toolbar, increase the brush size to a width that will cover the image and brush a vertical stroke from the middle of the image going down to hide the bottom part of the reflection. Your result should look like this:
STEP 7
Create a new raster layer and name it “Shadow”, place this under the Image layer. Use brush to paint a black line under the image and place it below the image. Then go to Adjust>>Blur>>Gaussian Blur and set the value at around 15. This will serve as the image shadow.
STEP 8
Toggle off the visibility of all layers except the Image and Pattern layer, right-click on Image Layer>>Merge>>Merge Visible. This will merge all visible layers which is the Image and Pattern layers. After this, toggle on the rest of the layers.
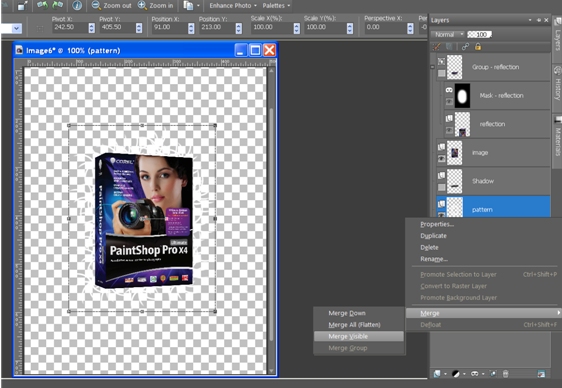
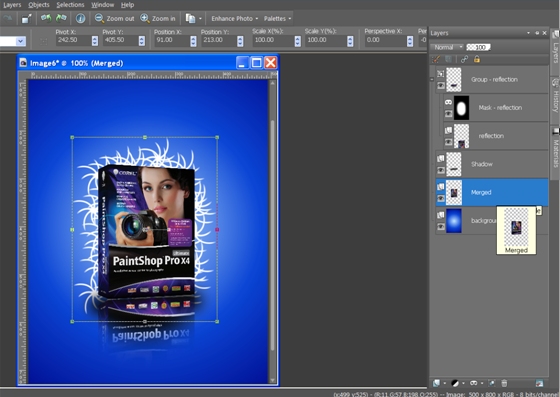
Notice on the Layers Palette, there is a new layer called Merged layer. Your image should look like this:
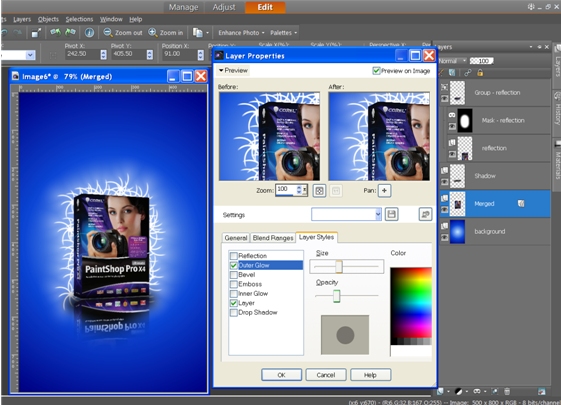
STEP 9
Double-click on the Merged layer to open the Layer Properties dialog box. Enable Preview on Image. Go to Layer Styles tab and check Layer and Outer Glow. Use white or any light color you want as the outer glow. You can set the size and opacity value like my settings below:
STEP 10
Now, let’s start making the laser lights. Create a new Vector layer and name it “laser”. Press V 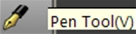 or choose Pen tool from the Tools toolbar. Choose any color for your Stroke Properties(I prefer blue for the color of my laser) Materials Palette and leave the Fill Properties transparent.
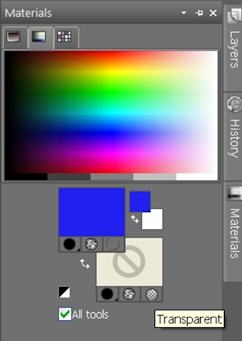
Now using the Pen tool, choose Draw Point to Point - Bezier Curves from the Tool Options palette, check both Connect Segments and Create on Vector options and change the width to 5. Draw a wavy line from top to bottom of your picture similar to the image below:
STEP 11
Now, from the Layers Palette, toggle off the visibility of all layers except for the vector layer then right-click on the vector layer and choose Merge Visible to turn this into a Raster Layer.
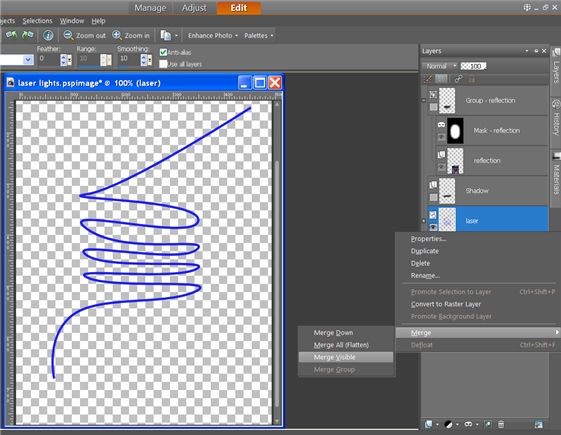
STEP 12
You can now toggle on the visibility of the other layers. Choose the Freehand Selection tool from the Tools toolbar and use the Point to Point selection type with smoothing value of 0 and Anti-alias enabled.
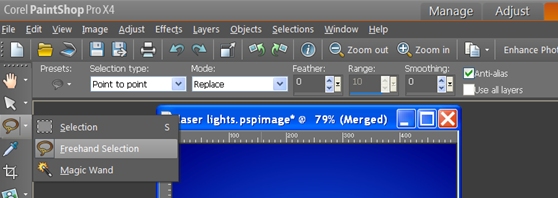
Important: Be sure that the active layer is the Laser(merged) layer. Select the areas of the line that needs to be deleted then press the delete button on your keyboard and CTRL+D to deselect before you make a selection again. Make the line appear as if the first wave is under the image and the second wave is over and so on.
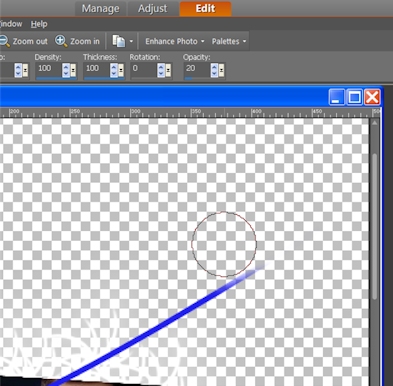
Select the Eraser tool from the Tools toolbar, change the opacity to 20% and delete the endings of the line to make it look tapered.
STEP 13
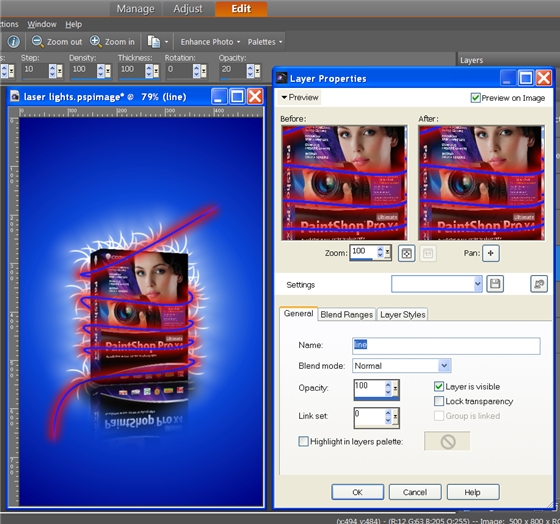
Double-click on the line layer then this will open the Layer Properties dialog box. Again, go to Layer Styles tab, check Layer and Outer Glow, and set the size and opacity slider then press OK. Your image should look similar below:
STEP 14
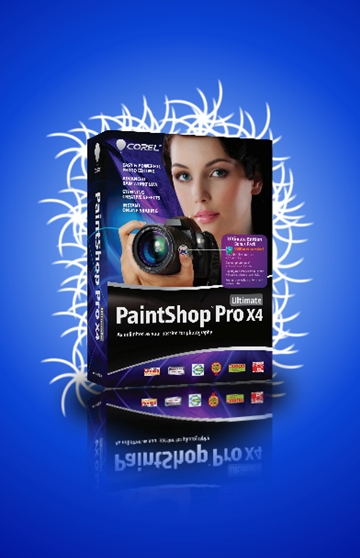
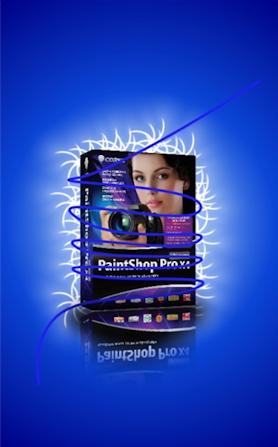
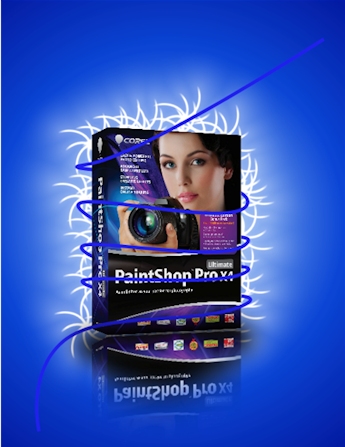
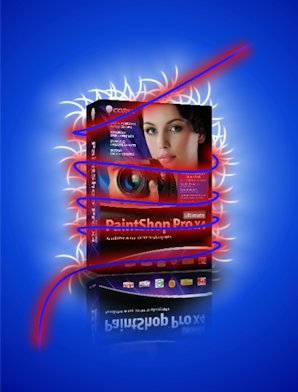
Don’t forget to Save your project first. Go to File>>Save>>”project name”.pspimage. Right-click on any layer from the Layers Palette, then choose Merge>>Merge All. If you want to save your project as JPEG, go to File>>Save As>>Save As Type>>choose JPEG and press Save. This is the final image:
Was this article helpful?
Tell us how we can improve it.