

Welcome to this tutorial using PaintShop Pro! This tutorial will teach you how to take an ordinary photo and turn it into a stunning holiday card.

What you will Learn:
- How to import a photograph
- Cropping to a 5X7 greeting card size
- Duplicating photos and working with Layers
- Adding a Film Styles Instant Effect
- Working wtih Text
- Exporting your project
1. Open PaintShop Pro and make sure that the Edit Tab is active.

2. Go to File > Open and select the image you wish to work with.

You can zoom in or out of the image by using the zoom controls at the top of your screen  or by rolling the wheel on your mouse forward to zoom in, or backwards to zoom out.
3. Select the Crop  tool from the Standard Tool Bar
4. From the Drop Down list in the cropping options, select 5X7.
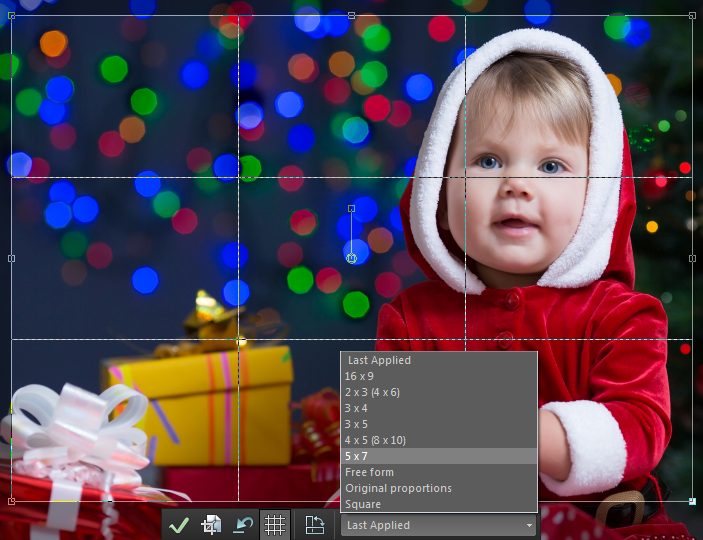
To change the setting from landscape to portrait or visa versa, click on the icon directly to the left of the drop down list to apply this change.

5. Position the guidelines of the crop tool to cover the area of the image you wish to keep. You can increase or decrease the size of the cropped area by dragging any of the nodes on the corners of the guidelines. When you have everything lined up the way that you like, click the check mark icon in the cropping options or tap the enter key on your keyboard.

To give this card a unique look we will use a trick to make the whole image look like it was taken during the early 1900's using Platinum developing and then add a stunning color effect to the little girl in the picture.
6. Go to the selections menu and choose ""Select All"".

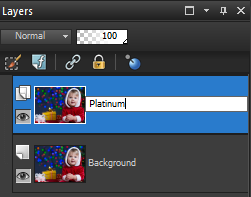
7. From the Edit menu select Copy and then click on ""Paste as New Layer""
8. So as to keep organised you can re-name that new layer ""Platinum"" as it will be the copy of the image that this effect will be applied to.
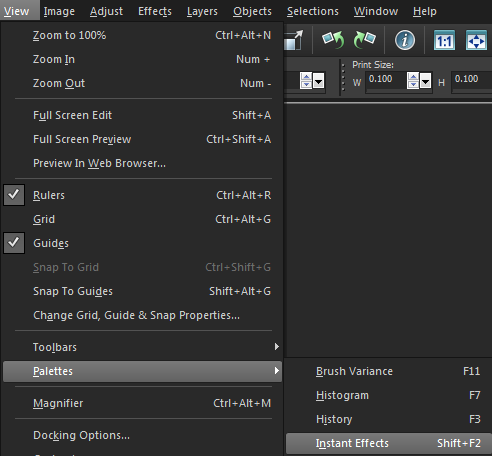
9. From the view menu, select Palletes and then Instant Effects. The Instant Effects will display on the right side of the screen.
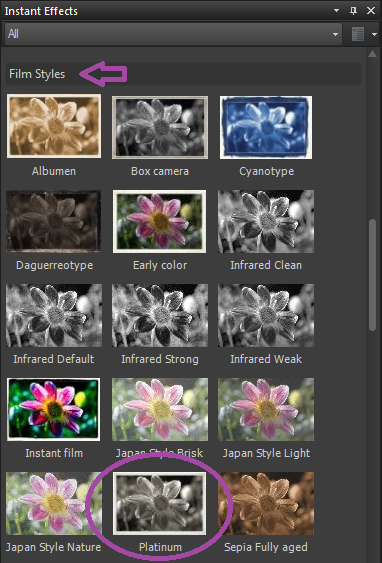
10. Scroll down until you see the section titled ""Film Styles"". In this example, we will be using the Platinum Film Style. Double click on the effect thumbnail and it will be applied to the image on the selected layer; in this case the layer we re-named ""Platinum"".

11. Now it's time for the fun part! From the Standard toolbar, select the eraser tool and choose a size that will be easy for you to make a rough outline around the part of the image you want to add color back to.


13. Click on the Text tool from the standard toolbar and then click the cursor over the image. You can type the text first and then make adjustments after. To change the font, highlight the text and choose a different font from the drop down list in the interactive properties bar at the top of your screen. To change the size, select the drop down list beside the font list. In this example we'll use a 72 point size. To adjust the size of the text manually, select the Pick tool from the standard toolbar and drag one of the corner handles outward.

14. To change the color, while the text is still highlighted, open the Materials Palette. To do this, put a check mark in Materials in the palletes section of the view menu or simply press the F6 key on your keyboard. When you're using the Materials palette it is important to remember that if you wish to change the fill color, right click and to change the outline color, left click.
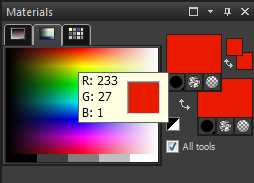
(Note: To change the Text color, the Text must be highlighted)

16. Duplicate the text by using the key combination ""CTRL and the letter C on the keyboard"" to copy and ""CTRL and the letter V on the keyboard"" to paste. Now this new text can be re-colored and placed partially over the red text to really make it pop out of the card.

17. If you wish to go back to working on your card at a later time, make sure to save a PSP version of the file, so that way your layers and text will remain intact. To do this, go to File > Save As and select a PSPimage file type. To save a version that can be printed or uploaded to the web, go back to File and Save As and select Jpeg.
Many photo centers now have web sites and photo booths that will allow you to upload your Jpeg image and have it printed as custom made greeting cards.

Thank you for watching this video on how to create a greeting card in PaintShop Pro. And have a safe and happy holiday season.
If you have enjoyed this tutorial, be sure to check out the other tutorials that are available in the Discovery Center. If you have any ideas for tutorials or projects that you would like to see in the future, e-mail Discovery.Center@corel.com.
Was this article helpful?
Tell us how we can improve it.