
Welcome to this tutorial on how to add color to a black and white photo in Corel PaintShop Pro.
Adding color to black and white images is anything but recent; in fact, some of the earliest application of colorization was done by Thomas Edison and involved painting dyes onto the emulsion.
In this tutorial we will show you a similar, but much less messy, version of Edison's technique that you'll be simply dying to try out for yourself.
1. First, launch PaintShop Pro and make sure that the Edit tab is active.

2. Next, open the image you will be working with.

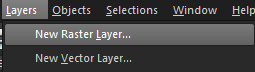
3. From the Layers menu, select New Raster Layer.
4. Since this project contains multiple layers, go to the File menu and select Save As. Save your project as a PSPImage file; this way your layers will remain intact and the original image will be preserved.
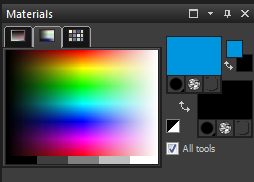
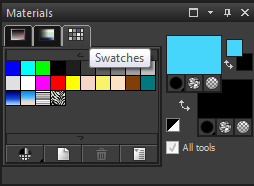
5. For the remainder of this tutorial you will need to have the Layers palette and the Materials palette open. If these palettes are not visible, you can click the F8 and the F6 keys on your keyboard respectively to launch them.
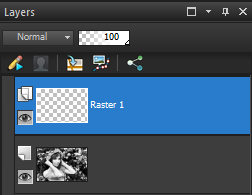
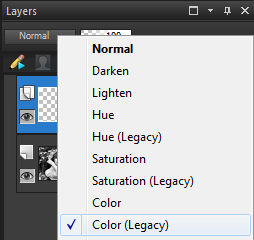
6. From the Layers palette, select the new raster layer you have just created, and from the Blend Mode drop down list,
select Color (Legacy).
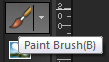
7. Next, select the Paintbrush tool from the Standard toolbar.
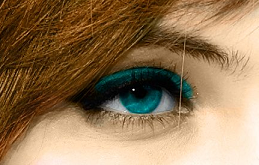
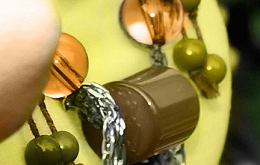
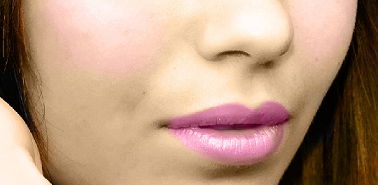
8. Choose a color that you think best represents your subject. In this example, I will be using many different colors and blending them together. First, I'll begin with the skin tone. After selecting the color, you can add it to the color palette for later use; this is helpful when working with a complex image like this one, as you may miss a spot and have to do further touch ups as you go.
9. To add a color swatch, click on the Swatches tab in the Materials palette and then click on the Create New Swatch Icon (the icon with the image of a piece of paper on it).
You can give the Swatch a name, such as Skin Tone 1, and click OK.
10. As you paint over your subject, you can change the amount of color or the density by adjusting the opacity in the Interactive Properties bar at the top of the screen. This is helpful when adding blush to a face or blending the various shades of green on foliage.

When adding color to a photo that was originally shot in black and white, some level of artistic license is expected. In this example, we know that leaves are green and dandelions are yellow; eye color, makeup, and the color of the beads on her necklace are guesswork.
Depending on the complexity of the image, it's not uncommon for the procedure to take a long time so patience is key, and make sure to save often so that you don't lose your work.
11. When the project is complete, go to File > Save As and select Jpeg. You will get a warning, and this is because a Jpeg can only contain a single layer.
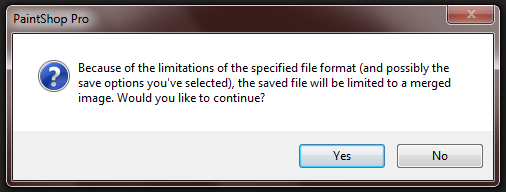
Click Yes to this message to continue, and your layers will be merged into one color photograph, and no need for any messy dyes or spilled ink bottles.

If you have enjoyed this tutorial, be sure to check out the other tutorials that are available in the Discovery Cente. If you have any ideas for tutorials or projects that you would like to see in the future, please leave us some Feedback."
Was this article helpful?
Tell us how we can improve it.