

Introduction
Customized picture frames make the perfect gift for family and friends during the holiday season. Add a thoughtful touch to your gifts this year by creating a memorable photo frame with Corel PaintShop Pro.
What You Will Learn
In this tutorial, you will learn how to:
Create a faded vignette frame
Use the Picture Tubes tool
Add your own picture frame on an image
Creating Your Own Holiday Picture Frame
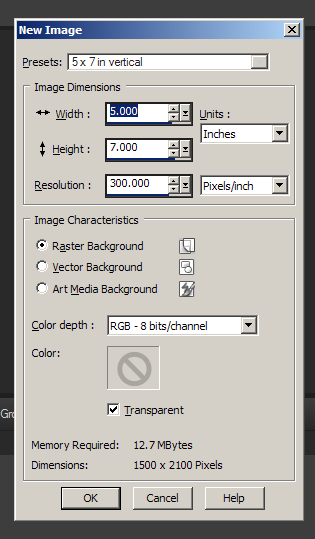
1. Open a new image that is 5x7 inches in size with 300 ppi and then select transparent. Click OK.
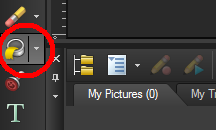
2. In the Tools Toolbar, click on the Flood Fill tool.
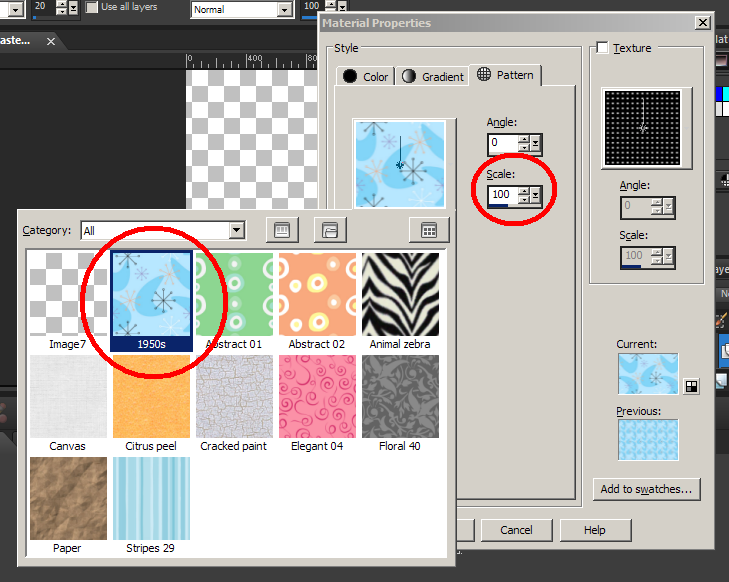
3. In the Materials Palette, click on the Foreground color to choose a pattern--for example, this 1950s pattern. Next, set the Scale to 100and then click on OK.
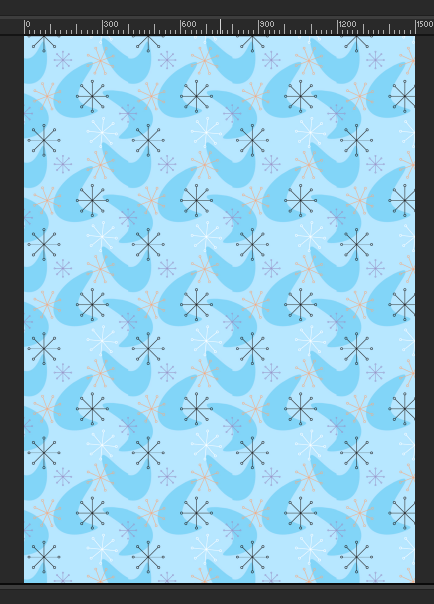
4. Click on the image to apply the selected pattern.
5. Drag a guide from the ruler and drop it about an inch around all four sides of the frame.

6. Click on the Selections tool in the Tools Toolbar and set the Feather to 30.
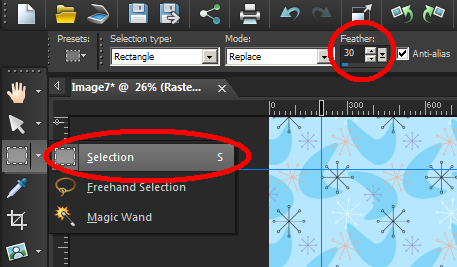
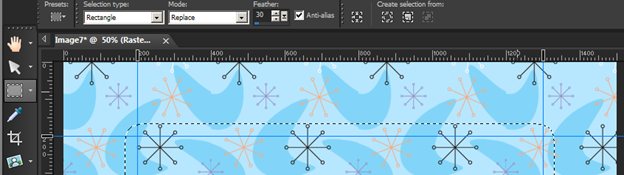
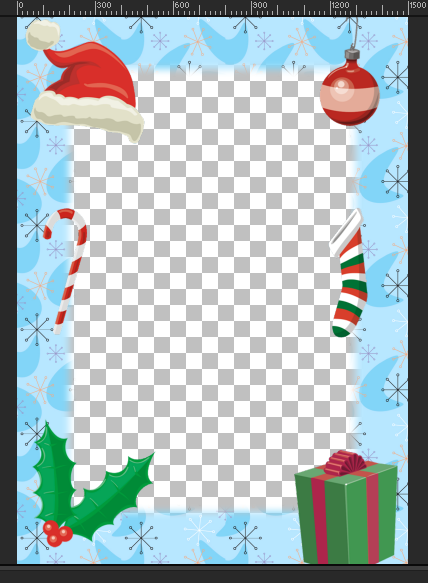
7. Follow the guides and create a rectangular selection around an area of the inside of the frame. Notice that the applied feathering effect made the selection appear to be 1/3 of an inch around and this is normal.
8. Hit the Delete key once and you will get a faded vignette frame.
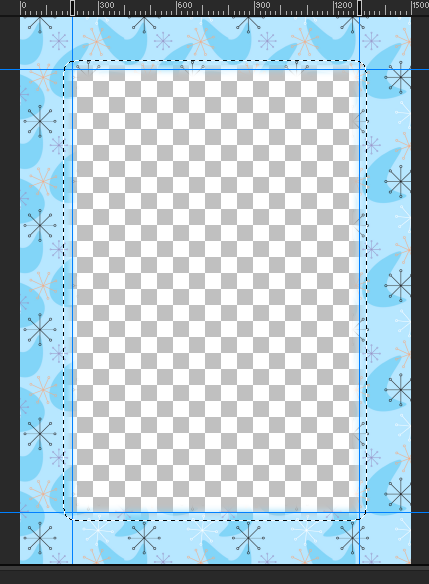
9. Deselect the selection by pressing Ctrl + D on your keyboard or go to Selections 4 Select None.
10. Go to the View menu and uncheck the Guides.
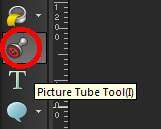
11. To add a little something extra, click the Picture Tubes tool in the Tools Toolbar and select the Christmas theme from the Holiday Picture Tubes.
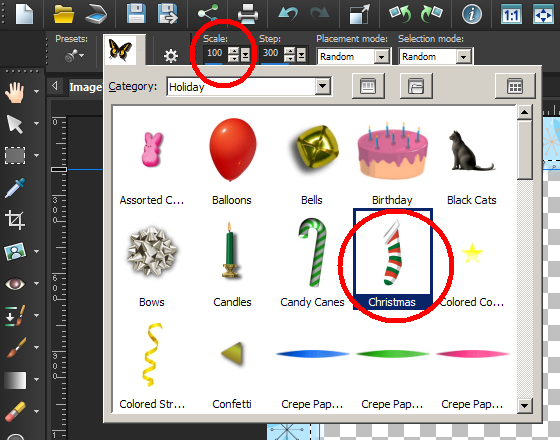
12. Set the Scale to 200 and click anywhere within the frame to add picture tubes.
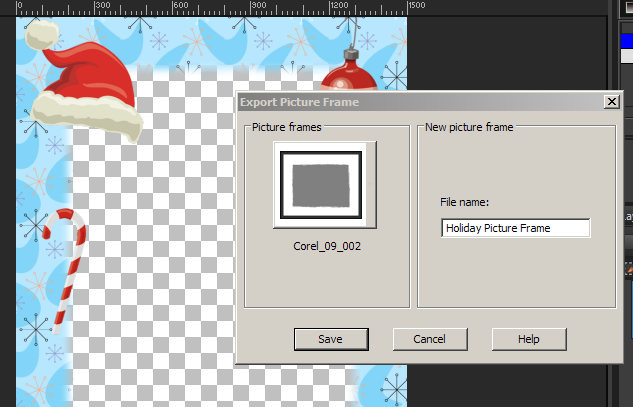
13. Save this as a frame by going into File'4'Export'4'Picture Frame;give this frame a name and then click the Save button.
14. To apply this on your photo, simply open a photo in PaintShop Pro and then go to Image'4'Picture Frame.
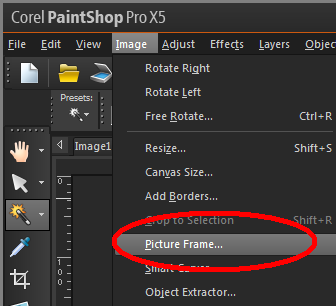
15. Choose the picture frame that you have just created and then select Frame current layer.
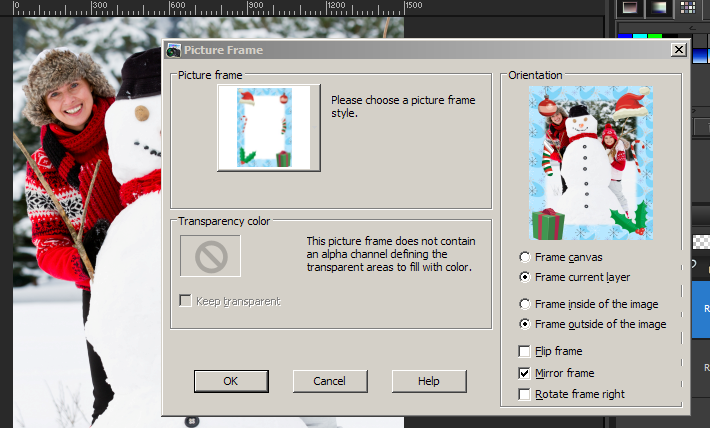
16. Click on OK when done.

And that's how you create a special framed photo for your family and friends this holiday season with Corel PaintShop Pro X5. Thank you for watching.
If you have enjoyed this tutorial, be sure to check out the other tutorials that are available in the Discovery Center. If you have any ideas for tutorials or projects that you would like to see in the future, e-mail Discovery.Center@Corel.com.
Was this article helpful?
Tell us how we can improve it.