Step 1: Choose a Photo
Choose a photo that shows a smiling face with all teeth visible. Once you have made your choice, open the image in PaintShop Pro.

Step 2: Add Fangs to the Teeth
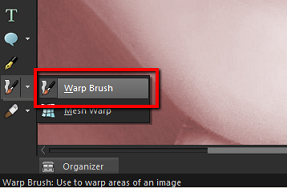
To make the fangs, choose the Warp Brush from the Tools toolbar.
Using the Warp Brush tool, gently drag the incisors down. Adjust the size of the Warp Brush so that it is smaller to create the tip of the fangs.


And that's how you can quickly and easily add fangs to an image in PaintShop Pro X6.
If you have enjoyed this tutorial, be sure to check out the other tutorials that are available at the Discovery Center. If you have any ideas for tutorials or projects that you would like to see in the future, please leave us some Feedback.
"
Was this article helpful?
Tell us how we can improve it.