


What you will Learn
- How to use the Smart Photo Fix tool
- How to use the Straighten tool
- How to use the Makeover Toothbrush tool
- How to use the Local Tone Mapping tool
A video version of this tutorial can be viewed at the 
After clicking on the Adjust tab, PaintShop Pro will bring you to the Adjust Mode interface of the program. The Adjust Mode, as a brief description, is a section of PaintShop Pro that will allow you to easily edit your images with only the very basic, but most common tools used in photo editing.
How to open your pictures
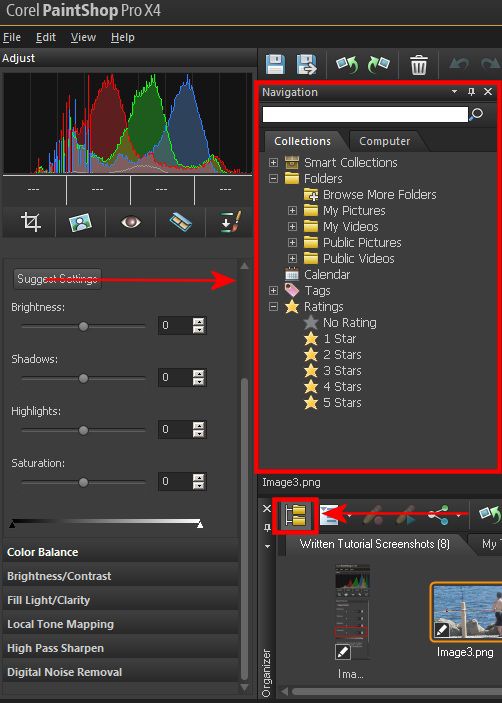
Clicking on the Folder Icon at the bottom will open up the Navigation Palette. The Navigation Palette is a much bigger rectangle just above the folder icon. Inside the palette you will find a column of additional folders. These will be the same folders that you will find in your own computer. You can open your folders in the same fashion just by left clicking on them to open them up and reveal your pictures. Your pictures will be visible in the tray below the Folder Icon. This tray is called the Organizer Palette. Selecting a picture to edit is as simple as left clicking on one in the Organizer, and a bigger preview of the image will appear in the middle of the workspace.
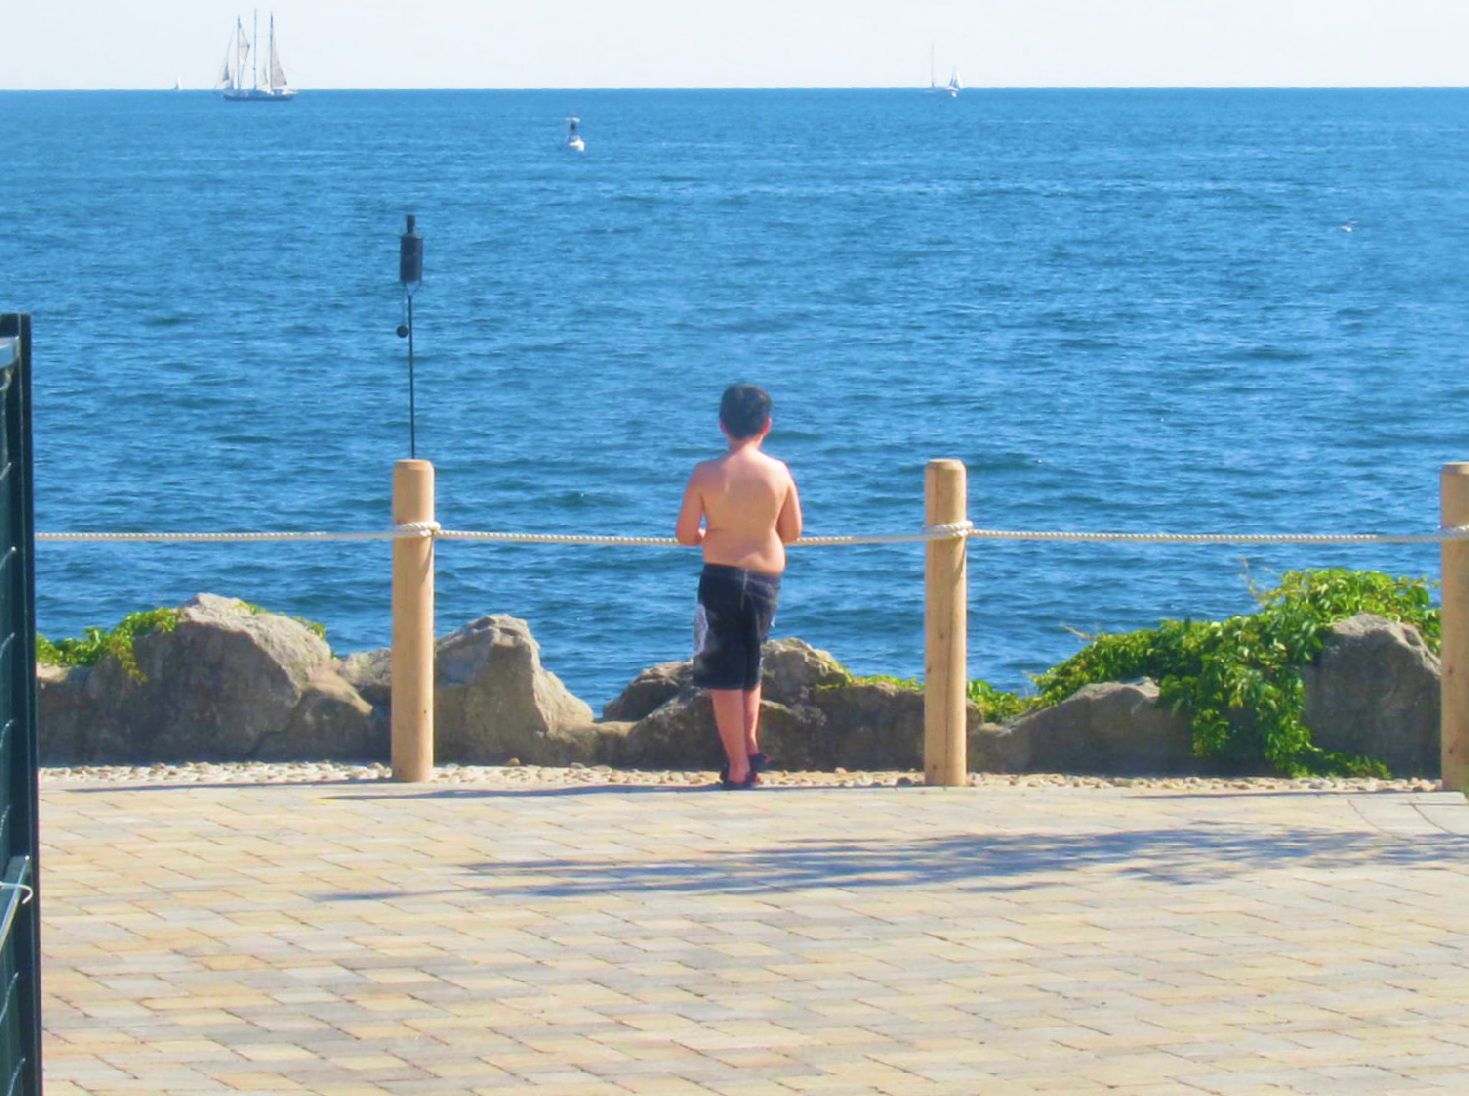
Photo 1: Boy by the Sea
Before

After
Step 1 - Select Smart Photo Fix
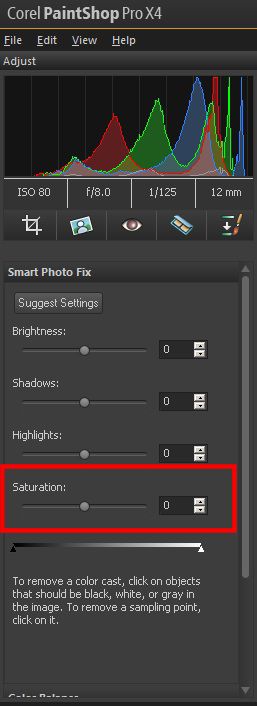
Tools for the Adjust Mode can be found on the left hand side of the screen. The setting that we will be adjusting for this picture is the saturation. The saturation can be found under the Smart Photo Fix Tool. To increase the amount of saturation needed, press and hold down the mouse button on top of the slider and gently drag it to the right to increase. Dragging to the left will decrease the saturation. For this image, try a saturation of 50 and you will notice a considerable difference.
Step 2 - Correcting a crooked image
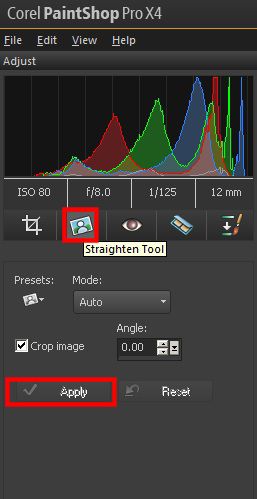
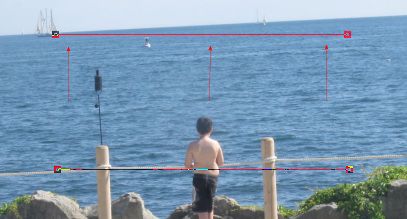
The Straighten Tool (highlighted by the smaller box in the first image) will help you straighten any crooked picture. Select the tool by left clicking on it. You will then notice a red line or `bar` appear in the middle of the image. This line will act as a guide to straightening your image. However, you need to find a parallel section of the image in order to line it up against. In this image, the sea line in the horizon would be the best option.

Line up the guide by using your mouse and hold down the left mouse button over the middle. Slowly drag it to the parallel object and release it so that one corner of the guide is connected. Next, you need to line up the opposite side so that both ends are parallel with the sea line. (See image above) Once you have lined up the guide, click on the Apply button (see first image) and it will automatically straighten the picture.
Step 3 - Brighten the sky
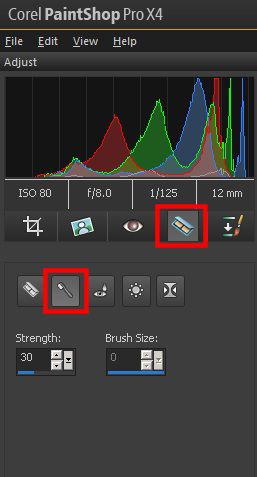
This picture is starting to take shape. However, the sky is not nearly bright enough. So without brightening the rest of the image, there is another tool that will do the job. Go to the Makeover Tool (upper box) and click on it. Select the Toothbrush (lower box) and bring the cursor up the the sky in the image and do single click. Each time a left click is done, the sky will increase in whiteness. This image required 3 clicks to obtain the proper whiteness.
Some additional buttons are provided just above the workspace such as the Save and Save As selection buttons. There is also an Undo Changes button (reverse arrow) that you can select anytime you make a mistake and wish to undo your last action. (See image below)

Photo 2 - Pier by sunset
Before
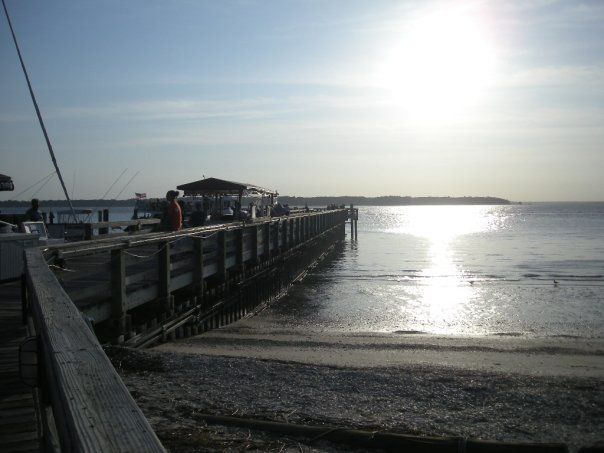
After

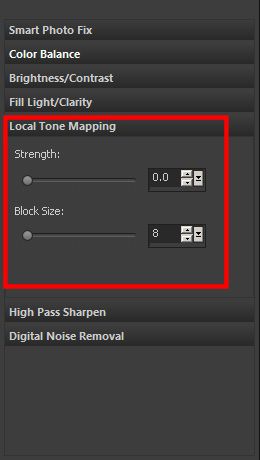
To create this artistic effect, click on the Local Tone Mapping tool and increase the Strength and Block Size to the appropriate, and most appealing look.
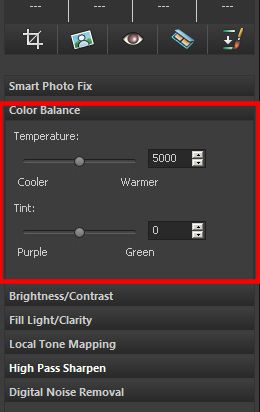
To give it a warm effect (such as the image on the right), click on the Color Balance and then drag the
Temperature selector to the right towards warmer.
If you enjoyed this tutorial, be sure to check out the other tutorials that are available in the Discovery Center. If you have any ideas for additional tutorials or projects that you would like to see in the future, e-mail Discovery.Center@corel.com.

Was this article helpful?
Tell us how we can improve it.