Welcome to this tutorial on creating 3D Photo Frames in Corel PaintShop Pro.

What You Will Learn:
- How to import a photo onto a background as a new layer
- How to use the rectangle tool to frame an image
- How to convert a layer from Vector to Raster
- How to adjust the angle of an object
- How to change layer transparency
In this tutorial we will show you how to make an image that appears to defy the laws of photography by leaping out of the picture.
First, open your image in PaintShop Pro and make sure that the Edit tab is active.

1. Go to the File menu and select New.
2. You will want to choose a wider background than your photo and it can be cropped down to size later. In this example we will set the image size to 900 by 800 and select a pattern for the background.
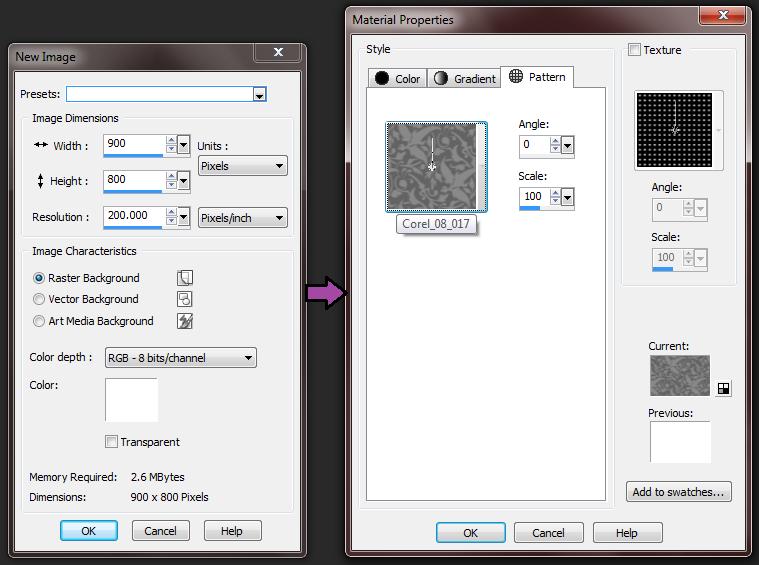
3. Click OK and then OK again to continue.
4. Now you will need to paste the image on top of the background. Click on the tab containing your photo and then from the Selections menu choose Select All.

5. To copy, use the key combination CTRL C on your keyboard or select Copy from the Edit menu.
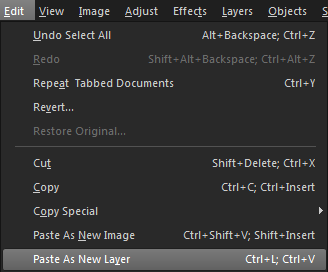
6. Next, click on your background and from the Edit menu select Paste As New Layer.
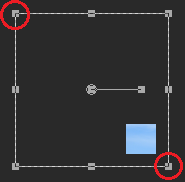
7. As you can see the image is massive, so what we can do here is zoom out, select the corner nodes and drag them to re-size the image.
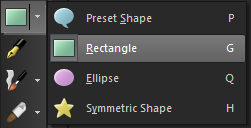
8. Now we'll need to frame the image so that it appears to be on an angle. To do this, select the Shape Tool and choose Rectangle.
9. Set the outline width and choose an outline color by left-clicking in the Materials palette. In this example we'll use a white outline color.
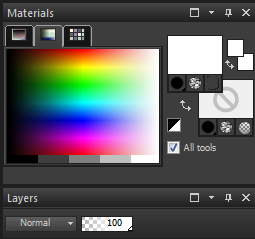
10. The fill color will need to be set to Transparent. To do this, select the far right button on the bottom color swatch and set it to Transparent. The swatch should appear to have a strike out sign in it.
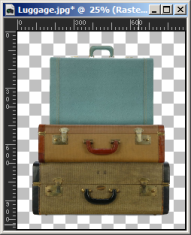
11. Draw a rectangle around part of the image and size it appropriately.
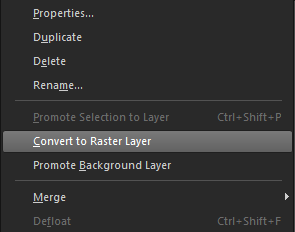
12. This will create a Vector Layer because the rectangle is a vector object. In order to make the rectangle appear to be on a three dimensional angle, we will need to convert the layer to a Raster Layer. To do this, right-click on the layer and select Convert To Raster Layer.
13. In the Interactive Properties bar at the top of the screen, type 10 into the X Perspective and hit Enter. Don't' worry if the number may change slightly after you've hit Enter; this is due to the re-adjustment process after the new angle has been created.
14. Now that the perspective has been changed, you may need to reposition the rectangle so that it frames the image just right. Click on the layer containing the photo. You can remove the large portions from the outside edges of the image by selecting them with the Selection tool and then hitting the Delete key on your keyboard. In this example I will remove the left, top and bottom edges, cutting them off just under the frame.
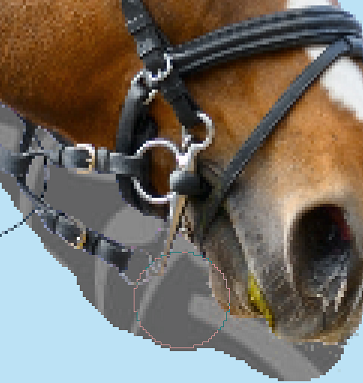
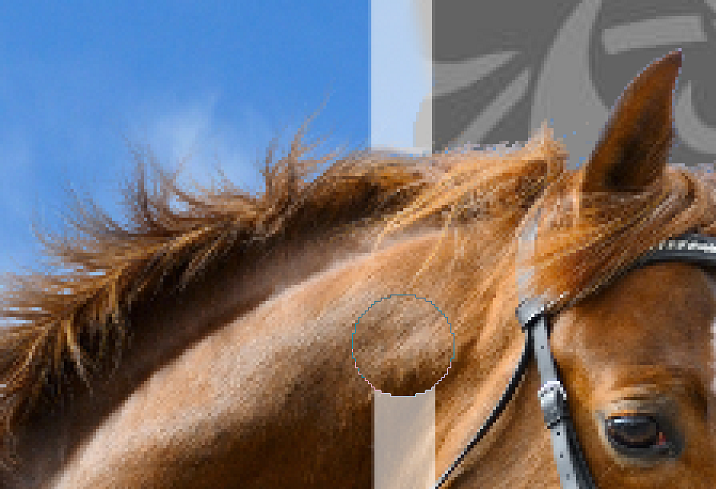
15. Next, erase the background from the front of the image where it will be jumping out of the frame. You can use the Eraser tool to remove the large portions and then the Background Eraser tool for the detailed edges.
For more information on the Background Eraser tool, please watch our video on 
17. Carefully erase the rectangle at selected locations.
18. When you have finished you can restore the opacity to the rectangle in the Layers palette.
19. From the Layers menu, select Merge All Flatten to combine all the layers into one image.
20. Next, use the Crop tool to select just the amount of background you want.
And that is how you can make part of your photo appear to be jumping right out of its frame.

If you have enjoyed this tutorial, be sure to check out the other tutorials that are available in the Discovery Center. If you have any ideas for tutorials or projects that you would like to see in the future, please leave us some Feedback.
Was this article helpful?
Tell us how we can improve it.