Miniatures: Tilt and Shift effect
Using expensive Tilt and Shift lenses to give your photos that trendy miniatures look is actually quite a tricky technique; however, it’s far simpler to achieve using a suitable picture in Corel® PaintShop Photo® Pro X3 (PSP). There are some prerequisites to this though; it won’t work with any image.
For it to work with impact, it’s crucial that the photo is taken from a high vantage point looking downwards. Another point to bear in mind is that there should be a point of interest: perhaps people, houses and shops, cars, planes or trains. Boats also work really well. The subject should be something that you might find as a genuine miniature in real life.
In this tutorial, we’re going to reveal a really simple technique, without making tricky masks, so we can emulate that really intense, fun miniature effect.
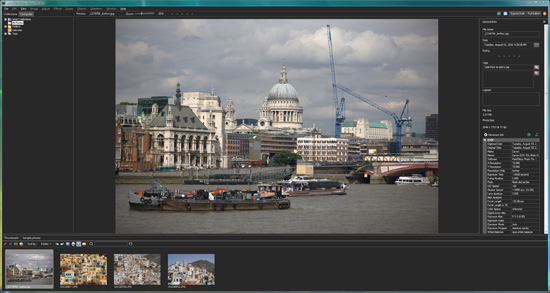
Step 1 Open your image from the Organizer
We going to assume you have your chosen photos displayed in the Organizer and that you’re looking now to open your images in the Main Editor.
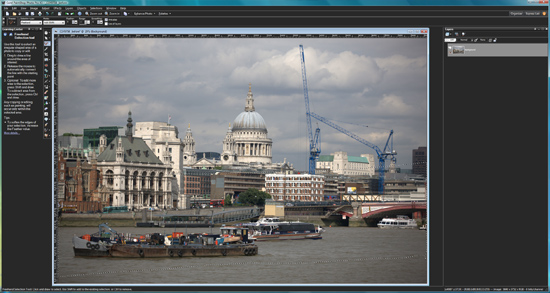
Click on the thumbnail to preview in the main browser window and then click the Full Editor button top right.
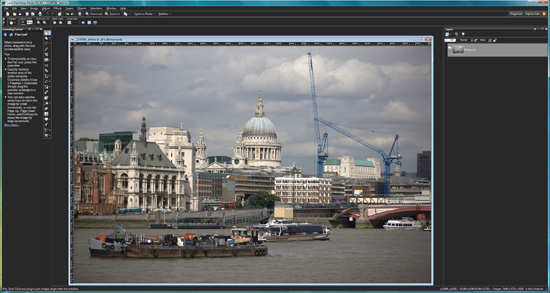
Now, with the image open in the main editor, it should look something like this. But it does depend on what you had open before. In addition to following this tutorial, you could have the Learning Centre and Layers palette displayed, but they’re not essential if you have the Tool Options open on the toolbar.
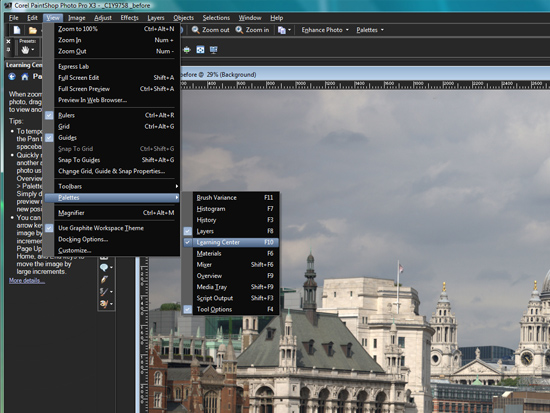
From the main menu, select View > Palettes > Layers, Learning Center, and Tool Options, or choose shortcuts F8, F10 andF4, respectively, if you prefer.
Tip:
I prefer the Graphite Workspace theme (View > Use Graphite Workspace Theme), as it’s easier on the eyes and doesn’t interfere with my colour perception.
Make a selection…
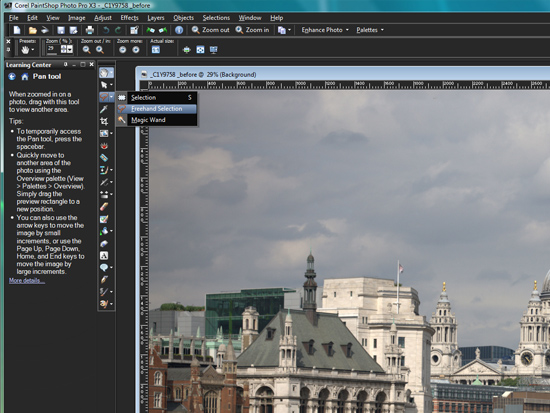
Step 2 Choose Freehand Selection
This step is far easier than it looks. Now, while I’ll admit using a fancy graphics tablet and pen is easier for freehand selections, it isn’t impossible to do with a standard mouse. Also, Corel has made it as easy as possible. First, choose the Freehand Selectiontool from the toolbar.
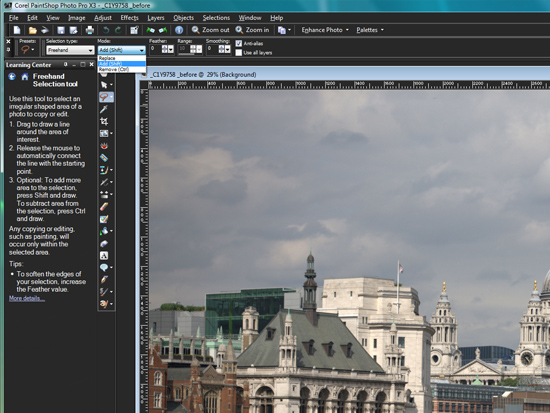
Then make sure you select the Add (Shift) mode from the Tool Options (F10) palette (from step 1, above). This option makes selections far easier, because you can simply go back over any mistakes with the areas you’ve selected. And, as the name implies you can even (right) click and drag the selection to move it into a better position, if you feel you need to.
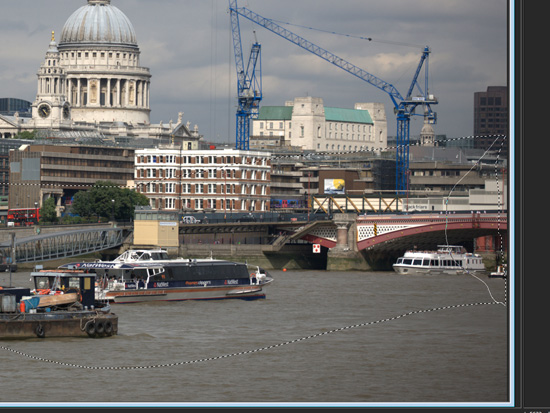
For our Tilt and Shift effect, we need to make a selection that will be the focal point, and we want a plane of focus across the image. We also want to skew it slightly, following the composition of the image, for greater impact.
Left click and hold while you draw a fairly deep rectangular selection right across the image. Start at the left edge, sweep across to the right, then down (outside of the image slightly to keep the edge straight), then sweep back left to the border, out again and up to join up to where you started. Now, release the left mouse button, and you’ll see the “marching ants”, depicting the selection.
Tidy up
If you made a mistake and the edge is ragged, for instance, draw a loop around it, from one edge of the selection to the next. Keep doing that until the selection is neat. You’ll soon get the hang of it. If you simply can’t correct it, or it’s taking too long, right click anywhere on the image to delete it. Then, simply start again.
Was this article helpful?
Tell us how we can improve it.