

Have you ever wanted to see what you might look like after a Hollywood Makeover or a professional photo shoot? Well today I'm going to introduce you to an amazing product called Face Filter that can transform any portrait into an amazing cover shot. The best part is, it comes free of charge as part of the PaintShop Pro X6 Ultimate product.
Now if that doesn't make your face light up, let me show you how you can make that happen in Face Filter.
First, make sure that the application is installed. Many first time users are unaware that even though Face Filter comes free with PaintShop Pro Ultimate, it requires its own installation and serial number. A link will be available in your e-mail order confirmation if you purchased a download version or the software will be included as extra content if you bought DVD copy.
Let's jump in. Start by launching Face Filter.
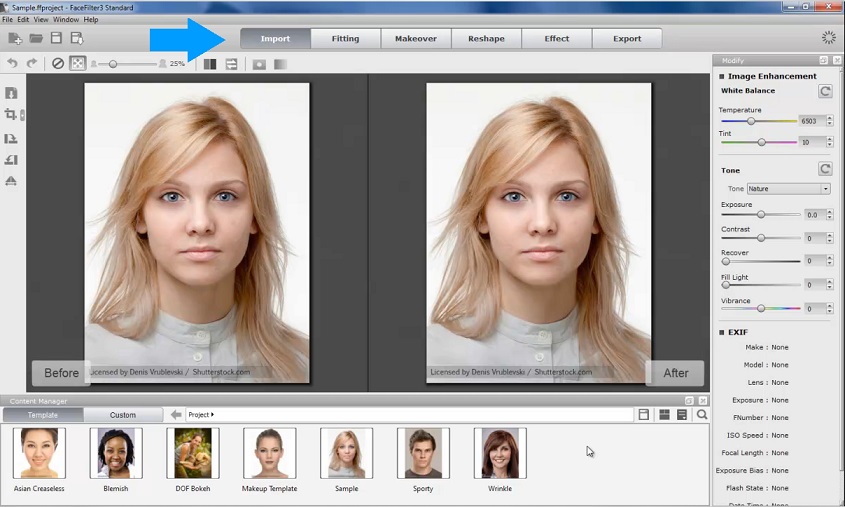
When the program opens you'll notice it's separated into various sections at the top, such as Import, Makeover, Reshape and Export, to name a few. There's also some handy samples at the bottom of the screen for you to practice on if you want to play with the application but don't have your own image to work with yet.
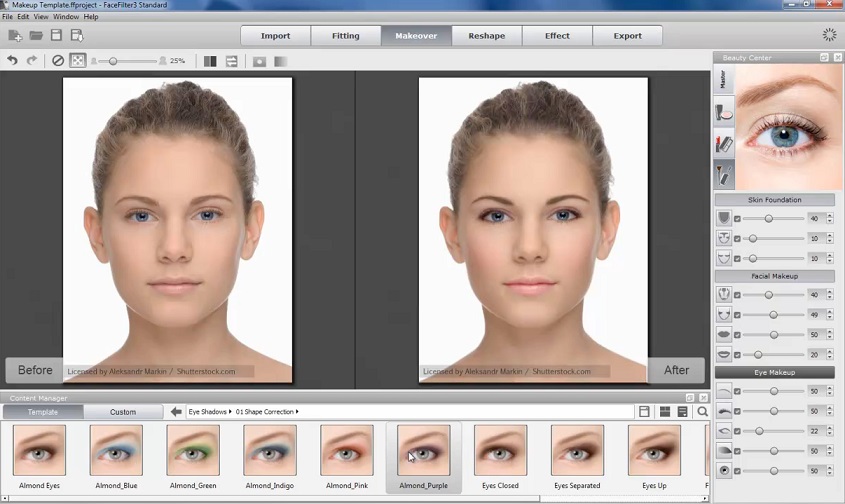
For the first part of this demonstration I'll use the Makeup template.
Just drag and drop this template into the work area and you'll be shown two version of your image, before and after. This can be very helpful while you're editing so that you don't forget what you've changed so far.
Next, click on Fitting. This is a very important step and you'll want to make sure you check each feature from the right side of the screen before continuing. Number 7 will show all of them on the screen.

Now let’s get to the fun part - the makeover!
Right away you can already see a major difference on the After portion of the screen. In this example, Face Filter has come up with some of its own suggestions for the makeup. However, everything is completely customize-able.
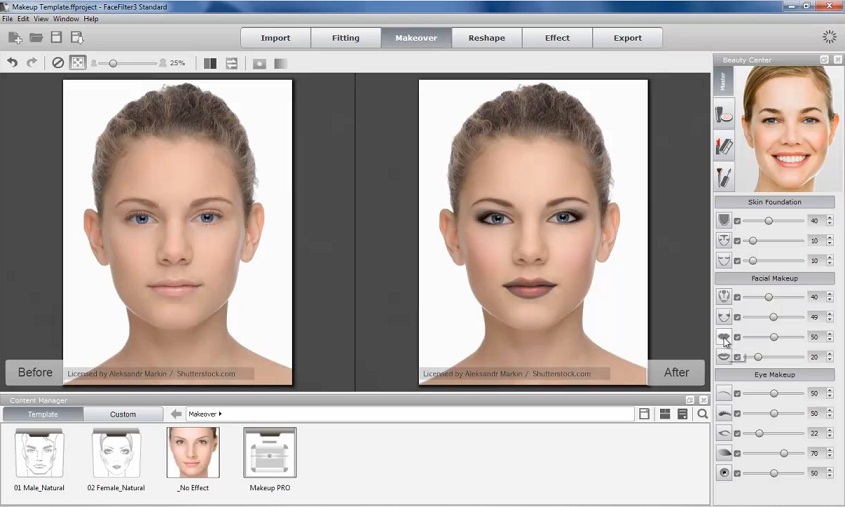
First, I want a bubble gum pink color on the lips...

Next, the eye makeup seems a little extreme, let's change that to a light violet.
Anything that can be done with makeup in real life can be done here. As you can see, the face has changed significantly.
Let's move onto the next step.
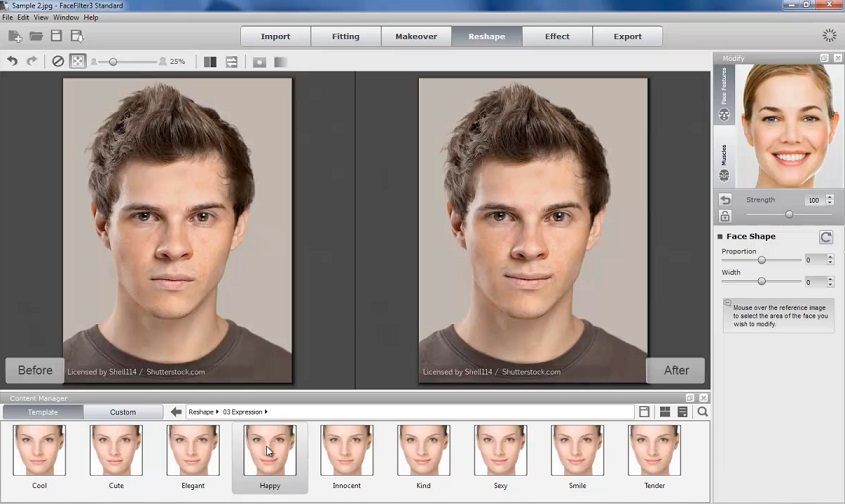
Imagine you have an amazing photo – the lighting is perfect, the background is stunning, everything looks good EXCEPT you're sporting a frightening grimace. Perhaps your eyes are squinting at the sun, or the photographer catches you at just the wrong moment. Well, let me show you how you can turn that frown upside down.
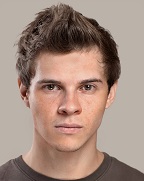
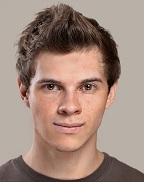
I'm going to start with model whose face looks downright angry. Let's focus on the mouth. Click on Reshape and then Expression at the bottom of the screen. There are tons of options to choose from here and it's amazing how drastically they can change the appearance of someone’s face. For this model, I'm going to double click on Smile and just like magic, the model looks pretty happy to be there and less like he's about to audition for a horror movie. This is literally the easiest and fastest way to turn a day around.
When the image is complete, click on the Export button and select the format you want. In this example I'll go with the tried and true JPEG format and the quality is already set to 100%.
Click the Export button at the bottom of these options, name your file and click Save.
Obviously to start with we had beautiful models, but we were testing out a new look. Face Filter provides a virtual makeover without having to go through any hassle, expensive makeup, or animal testing.
Was this article helpful?
Tell us how we can improve it.