
Before

After

What you will Learn
- How to use the Blemish Fixer, Toothbrush, and Red Eye Removal
- How to apply Skin Smoothing
Makeover Tools in PaintShop Pro
A video version of this tutorial can be viewed at the Corel Discovery Center. In this part of the series on Enhancing your Photos for Social Media you will learn how to use the Blemish fixer, Tooth Brush, Red Eye remover and Skin Smoothing tools to improve the quality of your profile pictures.
1. Open the photo in PaintShop Pro and make sure that the Edit tab is active.

2. Select the Makeover Tools from the Standard Toolbar.
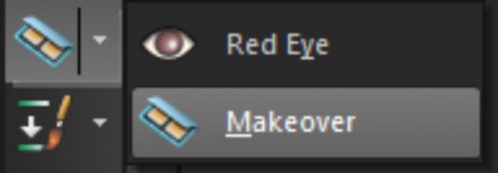
The Makeover tool options will show up at the top of the screen in the Interactive Properties bar.

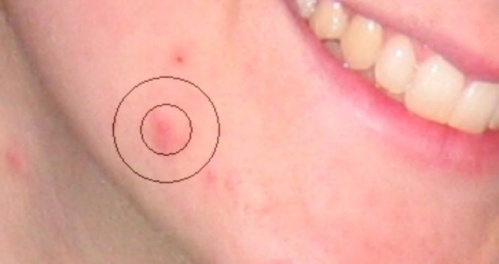
3. Click on the Blemish Fixer tool and then zoom into the area you're going to be working on by rolling your mouse wheel forward or by using the Zoom tool at the top of your screen. The size of the tool can be changed so that the inner circle exactly covers the blemish or mark. The outer ring is used to sample color that will fill the inner ring and make the spot disappear.
4. After the adjustments are complete you can zoom back out.
5. To whiten teeth, select the Toothbrush tool and then click once on the teeth to see instant whitening.
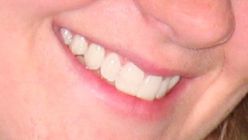
In this example the default Strength of 50% is used but if the image you're working with requires more or less correction, the strength can be changed in the Interactive Properties menu.

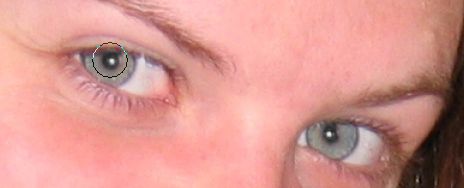
6. The Red Eye Remover is located in the same area as the Makeover tools in the standard Toolbar. After clicking on the tool, zoom into the area you're going to be working on.
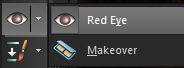
7. Place the circle over each pupil and click once; this will instantly darken the area. The size of the red eye removal tool can be adjusted so that it matches the pupils.
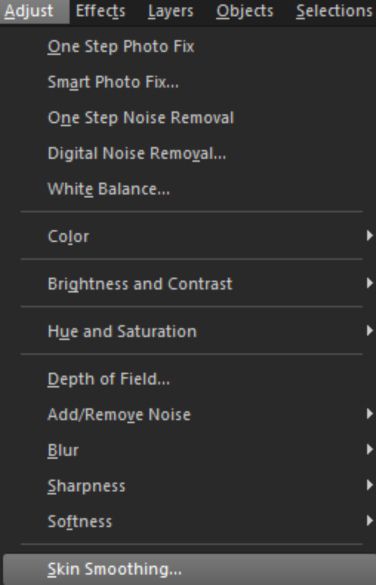
8. Skin smoothing eliminates wrinkles, bumps, bruises and rough areas, giving a portrait a nice finishing touch. To do this, click on the Adjust menu and then select Skin Smoothing.
With Preview on Image checked, adjust the Amount of smoothing by dragging the gage between 1 and 100. In this example set the amount of smoothing to 50%. You will be able to see the results taking place on the image and then click OK.

Using Makeover tools and skin smoothing feature appropriately can make any profile photo, from Facebook to LinkedIn, appear as professional as a magazine model shoot.

If you enjoyed this tutorial, be sure to check out the other tutorials that are available in the Discovery Center. If you have any ideas for additional tutorials or projects that you would like to see in the future, e-mail Discovery.Center@corel.com.
Was this article helpful?
Tell us how we can improve it.