

Follow these steps:
1. Open Corel® PaintShop Pro
2. Select Edit mode

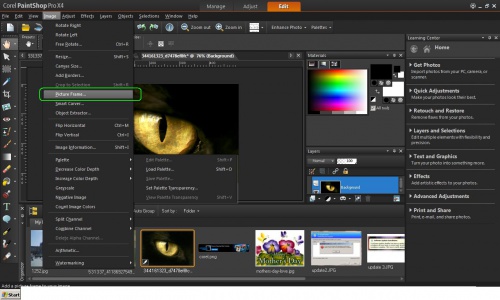
3.Select the Image menu
4.Select Picture Frame
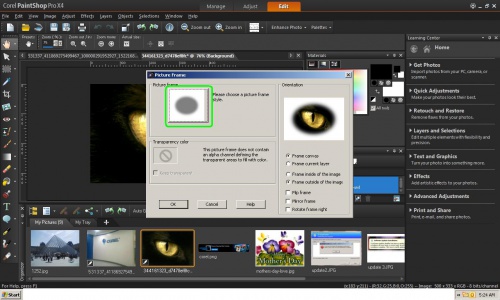
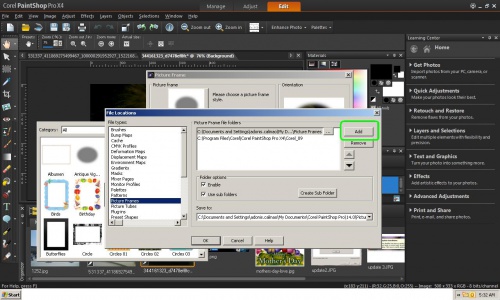
5.Under Picture Frame. click on the Picture Frame square on the left in order to select a picture frame from the list.
6. In the window that has the list of frames at the upper right section, locate the icon that saysFile
Location.
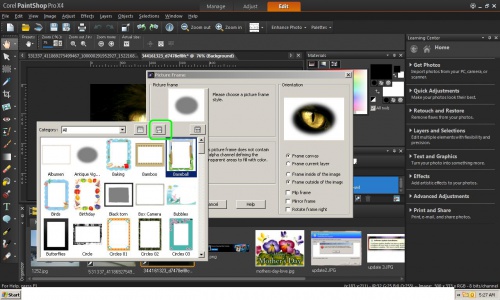
7. Under File Location, click ADD
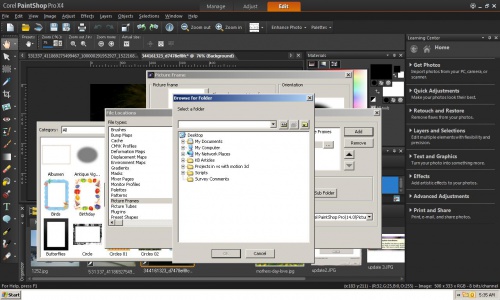
8. When the next window opens, navigate and select the specific frame needed to be used.
keywords: How to add picture frame that is not on the list of frames;picture frame;adding picture frame;frames.
Was this article helpful?
Tell us how we can improve it.