


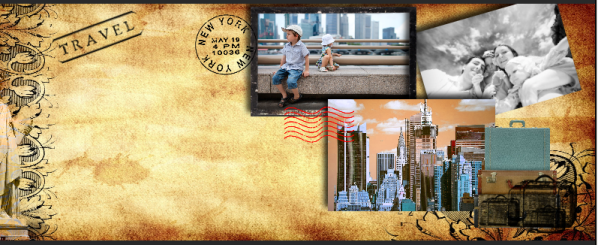
Create a photo collage that will fit as your Facebook Timeline cover using Corel PaintShop Pro X5. This tutorial will cover some techniques that can be used for any collage project, whether you are creating something for the Web or print.

What You Will Learn
In this tutorial, you will learn how to:
- Place and resize any photo or graphic as your Facebook Timeline cover
- Arrange photos in the Layers palette
- Apply a picture frame and photo effects
- Remove the background from an image
- Import custom brushes and apply brushstrokes
- Save your file for the Web
Placing and Resizing Your Photos for a Facebook Timeline Cover
1. To begin, create a blank canvas instead of just opening a photo, so you will be able to set the exact size you need. Start by going to File > New. Set the dimensions to 1702 (Width) by 630 (Height) pixels (set Units drop-list to Pixels') as these are the dimensions of the Facebook Timeline cover.
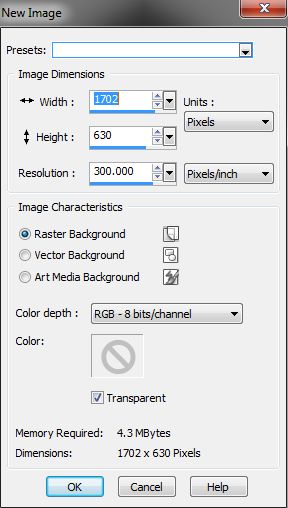
2. Set the background to Transparent and click OK; the new file will be placed in the Edit workspace.

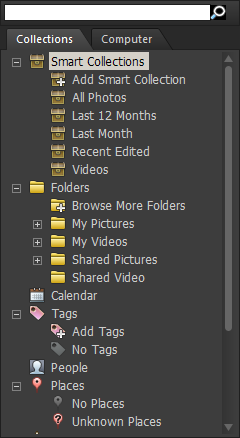
3. Use the Organizer palette to display the folder which contains the photos that you will be using in your Timeline cover. To display the Organizer palette, click Palettes > Organizer on the Standard toolbar (or press Shift + F9). You can see your list of folders by clicking the Show/Hide Navigation button in the upper-left corner of the palette.
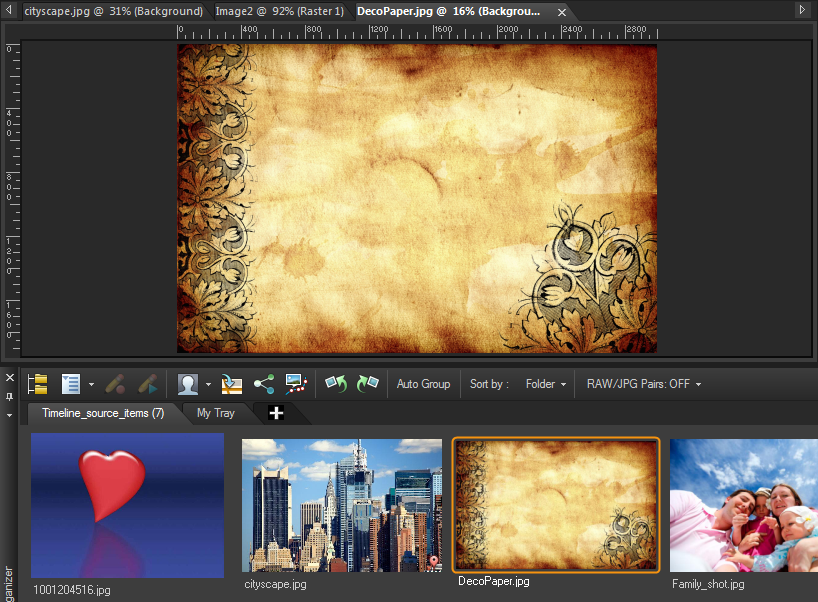
4. In this tutorial, I will be using photos and objects that I have collected from a variety of sources including the Internet, clip art collections and stock photo sites.

5. I will use this background image first by double-clicking it in the tray.
6. There are several ways to transfer images from one window or file to another. You can select, copy, and paste the image into the new file; or, in the Layers palette, you can grab the layer that you want to move and drag it over the tab of the image you want to add it to.
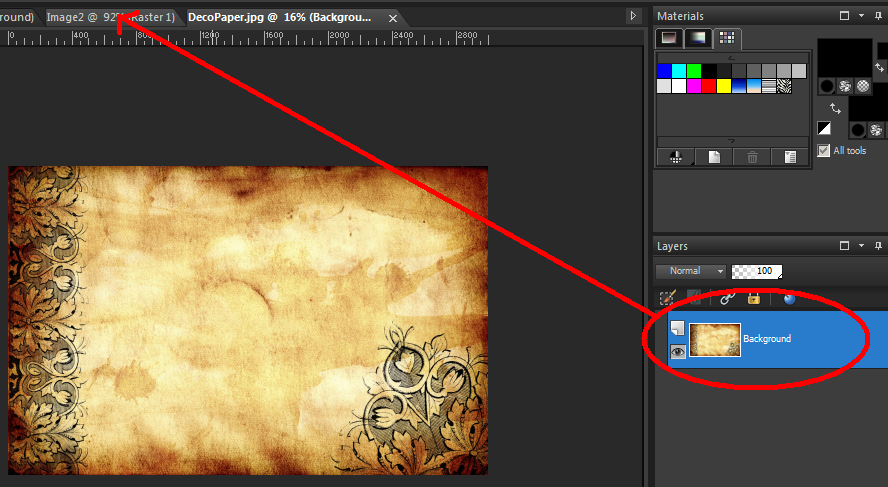
7. That tab will then come to the front and then simply drop the selected image onto the blank image. Note that the selected image is added to the blank image as a new layer (you can see this in the Layers palette).
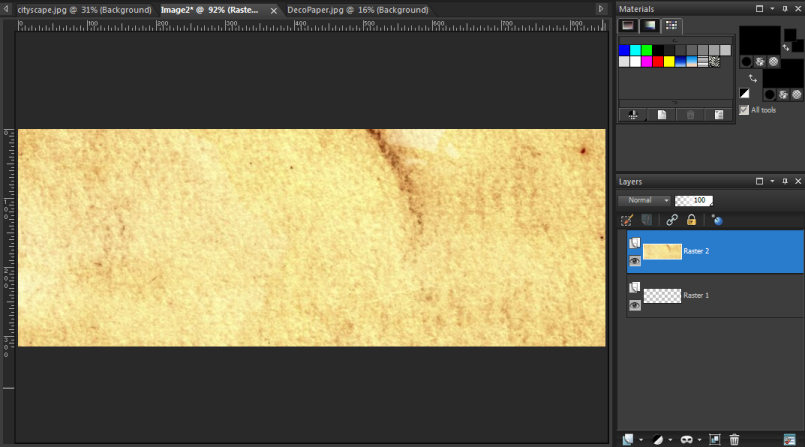
8. Since the image size is big in comparison to the canvas size of the blank image, I can't see the outer edges of the image (only the part of the image that overlaps the canvas area is visible). To fix this, zoom out until the outer edges of the background image are visible on the screen. The outer edges are displayed as a bounding box when the Pick Tool is selected.
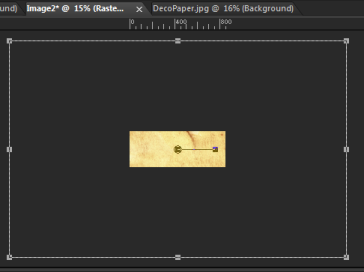
9. Now I can resize the image by dragging the handles on the bounding box inwards and then zoom back in.
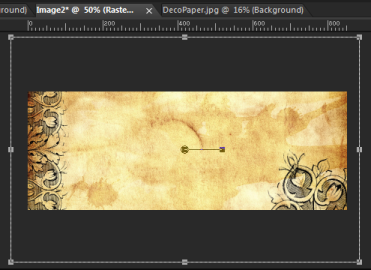
10. Since the image that I am resizing is a design graphic, I can skew it a little bit (by dragging a side handle instead of a corner handle) and it will still look good. I'll even let it overhang the edges of the canvas somewhat, but only what is on the canvas will be visible.
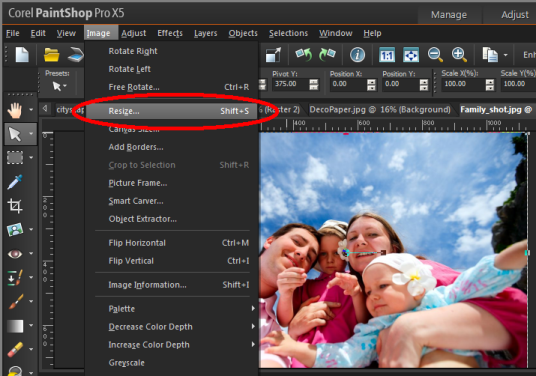
11. Another method of adjusting the size of an image before you use it in a collage is to use Image > Resize.
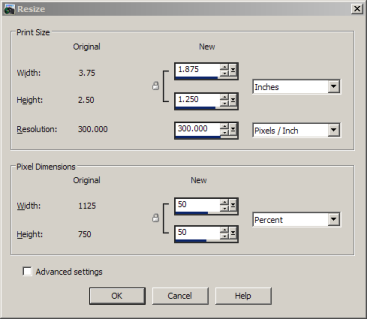
12. Decrease the value of Pixel Dimensions to 50% and then click OK.
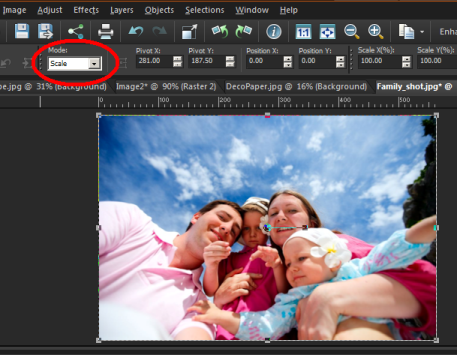
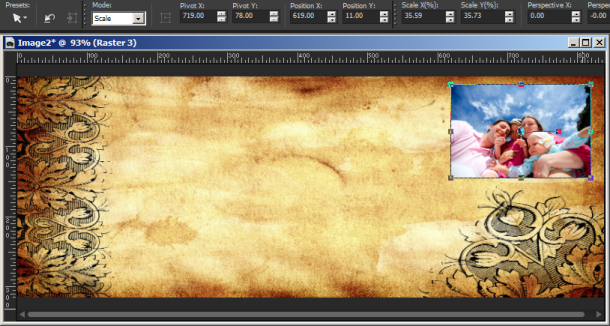
13. Another method of resizing an image before you use it in a collage is to use the Pick Tool and choose Scale in the Mode box on the Tool Options palette. Then you can drag a handle on the bounding box the image, to resize the image interactively.
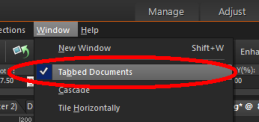
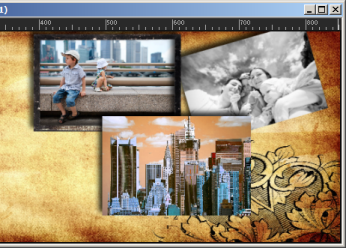
14. Next, turn off Tabbed Documents to see multiple windows at the same time. To do this, go to the Window menu and uncheck Tabbed Documents. Whether you choose to work in Tabbed Documents mode or not is up to you - sometimes it is easier working with multiple windows when you are doing collage work. In other cases, you might prefer the larger preview area that Tabbed Documents provides.
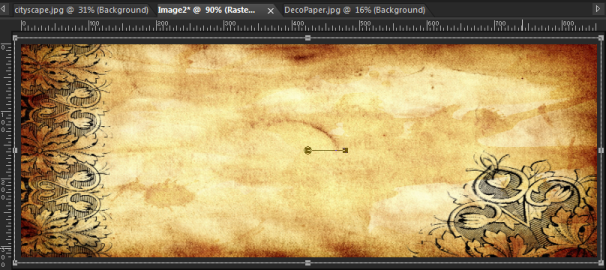
15. I will use the Scale mode for the Pick Tool to adjust the size of the images in my collage so they fit it into my Timeline cover.
Arranging the Photos in the Layers Palette
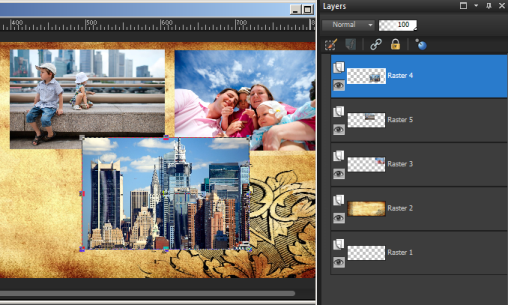
1. You will notice that as you add each photo, Corel PaintShop Pro places each on a new layer as indicated in the Layers palette. This will be very helpful as you'll be able to edit and rearrange the content on each layer without affecting anything else. For example, you can move the Raster >layer on top of the Raster 5layer.
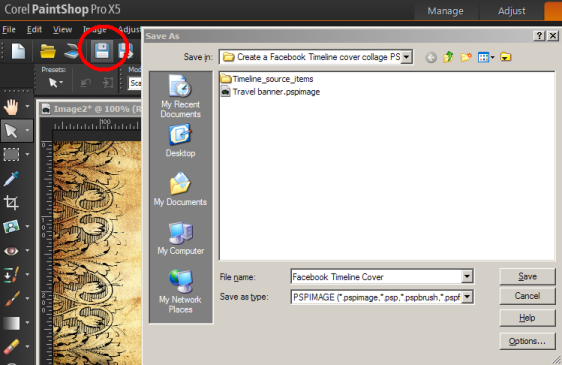
2. This is a good time to save your file into the Corel PaintShop Pro format. Click File > Save As, and choose PSPIMAGE from the Save as type drop-list when you save your file. The .pspimage format will retain all the layers as editable so you can make any changes you like.
Applying a Picture Frame and Photo Effects
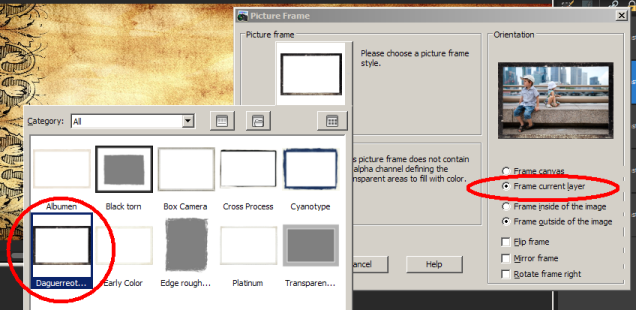
1. Next, add a picture frame to one of your photos by going to Image > Picture Frame.
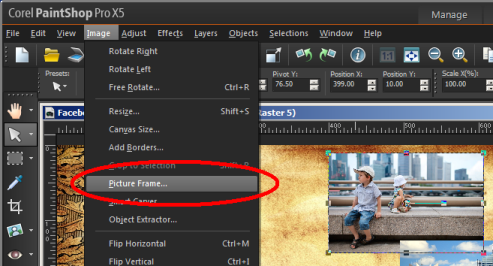
2. Choose Daguerreotype and make sure to apply this only to the objects on this layer by enabling the Frame current layer option in the Picture Frame dialog box. Click on OK when done.
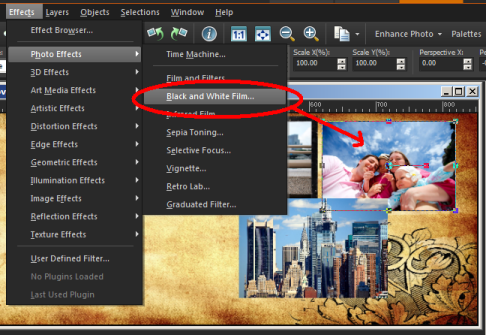
3. I will select the family photo and add a photo effect to it by going to Effects > Photo Effects > Black and White Film.
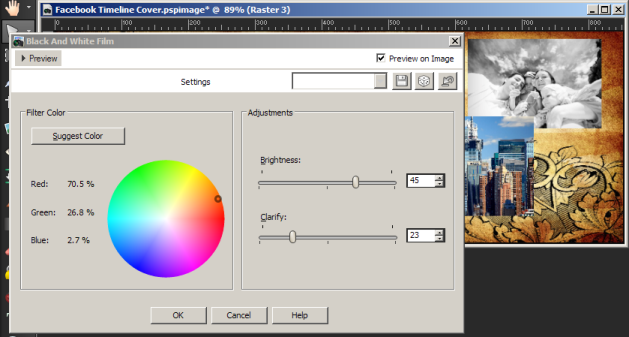
4. In the Black and White Film dialog box, start by using Filter Color. Going from one side of the color wheel to the other produces the opposite contrasting effect. I set the color wheel to an orange filter and set the Brightness to around the mid-40s and Clarity to the low 20s. Click OK when done.
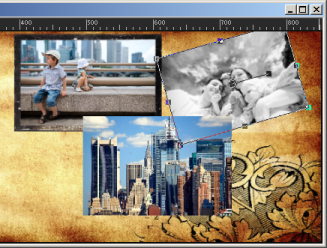
5. You will notice that the effects are applied to the selected layer only. If you want, you can also rotate the layer by selecting the layer with the Pick Tool and positioning the pointer just beyond a corner handle. When a curved double-arrow cursor appears, drag to rotate the layer.
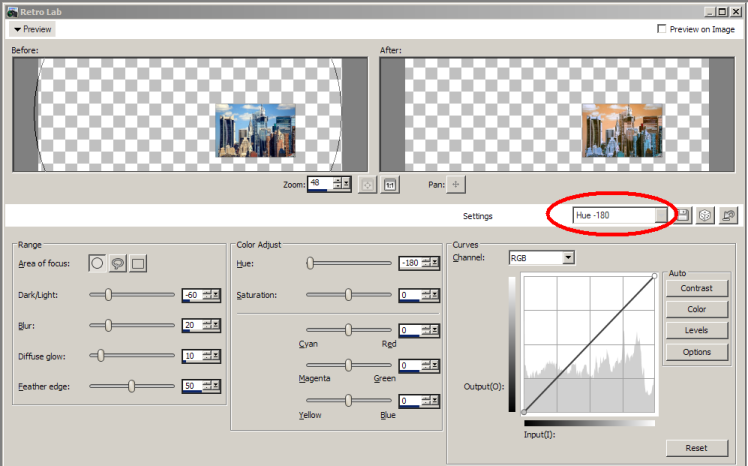
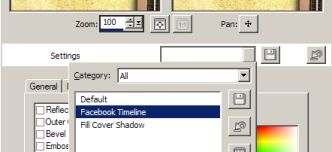
6. For the third photo, I will apply the Retro labeffect located under Effects > Photo Effects > Retro Lab.

7. In the Settings area, select the preset Hue -180 from the Load Preset drop-list and leave all the other controls at their default settings. Click OK.
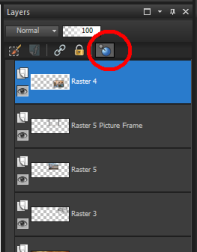
8. Click the Layer Stylesbutton in the Layers palette to add other effects to the selected layer.
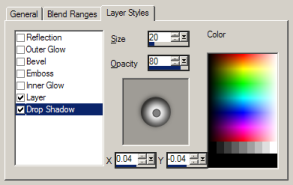
9. In the Layer Properties dialog box, the Layer Styles tab displays by default. Add a small drop shadow by selecting the Drop Shadow check box. Adjust the look of the drop shadow by using the joystick or by entering values for the settings.
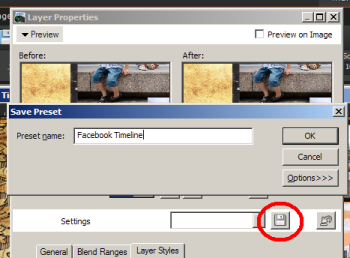
10. Save the setting as a preset if you want to apply the same shadow to the other photos by clicking the Save Preset button and typing a name for your preset. Click OK to save the preset and click OK again to close the Layer Properties dialog box.
11. Use the saved preset on other photos by choosing it in the Load Preset drop- list.
Removing the Background from Images
1. Now, I will add a photo of the Statue of Liberty, but I would like to retain just the statue and not the sky. For this photo, I will use the Background Eraser tool to remove the sky.
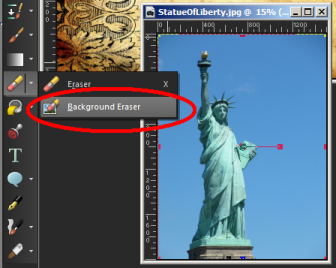
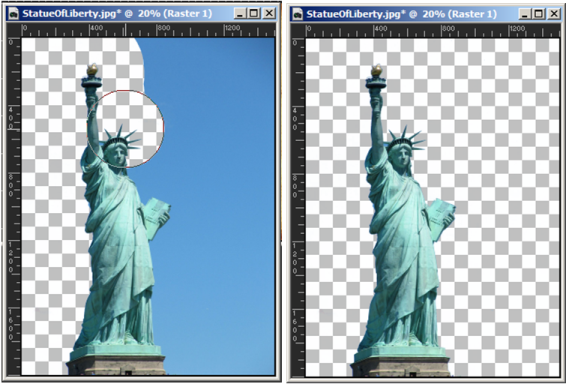
2. On the image, drag the nub in the middle of the pointer on the area you want to delete, but make sure the outer circle overlaps the area that you want to keep. It helps that there is good contrast between the background and the foreground. The size of the circle can be adjusted interactively by holding down the Alt' key'while dragging.
3. If you need additional assistance using this tool, remember to refer to the Learning Center palette (on the right side of the workspace; F10 displays and hides the palette), which will display instructions whenever a tool is selected.
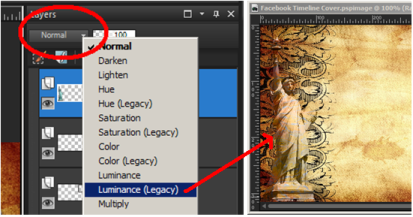
4. When done, move the statue over the main image, place it just above the background layer and move it over to the left.

5. Add an additional effect on the statue using the Blend Effects in the Layers palette. These effects provide various results by blending the current layer with the layer underneath it. In this example, choose Luminance (Legacy)from the Blend Mode drop-list.
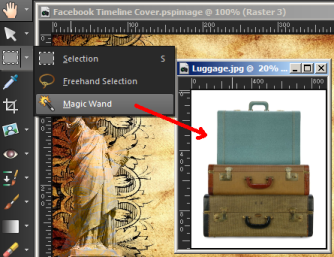
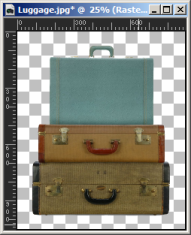
6. Next, I will add a photo of suitcases. I will select the Magic Wand tool to remove the white background on this photo.
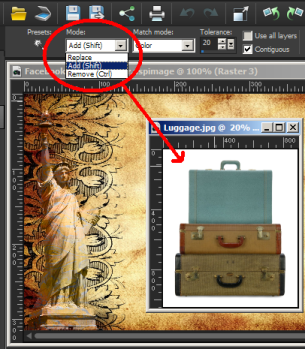
7. Select both portions of the white background to delete it. To do this, hold the Shift key and click, or choose Add (Shift)in the Mode drop-list. Then simply click the portions you want to delete.
8. But the white portion cannot yet be deleted because you can't delete anything from the Background layer. To remove the white portion, right-click on the layer in the Layers palette and select Promote Background Layer.
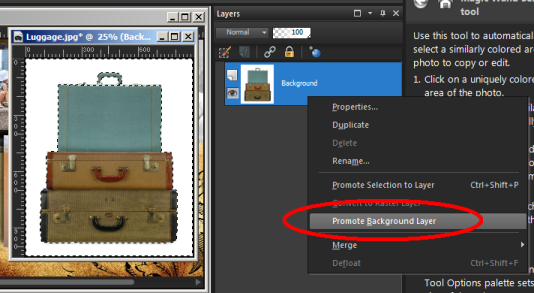
9. This will lift the selection off the Background so you can delete only the white portion when you press the Delete key.
10. Place and resize the suitcase photo in the lower-right corner of the Timeline cover.

11. Leave the lower-left portion of the image empty to make room for the Facebook profile photo.
Importing Custom Brushes and Applying Brushstrokes
Although Corel PaintShop Pro has its own set of brushes, I will use some custom brushes that I downloaded for free from the Internet. They happen to be made for Adobe Photoshop, but I can easily import and use them in Corel PaintShop Pro.
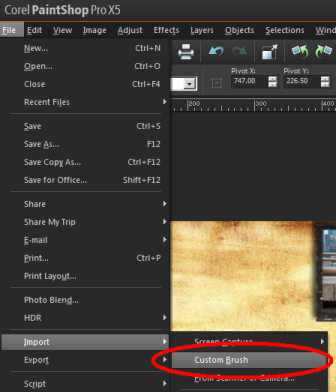
1. To add custom brushes, go to File > Import > Custom Brush.
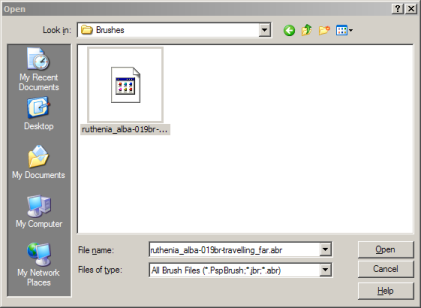
2. In the Import Custom Brush dialog box, click on Open and browse to the brush that you want to import.
3. In the left-pane of Import Custom Brush dialog box, select the brushes that you would like to add to your Timeline Cover.
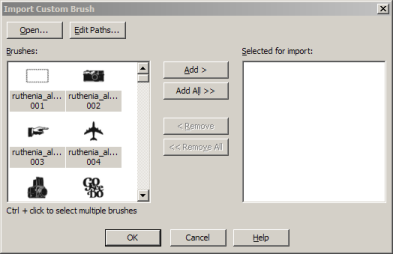
4. Click the brushes you want in the Brushes pane and click the Add button to include them in the Selected for import pane. Click OK.
5. Next, create a new layer in the Layers palette by clicking New Layer > New Raster Layer.
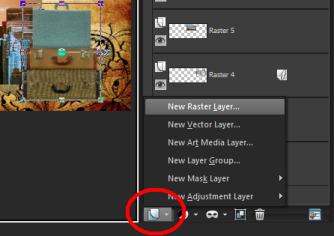
6. In the New Raster Layer dialog box, click OK.
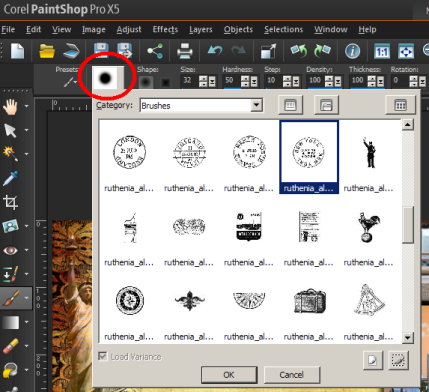
7. Now, click the Paint Brushtool and choose the brush you want from the brush tip drop-list on the Tool Options palette, and then click OK.
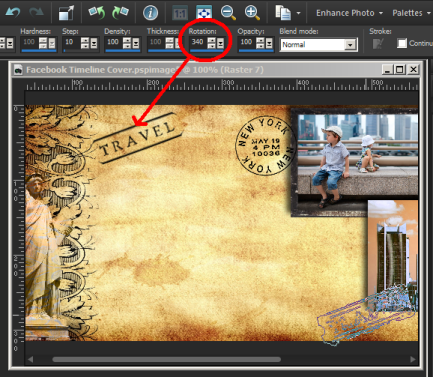
8. On the image, click where you want to apply the brushstroke (in this case, the brushstroke is applied like a stamp). Remember that you can hold down Alt and drag to resize the brush interactively.

9. To choose another brush, simply double-click it in the brush tip drop-list on the Tool Options palette. You can rotate the brush by typing a value in the Rotation box on the Tool Options palette.
10. Choose another brush and then change its color by clicking the color you want in the Materials palette. In this example, I will change the color of the brushstroke to red.
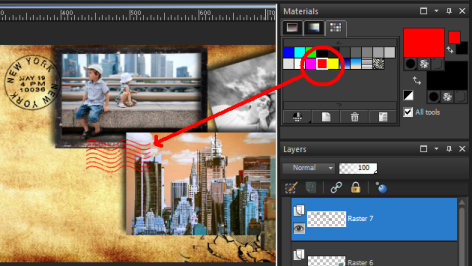
11. Add as many brushstrokes as you like, adjusting the color and the settings on the Tool Options palette to get the look you want.
12. You can also use the Text Tool to add some text if you like.

Saving Your File for the Web
1. Don't forget to save your file in the .pspimage file format. This ensures that you have an editable copy of the file if you want to edit something later.
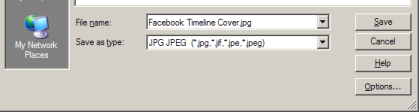
2. To save a copy that you can use in your Facebook account, you need to save to a JPEG file. When you save to JPEG, all the layers are merged into one layer (flattened). Click File > Save As to save to JPEG.
Done!
And there you have it - a collage for your Facebook Timeline cover.
If you need more information, check out the Corel PaintShop Pro Help files or explore the Corel Guide for additional resources and tutorials.
If you have enjoyed this tutorial, be sure to check out the other tutorials that are available in the Discovery Center. If you have any ideas for tutorials or projects that you would like to see in the future, please leave us some Feedback.
Was this article helpful?
Tell us how we can improve it.