Light Metering is another word for the different ways you camera can 'look at' a scene and determine exposure. In order that a camera get a proper exposure for different types of lighting situations, it is possible to select different ways for the camera to look at, or meter the scene you are photographing and judge the best exposure. As is the case with much in this section, the names and means of selecting different meter settings will vary depending on the brand of camera but they will generally all have similar ways of metering a photograph, consult your manual to best understand the settings specific to your camera.
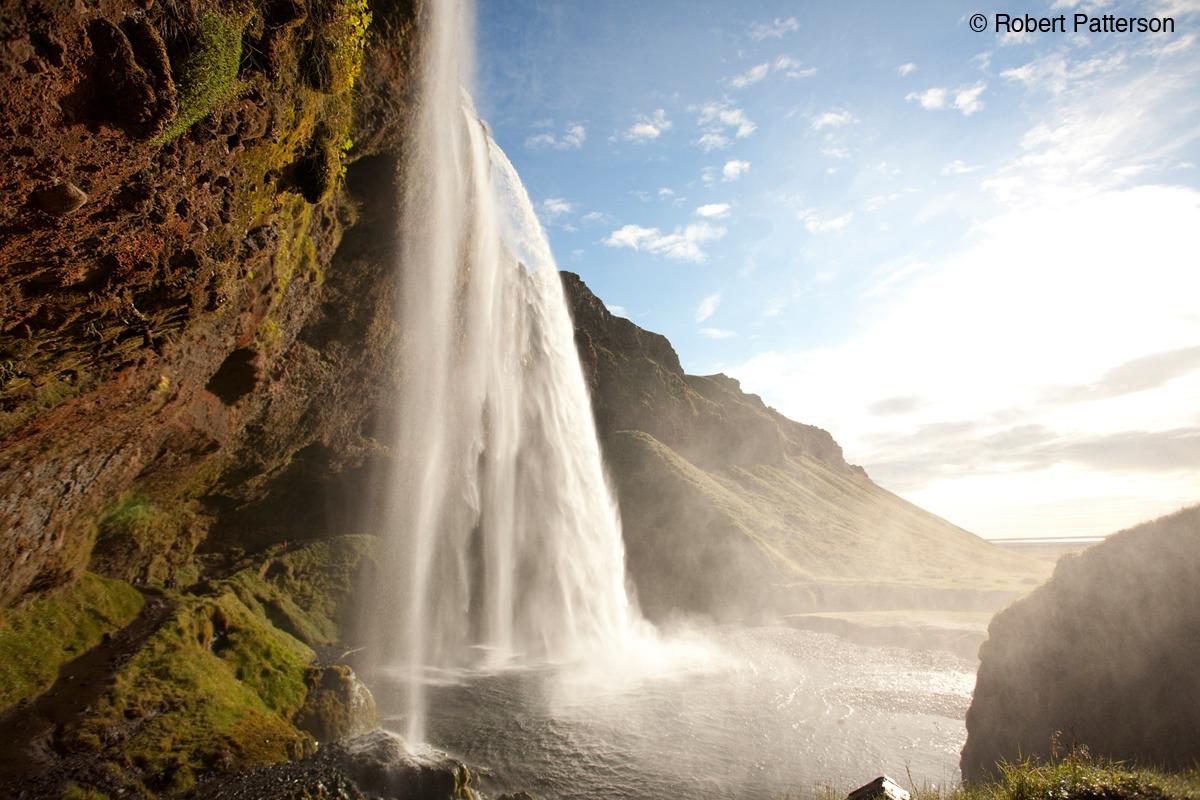
The common types of meter settings include:
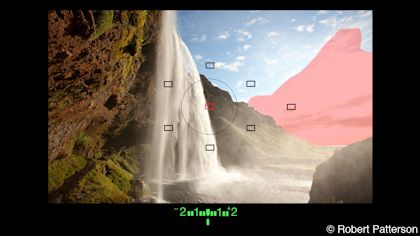
Evaluative or Matrix - The camera essentially will look at the brightness levels across the entire scene and then create a balanced exposure based on this information. This is a good all purpose setting and will function well in a wide variety of situations including direct light and backlit scenes. This is usually the default setting on most cameras and is recommended until you become more familiar with the other types of meter settings.
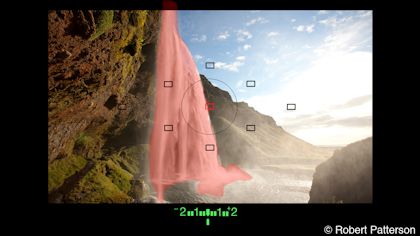
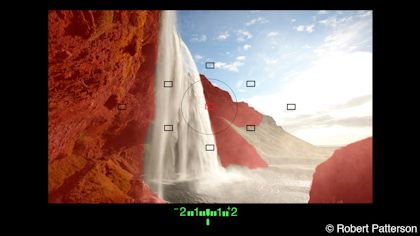
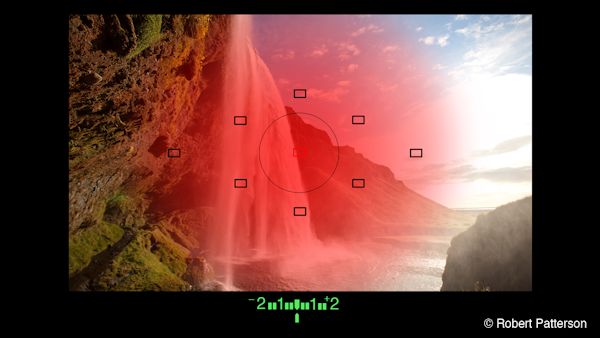
Red areas represent the sections that the camera meter will look at to assess exposure.
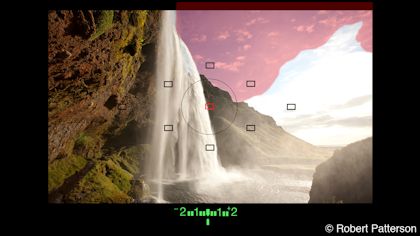
Center-weighted - The camera will still meter the entire scene but will place more importance on the center of the frame. This is useful when one part of the photo is significantly brighter than another.
Partial - The camera will meter a small area in the center of the frame. This is useful for backlit scenes
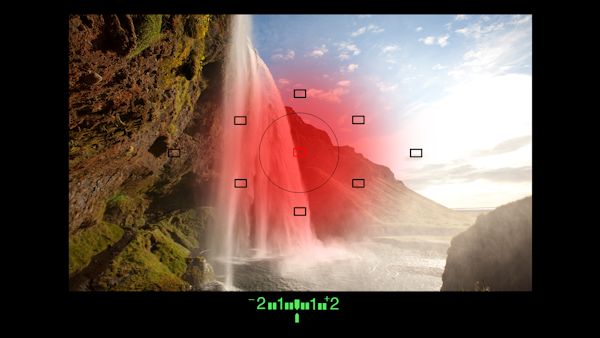
Spot - The camera will meter only a small spot in the center or if your camera can select different auto focus points, on whichever auto-focus point is selected. This is useful when the subject is much darker or brighter than the background.
The use of one shot auto focus can come in handy here as well. As the camera is using the auto focus point for both focus and exposure, you can aim the selected auto focus point at the subject and press the shutter release button half way. This will lock both exposure and focus on that point allowing you to then recompose the shot for a better composition so long as you don't release the shutter button before taking the shot. Use this technique and setting for sunset photography. Try metering at different points in the photo to see the effects of different meter values. You will rarely meter directly on the sun, and remember to not stare at the sun through your viewfinder. This is exactly the same as staring at the sun with the naked eye.

The difference between some of the modes is subtle so experiment with different settings to see what results you get.
If you enjoyed this tutorial, be sure to check out the other tutorials that are available in the Discovery Center. If you have any ideas for tutorials or projects that you would like to see in the future, please leave us some Feedback.
Was this article helpful?
Tell us how we can improve it.