This tutorial will show you how to create a signature block and then set up a macro to automatically insert the signature. You'll also learn how to edit macros and how to assign them to a keystroke or toolbar button for quick access.
When life was simpler, only "corporate types" had signature blocks. Now, everyone has one. From a corporate signature block with all of the standard information, to a personal signature with social media contact information, to a legal signature block that must be formatted to specific standards, we all have more than just our names and phone numbers to share.
Most email applications let you set up a signature block once, then it automatically inserts it into your messages. Wouldn't it be nice if you could set up something similar in WordPerfect? You can – it's called a "macro". This tutorial will show you how to create a signature block macro and then edit that macro to make a small change. You'll also learn how to assign the signature block macro to a keystroke or a toolbar button for quick access.
What is a Macro?
A macro is "script", or "tape" that you create to perform a series of steps. Those steps likely take you several minutes to complete manually, but when you play the macro, the process takes only seconds. More important than that is the consistency and accuracy – every single time you play a macro, the exact same series of steps is performed.
If you're lucky, your company maintains a standard set of macros for everyone to use. If this is the case, all you need to know is how to play them – we'll talk about that later.
Creating a Signature Block Macro
Quite simply, a macro is just like a short video you can shoot with your camera. You turn on the recorder, record the action, and thenturn off the recorder. The same is true for creating a macro, except instead of recording video, you record actions taken on a document. You turn on the Macro Recorder, record your actions, and then turn off the Macro Recorder.
When you create your first macro, try to remember that you don't have to do it perfectly the first time. You can keep recording the macro over and over until you get it right. You can also edit a macro and make some adjustments to it, rather than recreating it.
You can record a macro in a blank or existing document. It's more efficient to create the macro the next time you need to perform a certain series of steps because you can create the macro and accomplish your task at the same time.
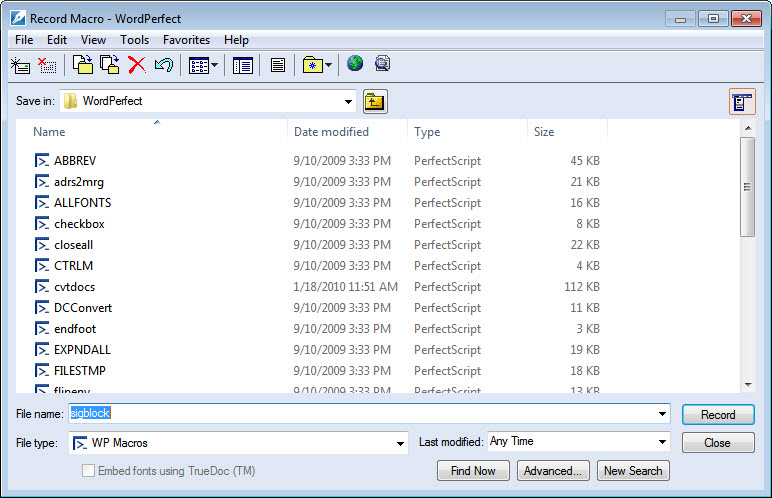
To record a macro, choose Tools > Macro > Record (or press Ctrl+F10) to open the Record Macro dialog box. Type an identifying name or a name like "sigblock" for the macro in the File name text box (see Figure 1). A macro is automatically saved with the .wcm extension, which identifies it as a macro file. Click Record.
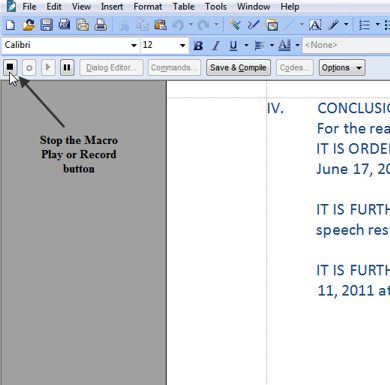
The Macro feature bar is displayed underneath the property bar (see Figure 2). The buttons resemble those that you see on a video camera so they may already look familiar. If you point to a button, a QuickTip appears with the name of the button.

The recorder is now on, so you're ready to start recording your actions. Type the signature block, and if necessary, use the menus and toolbars to open dialog boxes where you can make your selections. The macro records all your actions, whether you use the keyboard or the mouse. The only exception is that you have to use the keyboard to position the insertion point in the document window.
When you're finished, click the Stop the Macro Play or Record button (see Figure 3). The Macro feature bar disappears, and you are returned to a normal document window. The actions you took while you created the macro have been performed on the document, so you might or might not want to save those changes.
Playing the Signature Block Macro
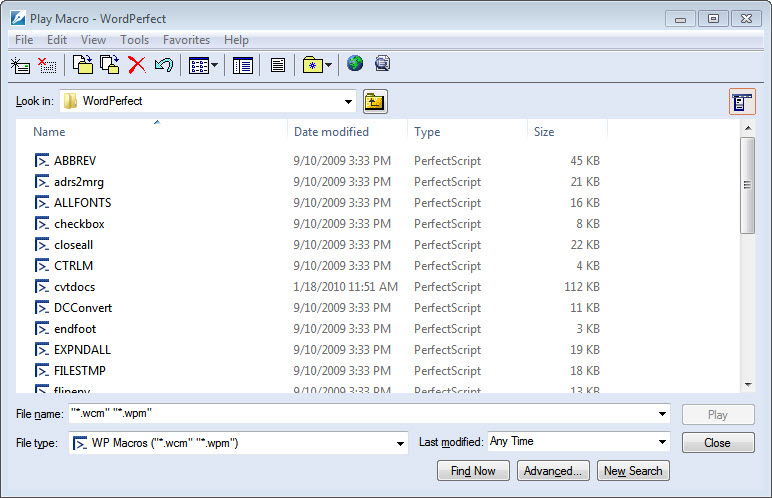
Now, open a blank document or a document that needs the signature block. Choose Tools > Macro > Play (or press Alt+F10) to open the Play Macro dialog box (see Figure 4). Scroll down to the sigblock.wcm file and double-click it. Voila - a signature block appears! Some macros run so quickly that it might seem as though the results appear out of thin air.
Tip: In the Play Macro (or Record Macro) dialog box, you can delete your test macros so they don't clutter up your macro folder. Simply select the file and press Delete.
Editing a Macro
Let's say your phone number changes and you need to update the macro. It's simple – you open a macro file just as you would any other document. If all you want to do is delete an extra line or update an email address, you just open the macro file and make your changes in the document window using the same techniques that you use in documents. Often, it's faster to edit a macro than it is to create it again.
To edit a macro, choose Tools > Macro > Edit. In the Edit Macro dialog box, double-click the signature macro to open it in the document window (see Figure 5). In this case, you want make a change to the phone number.
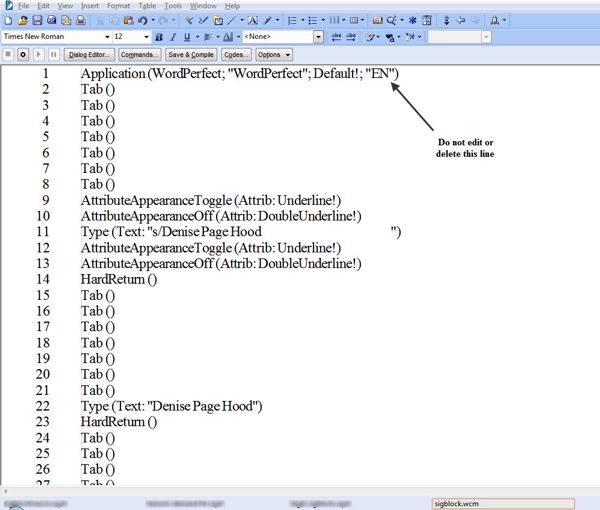
Caution: Take care not to delete the first line. It contains important information for the macro to run correctly.
When revising the text, be sure you don't delete the quote marks on either side of the text. If you accidentally delete one, type it back in. Click in the phone number and make your changes. Click the Save & Compile button (on the Macro feature bar) to save your edits. Click the document Close button to close the macro file. That's it! You just edited a macro.
Playing Other Macros
If someone else has written macros for you to use, all you need to do is play them. Before you play a macro though, be sure that everything is ready. If you are running a macro to add page numbers to a document, for example, you need to open the document first. Likewise, if the macro works on selected text, select the text before you run the macro.
To play a macro, choose Tools > Macro > Play (or press Alt+F10) to open the Play Macro dialog box (refer back to Figure 4). Browse to the correct location. Either double-click it the macro file, or select it and click Play.
Now that you've mastered the steps for creating a signature block macro, you can start thinking about how you might use these steps for other repetitive tasks. Adding your Facebook®, Twitter™ and email address information to your documents, for example. Or perhaps inserting standard copyright information, or generating a closing statement and signature area for legal briefs and pleadings. The possibilities are endless!
Was this article helpful?
Tell us how we can improve it.