A style is a collection of formatting attributes that you can apply to text or graphics. Using styles ensures consistent formatting throughout a document. Whenever you change the formatting in a style, you change the appearance of all text or graphics that use that style. Styles you create are added to the style list and saved with the active document.
To create a text style
1. Click Format > Styles.
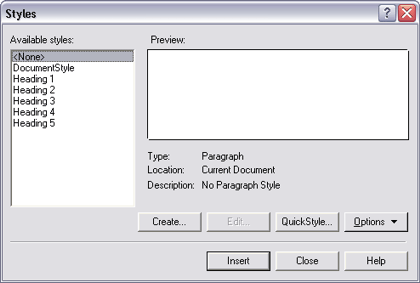
2. Click Create.
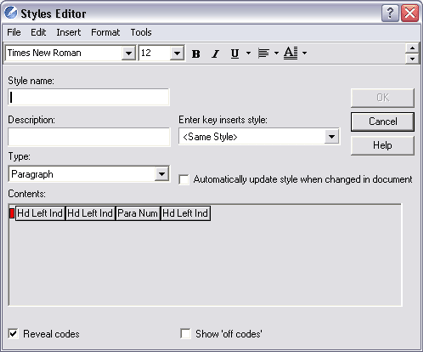
3. In the Styles editor dialog box, type a name for the style in the Style name box.
Style names can contain up to 20 characters. Give each style a unique name; otherwise, when you combine documents that contain styles with the same name, one style is used and the other deleted in the new document.
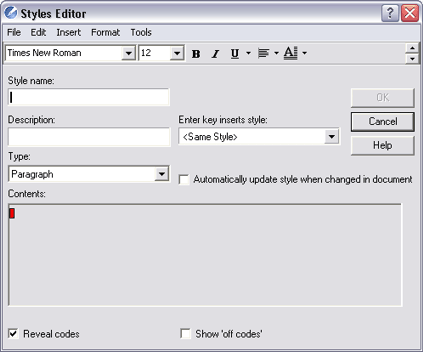
4. Type a description for the style in the Description box.
5. Choose a style from the Type list box.
6. Using the Styles editor toolbar and menu bar, apply any style attributes.

To create a list style
1. Click Insert > Outline/Bullets & numbering.
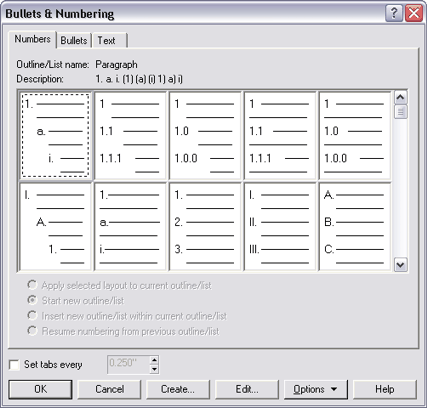
2. Click one of the following tabs:
- Numbers — lets you create styles for numbered lists
- Bullets — lets you create styles for bulleted lists
3. Click Create.
4. In the Create format dialog box, type a name for the style in the List name box.
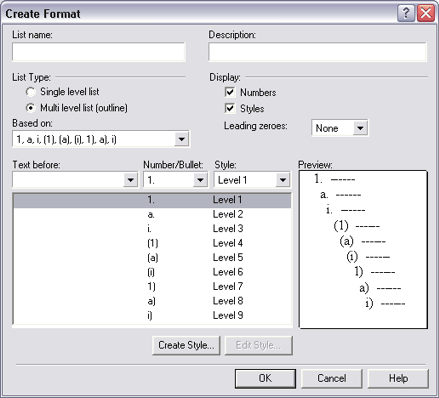
5. Type a description for the style in the Description box.
6. In the List type area, enable one of the following options:
- Single level list — Lets you create a list with only one level
- Multilevel list (outline) — Lets you create a list with multiple levels
7. Choose a style from the Based on list box.
If you want to add text before the list number, type the text in the Text before box.
8. Choose a number or bullet from the Number/Bullet list box, and a level from the Style list box.
9. Click the Create style button to display the Styles Editor.
To create a graphics style
1. Click Format > Graphics styles.
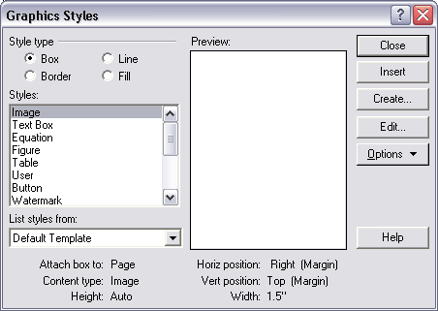
2. Enable one of the following options:
- Box
- Border
- Fill
- Line
3. Click Create.
4. Type a name for the style in the Style name box.
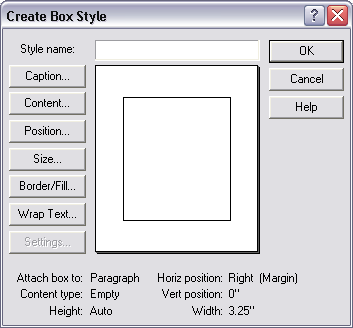
5. Change the attributes of the graphics style.
Was this article helpful?
Tell us how we can improve it.