How to re-establish the communication between WordPerfect and your printer.
This article involves editing the Windows Registry. It is critical to back up the Windows registry before proceeding. Here's how:
- In the Windows Search type "Regedit" or press WIN+R and type "Regedit"
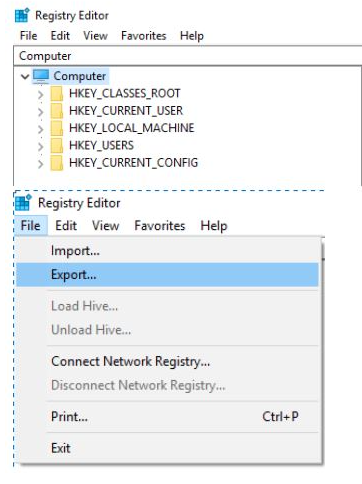
- Locate Computer by scrolling to the very top of the left side of the registry
- Once found, select the registry key in the left pane so that it becomes highlighted.
- From the Registry Editor menu, choose File and then Export. You can also right-click or tap-and-hold the key and then choose Export.
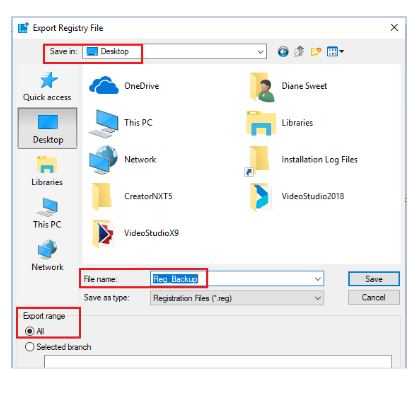
- In the new window that appears, double-check that the Export range selected is set to ALL
- Once you're sure you'll be backing up what you expected, choose a location to save the registry backup file to.
- (We usually recommend choosing the Desktop or the Documents folder)
- In the File name text field, you may want to name it something like Complete Registry Backup / Reg_Backup
- Select Save
- Once complete, a new file with the REG file extension will be created in the location you selected
To re-establish the communications between the printer and WP:
Reset the PrintEngine:
1. Close all applications, including WordPerfect.
2. Click Start, Run. In the Open text box, type: Regedit and click OK.
3. This will bring you into the Windows Registry. Click File, Export (or Registry, Export).
4. In the text box, Save in: select Desktop or My Documents.
5. Towards the bottom where it says File Name, type in the word: Backup.
6. Below to the left, under Export Range, select All and click Save.
The cursor will change to an hour glass and will return to a pointed arrow.
7. Double click the folder HKey_Current_User to expand it.
8. Double click the folder Software to expand it.
9. Double click the folder Corel to expand it.
10. Right‑click the folder PrintEngine and select Rename. Rename it to PrintEngine1.
11. Press the X at the top right corner to close the Windows registry.
Delete the printer drivers:
12. Click Start, Printers & Faxes (or Start, Settings, Control Panel, Printers).
13. Select your printer drivers and delete them. (All of them).
Disable the items in the startup:
14. Click Start, Run.
15. In the box, type: MSCONFIG and press OK.
16. From the System Configuration Utility dialog, select the Startup tab.
17. From the Startup tab, click Disable All, click Apply, click OK.
Shutdown and reboot the computer.
18. Shutdown your computer, wait 10 seconds and restart it. (This way your local printer will reinstall automatically).
19. Close the System Configuration Utility dialog and press the X at the top right corner to close the box.
20. Install your printer driver if Windows did not install your printer.
21. Start WordPerfect and test.
Was this article helpful?
Tell us how we can improve it.