WordPerfect's Top Ten Hidden Gems
A person could work with WordPerfect for many years and still not locate all the nifty shortcuts and time-savers. Not that they are difficult to find, rather that WordPerfect is so crammed with features that they can elude even the most innately curious user. While there are literally hundreds of cool tips and tricks, these top ten hidden gems sparkled their way to the top of the list.
Snowflake
The Snowflake is a button on the right side of the property bar (next to the Speller/Thesaurus box) that has a snowflake and a pound symbol on it. When you click this button, a palette appears with the last 16 special characters that you have used. You can select from this palette for one-click access to your most frequently-used foreign language letters and symbols.
At the bottom of the palette is the More button. Click this button to open the Symbols dialog box (see Figure 1) where you can browse through and select from over 1,500 special characters, symbols and foreign language alphabets in 15 different character sets.
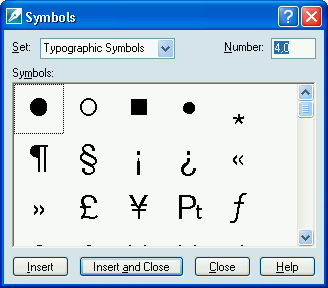
Select from more than 1,500 special characters, symbols and foreign lauguage alphabets in the Symbols dialog box.
QuickFormat
QuickFormat lets you click and drag to copy formatting from one section of text to another. Rather than repeating the same steps to format headings in a document, you can apply the formatting to one heading, then quickly copy it to the other headings. The QuickFormat button is on the toolbar and looks like a paint roller.
Click in the heading that you have already formatted, then click the QuickFormat button. When the QuickFormat dialog box appears (see Figure 2), choose OK to format the headings. The pointer changes to a paint roller. Click and drag across the next heading to format it as the first. With QuickFormat activated (the paint roller pointer), you can click and drag across all of the remaining headings in the document and complete the job in just seconds. When you are finished, click the QuickFormat button again to turn off QuickFormat.
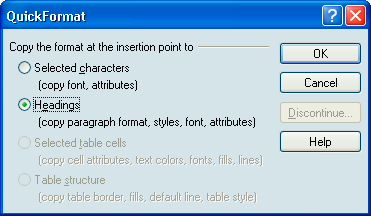
Use QuickFormat to copy formatting and apply it to other text.
The remaining QuickFormat dialog box option is to format text as selected characters. Essentially, this lets you select and format only a portion of a paragraph, instead of the entire paragraph. So, if you just want to italicize certain words in the text, you should select the Selected Characters option in QuickFormat.
Convert Case
Convert Case works especially well when you need to capitalize several lines of text at once. Select the text, then choose Edit > Convert Case > UPPERCASE to capitalize the text (or choose one of the other two options to convert the text to initial cap or lowercase text). This option also comes in handy after you've accidentally typed several paragraphs with the Caps Lock key on.
Make It Fit
For those documents that end up with 3 or 4 lines on a page by themselves, Make It Fit is a two-click fix to squeeze those last few lines onto the previous page. Adjustments are made to the margins, font size, and line spacing, to force the text into the smaller space. You can control which adjustments are made. For example, if you do not want to alter the document margins, you could only allow adjustments to the font size and line spacing.
Choose Format > Make It Fit to display the Make It Fit dialog box (see Figure 3). Enter the desired number of pages, then enable or disable the check boxes to control which adjustments are made. Choose Make It Fit. If you don't like the results, press Ctrl+Z (or choose Edit > Undo) to reverse the process so you can start over.
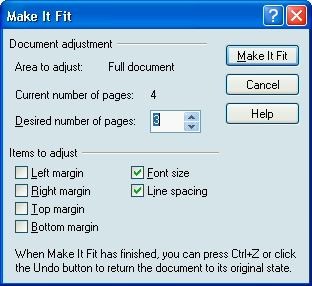
Make It Fit adjusts margins, font size and line spacing to expand or contract text so that it fits within a specific number of pages.
Paste Unformatted
The most common problem with copying and pasting between documents is that formatting codes are inadvertently copied over with the text where they can cause problems and unexpected results. Since the codes are invisible until you turn on Reveal Codes, you probably don't even realize you are inserting extra codes when you paste text from other sources. That is, until the pasted-in codes cause conflicts with the existing codes.
The solution is simply to paste the text in without any formatting, so the text adopts the formatting of the source document. This called Paste Unformatted and appears as a shortcut on the QuickMenu. After you select and copy the text you need, switch to the source document and position the insertion point where you want to paste the text. Right-click, then choose Paste Unformatted Text.
Open As Copy
How often would you say that you create a new document by opening an existing document and making changes to it? And how often do you forget to change the name of the existing document and accidentally save your changes on top of the original? Probably more often that you care to admit. There is a simple way to make sure it doesn't happen again.
Choose File > Open to display the Open File dialog box (see Figure 4). Notice that there are two buttons: Open and Open as copy. If you click Open as copy, instead of Open, the file opens in a read-only mode. This means you will not be able to save changes back to the original name – you'll have to rename the file to save any changes. Open as copy prevents you from accidentally modifying important files.
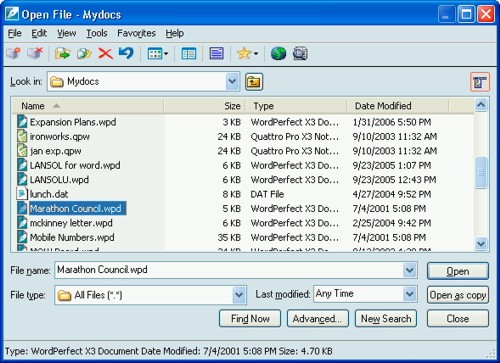
Click the Open as copy button in the Open File dialog box to prevent accidental changes to important documents.
Draw a Picture
Hidden away in the menus is a conduit to a graphics program that you can use to create custom graphics or to modify graphics from other sources. It's called Draw Picture and it can be found on the Insert > Graphics/Pictures menu. When you choose Draw Picture, you create a connection to the Presentations Graphics program in the form of an editing window in WordPerfect (see Figure 5).
The Presentations Graphics editing window has new menus and toolbars that allow you to create and revise graphics.
You'll notice right away that the toolbars and menus are different. This editing window has all the characteristics of the Presentations Graphics application, even though you are technically still working in WordPerfect. This tighly-integrated drawing program is available to Quattro Pro as well. Naturally, it can also be used in Presentations. For help getting started, press F1 to get access to the Presentations Graphics help topics.
Change Settings
It's fairly common these days for software developers to group the customization settings under Tools > Settings. What isn't necessarily common is the depth and breadth of the customization options that are found in WordPerfect. From the simplest settings like displaying paragraph symbols and the vertical scroll bar to creating custom menus, keyboards, and toolbars, virtually anything you can think of (and a few things that you haven't thought of yet) can be done in Settings.
Choose Tools > Settings to display the Settings dialog box (see Figure 6). Click one of the seven available categories to view options for that category. For example, if you want to change the location where your WordPerfect files are stored, click the Files category. To display symbols and otherwise customize the way the WordPerfect editing window appears, click the Display category. If you would like to customize your menus, toolbars and/or keyboards, click the Customize category.
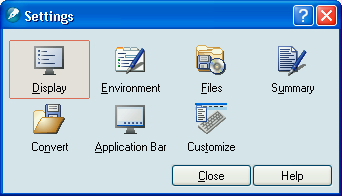
The Settings dialog box has seven categories of options for customizing virtually every aspect of the program.
Route a Document
Let's say you are collaborating on a project and you need to send a draft document to multiple reviewers. You could send it to the first reviewer, wait for them to send it back, review their comments, send it on to the second reviewer, wait for them to send it back, review their comments, send it to the third reviewer and so on. Or, you could simply let WordPerfect create a routing slip that automatically sends the file to each reviewer in turn.
Here is how it works. You create the list of reviewers in the order that you want them to review the file. Reviewers can be selected from the WordPerfect address books (including the WordPerfect Mail address book) or from the Microsoft Outlook address book. Choose File > Document > Routing Slip to display the Routing Slip dialog box (see Figure 7). Type a subject and a brief message to convey your instructions, then build the list of recipients.
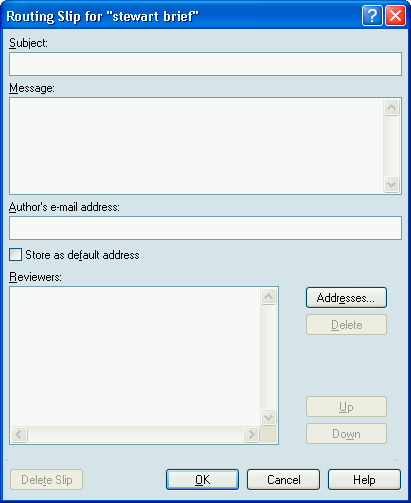
You can type a set of instructions and create a list of reviewers in the Routing Slip dialog box.
Once the routing slip for the document is created, the document is emailed (as an attachment) to the first reviewer in the list. The reviewer opens the attachment, types their name and selects a user color for their revisions and/or comments. Once they are finished with their review, they close the file. The document is then routed to the next person on the list. Each reviewer can see the names and colors of the other reviewers so everyone knows who made what changes. A reviewer is able to edit additions made by other reviewers, but they will not be able to edit or undo previous deletions. When the document has been reviewed by everyone on the routing slip, it is sent back to you.
Note: If you are working on a document with someone who uses Microsoft Word, you can save the file in DOC format and route that version around. WordPerfect and Word users can colloborate on a project seamlessly.
Speller/Thesaurus Box
There is a mysterious little box on the right end of the property bar. If you hover over the box, you'll see a bubble appear identifying it as the "Prompt-As-You-Go" box. Maybe they should have called it "Fix Mistakes Real Quick" box because that better describes what it does. As you work the insertion point moves around in the document. When the insertion point rests on a misspelled word, the box displays a suggested replacement word in red. If you click on the down arrow next to the box, alternate spellings are shown. This same list is presented when you right-click a misspelled word (shown with red slashes underneath).
Correctly spelled words appear in black in the box. When a word is displayed here, you can click the down arrow next to the box to display a list of alternate phrases as suggested by the Thesaurus. If you are using a word repetitively, click on the word, open the list and see if one of the other phrases will work instead.
</center></center>
Was this article helpful?
Tell us how we can improve it.