The first step to produce pleading documents is to set up the cases. New cases can be created from scratch, or you can create new cases based on existing cases. The case information is easily updated when it changes, so go ahead and get started with your cases by running the Pleading Expert Filler.
To create a new case with the Pleading Expert Filler:
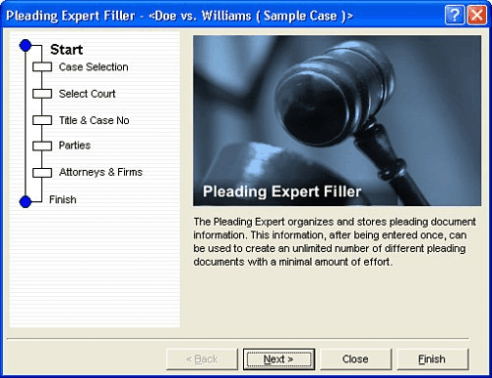
1. Choose Tools, Legal Tools, Pleading Expert Filler, or click the Pleading Expert Filler button on the Legal toolbar. The Pleading Expert Filler appears.
2. Choose Next to move to the Case Selection section.
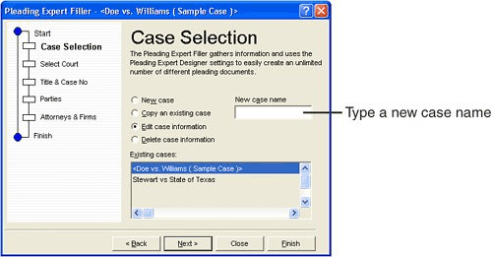
3. Enable the New Case option and type a name for the case in the New Case Name text box.
4. Choose Next to move to the Select Court section.
5. Select the pleading style that you want to use and type the judge's information.
6. Choose Next to move to the Title & Case No. section.
7. Enter the relevant information here, and then choose Next to move to the Parties section.
8. Select which parties are involved and enter the name(s) of the parties.
9. Choose Next to move to the Attorneys & Firms section.
10. Enter the contact information for the attorney(s).
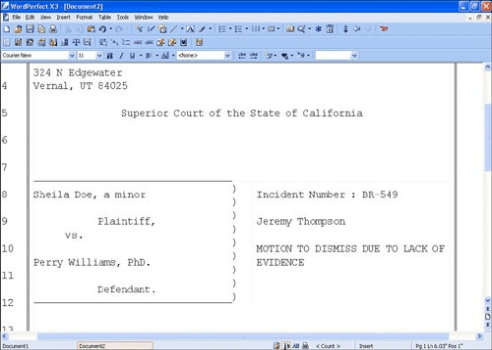
11.Choose Next, and then Finish. WordPerfect generates the pleading document.
When you need to edit a case, you do so through the Pleading Expert Filler. Keep in mind that you can create new cases based on existing cases. You will save yourself some time entering them contact information.
To edit an existing case with the Pleading Expert Filler
1. Choose Tools, Legal Tools, Pleading Expert Filler, or click the Pleading Expert Filler button on the Legal toolbar. The Pleading Expert Filler appears.
2. Choose Next, and then select the case you want to edit from the Existing Cases list.
3. Choose Next to start working through the different sections, making your changes as necessary.
All the steps necessary to complete a pleading are listed on the left side of the Pleading Expert Filler. You can click any of the items in the list to jump to that particular section.
Creating and Editing Pleading Styles
The preceding steps illustrate the creation of a pleading document using one of the two built-in styles. Specifically, Style 1 was used, with some modifications, to create the document. You can create your own pleading styles and select them from the list.
Creating your own custom pleading styles is a key piece of the puzzle, and it has been completely automated to save you time. The Pleading Expert Designer walks you through the entire process.
To create a new pleading style with the Pleading Expert Designer
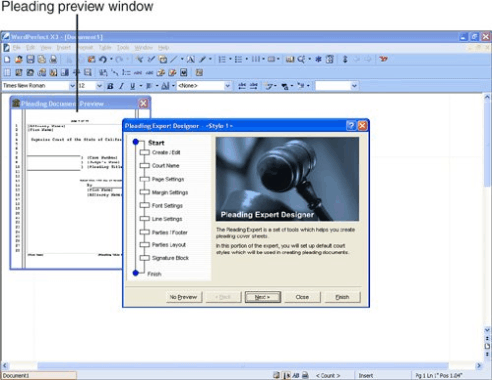
1. Choose Tools, Legal Tools, Pleading Expert Designer, or click the Pleading Expert Designer button on the Legal toolbar. The Pleading Expert Designer appears.
2.Choose Next to move to the Create/Edit Pleading section.
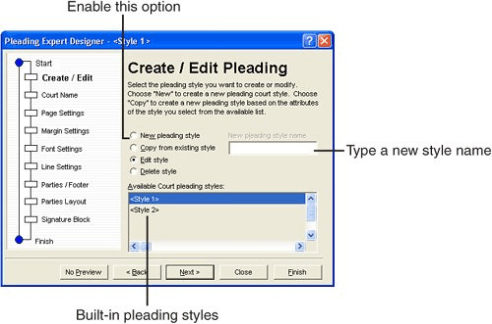
3. Enable the New Pleading Style option button, and then type a name for the style in the New Pleading Style Name text box.
4. Choose Next to move to the Court Name section.
5. Follow the prompts in the Pleading Expert Designer to complete the pleading style. Notice that as you work, the preview window is updated to show you how your pleading documents will look.
The new pleading styles that you create with the Pleading Expert Designer show up in the Select Court section of the Pleading Expert Filler so that you can select them when you create or edit cases.
Was this article helpful?
Tell us how we can improve it.