Creating eBooks
Anyone – from your daughter to your grandmother – can write a book and share it with others or sell it.
Sounds simple, doesn't it? It is and WordPerfect X7 is here to help you create an eBook file to share, post or sell.
To publish and preview your book, you will need WordPerfect X7 and a Previewer. WordPerfect X7 will help you install one or both previewers the first time you publish. That way you can "look" at how your file will appear to someone reading your eBook.
You can create an eBook by opening the WordPerfect eBook Publisher template and writing and formatting the eBook directly in WordPerfect. You can also base an eBook on an existing document by copying and pasting its content into the template.
Your eBook must have at least one chapter. Each chapter has two components: heading and content, which can be text or images. Adding a chapter forces a page break.
When you are ready to insert an image, click in the document window where you want the image to appear, then click the Insert Image button on the eBook Publisher toolbar. When the Insert Image dialog box appears, browse to the folder that contains your image files. Double-click the image file that you want to insert in the document.
WordPerfect places sizing handles around the inserted image so you can resize it if necessary.
You can add front matter, such as a title page, copyright, or dedication. Front matter appears before the chapters in your eBook. You can also proofread your work in the eBook Publisher template.
You can add metadata to your eBook. Metadata — or publishing information — in eBooks is the same as bibliographic data in traditional books. Metadata can help eBook retailers and librarians better catalog your eBook and make your eBook more discoverable in online searches. Most metadata fields are optional, but you must give your eBook a title. You can also add a cover to your eBook.
When you are ready to preview your book, select "Publish to eBook" in the eBook toolbar. Once you have a previewer installed, you can review your eBook progress at any time. To review your eBook on your device, use a USB cable to transfer the file to the eReader or device.
Step-by-step for each task follows:
- To create an eBook
- To add text from another file
- eBook Publisher Template Toolbar
- To proofread an eBook
- To add a chapter
- To insert an image in an eBook
- To publish to an eBook format
- Completing the Publishing Information
- eBook Readers
To create an eBook
- Click File / New from project
- Click the Create New tab
- Choose [WordPerfect WordPerfect] from the list box
a. If [WordPerfect WordPerfect] is not displayed in the list box, click Options, and click Refresh projects - Choose eBook Publisher from the list
- Click Create
a. Click Enable macros
b. If you do not want to show this warning again, enable the 'Do not show this message again' check box - Click Start
- In the New chapter dialog box, type a chapter heading
You can now start writing the eBook. You can also copy text from an existing file. For more information on transferring your eBook to WordPerfect's eBook template, see 'To add text from another file', below.
To add text from another file
- Click the Open button on the eBook template toolbar.
- Choose the file containing the text you want to copy, choose the file, and click Open.
- Select the text, and click Edit / Copy
- In the eBook Publisher template, position the cursor where you want to insert the text.
- Click the Paste / button (or use Paste Unformatted Text, Alt+Ctrl+V to paste without extra formatting) on the template toolbar.
Note:
- The default font in the eBook Publisher template is Georgia, but can be changed
- Using Paste on the eBook Toolbar or Paste Unformatted text ensures your paste is clean of unwanted formatting
- Footnotes that you copy into the eBook Publisher template appear as endnotes in the eBook. The endnote reference number and the corresponding information in the endnote are linked to one another. You can also add endnotes to your eBook
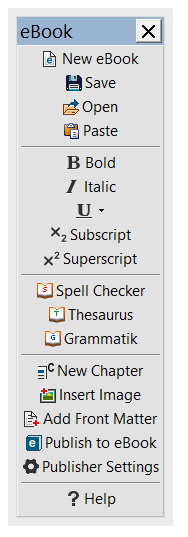
eBook Publisher Template Toolbar
Tip: You can start a new eBook in the eBook Publisher template by clicking the New eBook button on the template toolbar
To proofread an eBook
- On the template toolbar, click one of the following buttons:
- Spell checker button — checks and corrects spelling
- Grammatik button — checks and corrects grammar and spelling
To add a chapter
- Position the cursor where you want to insert the chapter.
- Click the New chapter button on the template toolbar.
- In the New chapter dialog box, type a chapter heading.
To insert an image in an eBook
- Click the Insert image button on the template toolbar.
- Choose the drive and folder where the image is stored, choose the file, and click Open.
You can use JPG, BMP, GIF, PNG, or TIFF files.
To add front matter
- Click the Add front matter button on the eBook template toolbar
- Enable any of the following check boxes for the components you want to add:
Title page — the first page after the cover
Copyright — details on content copyright or other legal matters
Dedication — warm words for your sources of inspiration - Click OK, and then click within any inserted component to proceed with its content.
To publish to an eBook format
- Click the Publish to eBook button on the eBook template toolbar
- In the eBook formats dialog box, enable any of the following check boxes:
MOBI
EPUB - Click Next.
Completing the Publishing Information
See the Quick Reference Card for more information on metadata in your eBook file
- In the Publishing information dialog box, type the eBook title in the Title box
a. For best results, capitalize every word in the title and subtitle except articles, conjunctions, or prepositions unless they are the first or last word in the title - If you want to add non-mandatory metadata, type in the following boxes:
a. Author
b. Publisher
c. Subject
d. Unique ID — If you want to sell your eBook through an online vendor, it must have a unique identifier. Although there are several common identifiers for eBooks you could use, International Standard Book Number (ISBN) is recommended. For more information about obtaining an ISBN for your eBook, see www.isbn-international.org. If you don’t choose a unique identifier, WordPerfect automatically assigns one based on the date and time of publishing
e. Publish date
f. Description
g. Choose a language code that from the Language list box.
h. The language code embedded in your eBook helps optimize reading devices for the eBook language
i. To add a cover, click the plus sign (+) next to the Cover image box, choose the drive and folder where the image is stored, choose the file, and click Open. You can use JPG, BMP, GIF, PNG, or TIFF files. The cover image will appear as the first page in your eBook. For best results, choose an image 600 pixels wide by 800 pixels high. - Choose the point in your eBook that displays on opening from the Book starts at list box:
a. First chapter
b. Tables of contents
c. Title page - Click Publish
Note:
-
MOBI: When you first publish to MOBI, or when you click the Publisher settings button on the eBook publisher toolbar, the Publisher settings dialog box prompts you to specify the installed location of two supporting files, kindlegen.exe and KindlePreviewer.exe. These files are required to publish your document to the MOBI file format. You can download the files by clicking Auto download or Go to download site
- EPUB: When you would like to preview EPUB eBooks, use one of the viewers below.
eBook Readers
EPUB | MOBI | |
iPad | use Apple iBooks | |
Android Tablet or Phone | Aldiko Book Reader and many others (~300) | |
PC or Windows | Calibre, Adobe Digital Editions & many others | Calibre |
Mac | Apple iBooks or Adobe Digital Editions | |
Kindle | Appears in the Kindle Library | |
Kobo, Nook, Pocket Book, Hudl, Sony | Appears in your device library |
Quick Reference Card on Publishing Metadata: http://www.wordperfect.com/static/landing_pages/16900020/WP_4.pdf
Limitations: eBook is not included in Home & Student Editions
Was this article helpful?
Tell us how we can improve it.