
Explanation
In some instances, Corel® VideoStudio will experience a problem with playing back a particular file, or project. Or even in some cases converting the project to a video file or to DVD. Certain circumstances may require the user to either:
However, when neither one of those options will solve Corel® VideoStudio Pro from crashing, then it may be attributed to the media that it is trying to read or convert. If this may be the case, it will be necessary to look for certain symptoms of these broken or corrupted media files.
Symptoms
The obvious symptom of this issue would be Corel® VideoStudio Pro freezing and eventually crashing. At the moment this happens, a log file will be created within the Windows® error reporting in the Event Viewer. For information about the Windows Event Viewer, please clickhere. Any and all application error messages will appear in the Windows Logs folder in the left pane of the Event Viewer.
- Expand the Windows Logs folder ▸ Click Applications
The middle pane will open up with a listing, or log, of multiple actions or incidents that were created by various programs or applications within Windows®. Although most logs will show up asInformation, the main items to concentrate on are the Errors that are listed. An Error will appear on the left side of the middle pane under the Level heading, which will be proceeded by a'red circle outlining a white exclamation mark. In the case of Corel® VideoStudio, theSource' category will list either an Application Error or Application Hang. To view the information about the error message, double click on the error message and the details will appear in the middle pane under the General tab. Some of the common errors that will display regarding these types of crashes are:
- Faulting application name: vstudio.exe; Faulting module name: msvcr90.dll
- Faulting application name: vstudio.exe; Faulting module name: ntdll.dll
Solution
Videos
While there is no clear cut solution for these faulty module names (as there have been many solutions for many different programs and many different scenarios), the following steps have been proven to work on various occasions within Corel® VideoStudio Pro. The tool that is most commonly used to view and fix fragmented or damaged frames is the Multi-trim Tool. The Multi-trim tool will allow the user to view a video clip frame by frame during the editing process. If there is a possibility that a video clip has a damaged frame, the Multi-trim Tool will detect it and allow the user to eliminate it by trimming around the damaged frame. To view an example on how to use the Multi-trim Tool, please click on the following link:
Corel® VideoStudio Pro Multi-trim Tool
A damaged Video clip will display some of these possible characteristics:
- A frame will look completely white or has a greyish haze to it.
- A frame (or half of a frame) will look orange in color.
Photos
A damaged photo will not display the same characteristics as a damaged frame in a video. The Multi-trim Tool cannot be used on an image. However, to determine if the the probable cause of the crash is an image, would require a lot of trial and error. It would be necessary to create several file renders to find out where VideoStudio is crashing. Luckily, during the rendering process it is possible to see the video render in "real-time" by selecting the Previewbutton as shown in the image below:
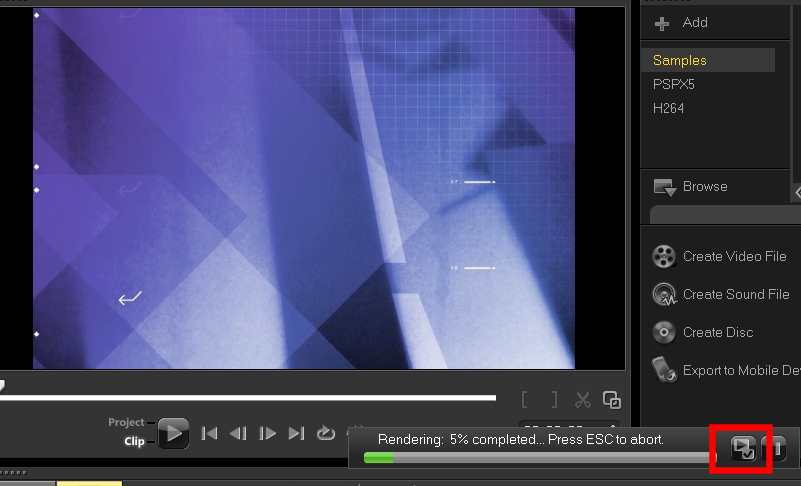
After depressing the Preview button, the video project will play itself as it is rendering in real time. Once VideoStudio freezes on a particular clip, then that would be the piece of media that would be subject to either removalor replacement. The easiest fix for this type of problem would be to delete the image or photograph from the project. However, if deleting the image is not a viable option, then to replace it would require access to photo editing software.
Photo editing software such as Corel PaintShop Pro will allow for the replacing of image files by converting them into a different file type. It would be recommended that if it is a single clip that is causing an issue, and that clip happens to be a .jpgor JPEG, then converting it to a .png(Portable Network Graphic) would be a more suitable replacement. After converting the image file, replace the image in the timeline by following these steps:
- Locate the Image clip in the timeline
- Right click on the Image clip
- Select Replace Clip...
- Select Photo
- Using the Replace/Relink clip box, browse for the replacement image
- Once located, left click on the image to select it
- Click on the Open button
If the photo editing software that is being utilized as the ability to process a group or a batch of image, it would be best to use that tool if it is felt that more than one image could be damaged or degraded.
Was this article helpful?
Tell us how we can improve it.