


In this tutorial we will teach you the basics of importing and capturing video files using VideoStudio Pro.
What You Will Learn
- How to import video files into VideoStudio
- How to capture footage from Digital Video cassettes.
How to Import Video Files
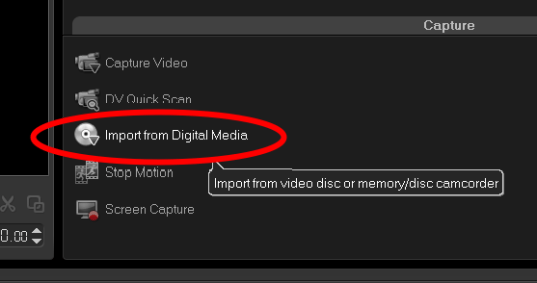
1.Go to Capture and click Import from Digital Media.
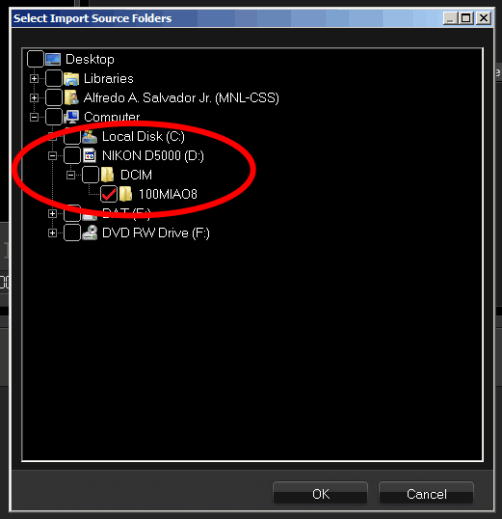
2.Next, browse for the folder that contains your video files and click OK.
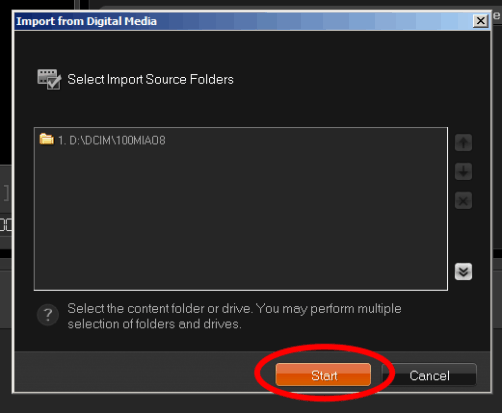
3.Click Start to launch the Import from Digital Media dialog box.
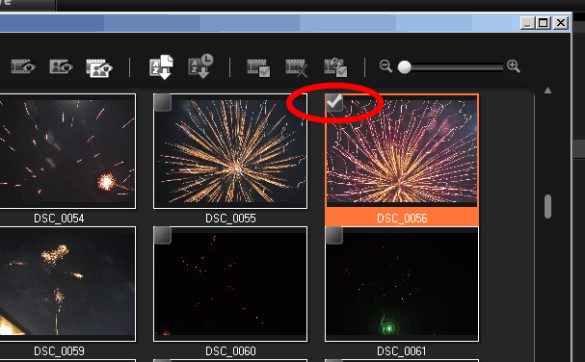
4.Then choose the media files that you want to import by checking the small square on the upper-left corner of a thumbnail.
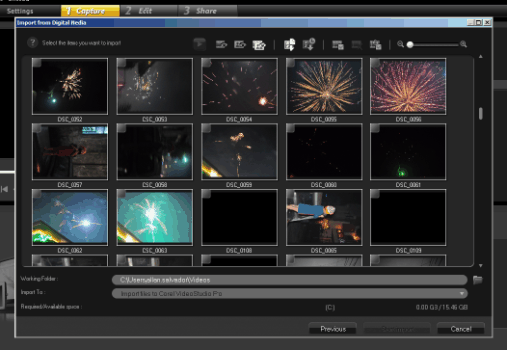
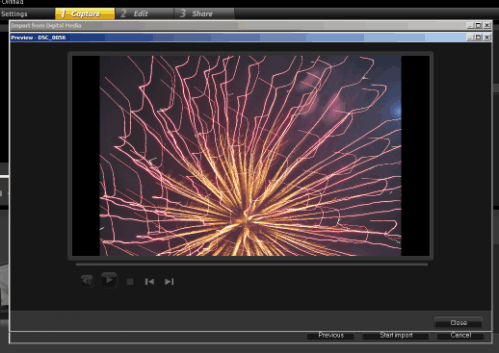
5.You can click on the Preview clip button to preview the clip before importing it to your computer.
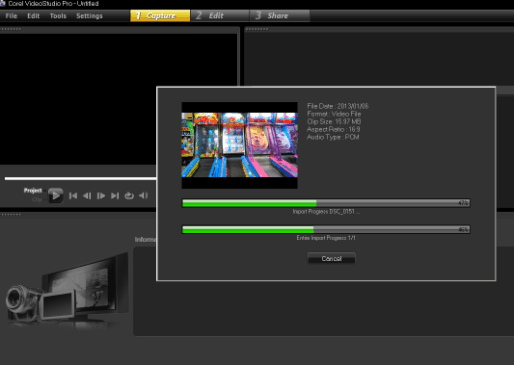
6.After you have selected the clips that you want to work with, click Start Import to bring in the selected clips.
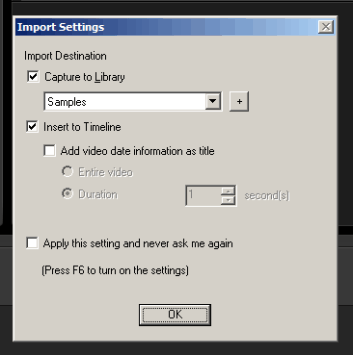
7.Now you can access the imported clips in the library if you check the Capture to Library box in the Import Settings dialog box. The clips will also be inserted onto the Timeline when you check the Insert to Timeline box. Click on OK when done.
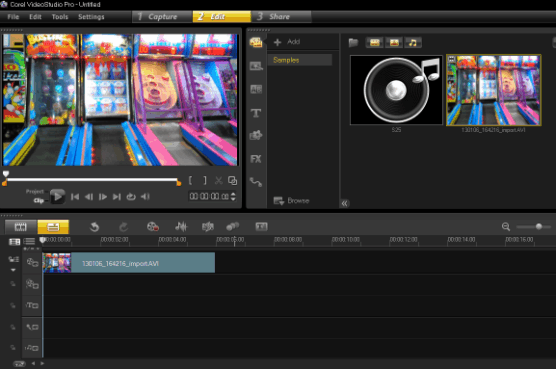
8.Go to the Edit tab to see the imported media on the Timeline.
How to Capture Files
If you have some old family videos on pocket-sized Mini DV Tapes, you can use the Capturing process in VideoStudio to get that footage onto your computer.
1.To capture footage recorded from a DV or HDV camcorder, make sure that it is connected to a computer with an installed capture card or built-in FireWire port through a high-speed transfer FireWire (IEEE 1394) cable. In this video tutorial, I will be using a DV camcorder.
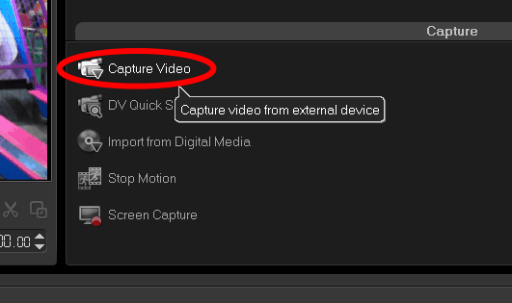
2.Next, go to the Capture tab and select Capture Video. Corel VideoStudio Pro will automatically detect and select the DV camcorder connected to the computer.
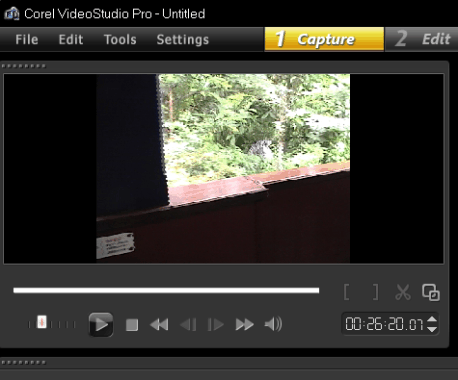
3.In the Options Panel, select DV from the Format list (this is the native format of Digital Video).

4.At this point, you can use the Navigation Panel to scan your footage and locate the scenes you want to capture.
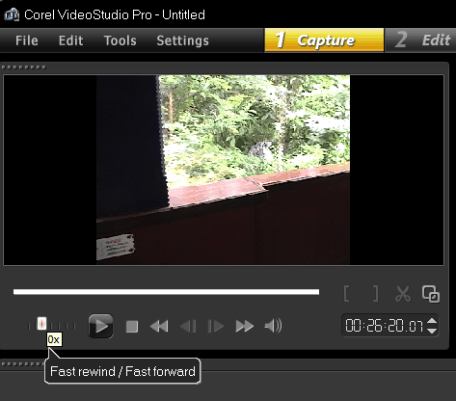
5.Drag the Shuttle Slider to move forward and backwards through the footage.
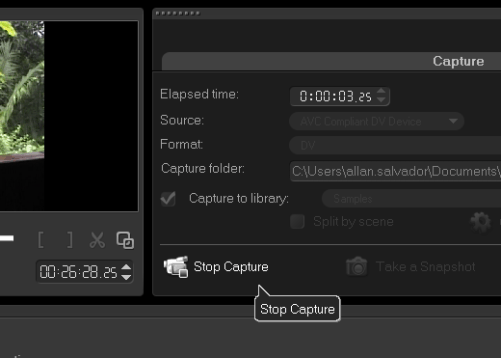
6.Click the Capture Video to start the capturing.

7.Click the Stop Capture button to end the capturing. The captured video will be stored in the capture folder set in the Options Panel and can be accessed from the Library.
And that's how you import and capture video footage in Corel VideoStudio Pro. Thank you for watching.
If you have enjoyed this tutorial, be sure to check out the other tutorials that are available in the Discovery Center. If you have any ideas for tutorials or projects that you would like to see in the future, please leave us some Feedback.
Was this article helpful?
Tell us how we can improve it.