


Create animated videos by stitching together individual still images captured from webcams or camcorders using Stop Motion Animation in Corel VideoStudio Pro. This animation technique is widely used in television and in Hollywood films. You can create your own animation in three easy steps in the comforts of your home!
What you will learn
In this video tutorial, you will learn:
- How to launch Stop Motion in VideoStudio
- How to setup your project for Stop Motion
- How to capture frame-by-frame using Stop Motion
- How to import your Stop Motion project in the Timeline Editor for further editing
- How to import Image Sequence shot from a DSLR camera
3 basic steps
To prepare for a Stop Motion frame sequence, you will need to:
- Attach a webcam to your computer
- Capture the small changes to the scene you are shooting (this will create the illusion of motion from frame to frame)
- Export your Stop motion animation project into a video format
Setting up the camera
Before you begin, make sure that you have a webcam attached to your computer; then set it to live capture mode once you access the Stop Motion window.
- Point your camera to the object that you would like to animate.
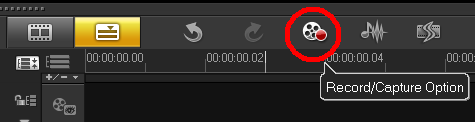
- In the toolbar above the Timeline panel of the VideoStudio Editor, click on the Record/Capture Option button to launch the Stop Motion window.
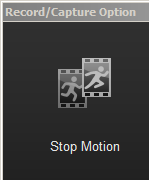
- Now, select Stop Motion to create an animation.
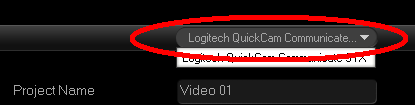
- Wait until your webcam appears in the drop-down menu list of capture devices. Once your capture device has been detected, you will see the live feed on the Preview window.
Setting up the Animation
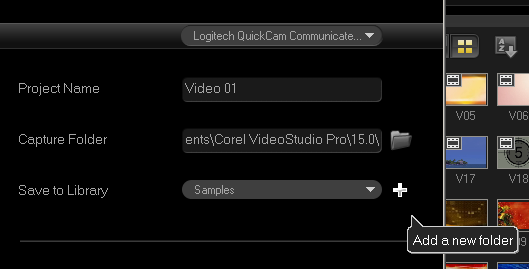
The Stop Motion Settings are right beside the Preview window.The first section of the settings lets you enter the Project name of your animation and specify the Capture Folder with the destination folder where the captured images will be stored. It also saves your Stop motion animation project in the Library panel of VideoStudio once you click on the Save button. Just select a folder from the drop-down menu in the Save to Library field where you want your project to be stored. You can also create a new library folder when you click on the Add a new folder button.
The second section of the settings pertains to the Preview. Choose the speed that you want to apply to your animation in the Image Duration field. There are several choices: 1 frame, 2, frames, 3 frames, and so on. Just remember, the higher the number of frames you select, the longer the exposure time will apply to each captured image. Select the default value which is 5 frames.

Select the highest screen capture quality in the Capture Resolution; however, the available options can vary according to the capabilities of your capture device. The webcam that I am using in this tutorial supports up to 640x480 pixel resolution.

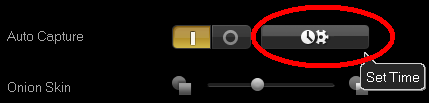
Let the program capture automatically by enabling the Auto Capture. To do this:
- Click on the Enable Auto Capture button;
- Click on the Set Time button;
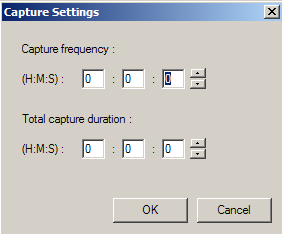
- In the Capture Settings window, set the time for Capture Frequency and Total Capture Duration;
- Capture Frequency instructs the program to automatically capture a frame at a given period of time,
- While Capture Duration limits the time of automated capturing.
- Click on OK when done.
But for this example, manually capture the frames by disabling this option.
Grab the Onion Skin slider from left to right to control the opacity of the next live image and the captured image. Onion Skin will allow us to see the direction of the animation as we capture it.

Capturing your first Animation
At this point, you are at the first stage of creating an animation. To create an animation, you will need to move an object slowly and capture every move over a period of time; then, when you play it back, it will make the object appear to be moving on its own. Isn't that exciting">I will be selecting the images that I edited in Corel PaintShop Pro X5.
To get the best results, I highly recommend that you use a tripod when you shoot photos and videos for stop motion animation.
Click on Open and your images are automatically included in the project.
Click on Save and Exit to go back to the Timeline window.
Here's my animation that I just imported from the Stop Motion window. I'm going to select the play button to preview the animation. And thats how easy it is to create stop motion animation using Corel VideoStudio Pro.
If you have enjoyed this tutorial, be sure to check out the other tutorials that are available in the Discovery Center. If you have any ideas for tutorials or projects that you would like to see in the future, please leave us some Feedback.
Was this article helpful?
Tell us how we can improve it.