


What you will learn:
• Adjusting project settings
• Gathering content for the slideshow
• Customizing transition effects
• Exporting the project as a DVD slideshow
Adjusting settings
Before starting the project, change a few default settings.
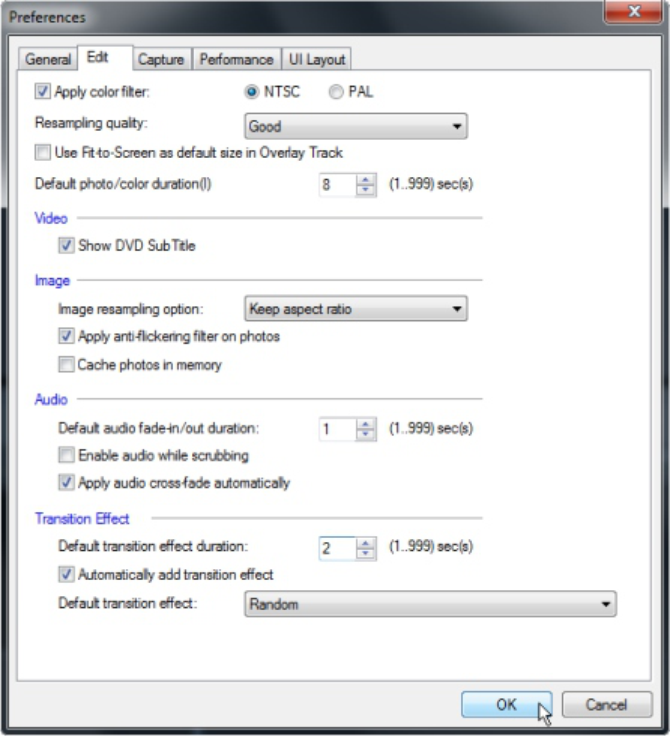
1. Click Settings menu > Preferences.
2. Click the Edit tab.
3. Set the Default photo/color duration control to 8. The default duration is 3 seconds, but for this tutorial, the duration of each image is 8 seconds.
4. Set the Default transition effect duration control to 2.
5. Check the Automatically add transition effect option box.
6. Click on OK to apply the changes.
Gathering content
Now, add the slideshow content.
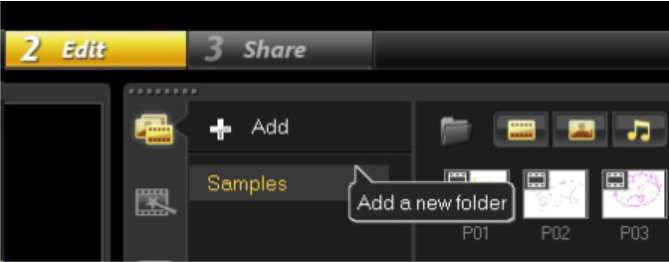
1. Click the Show Library Panel Navigation button .
2. Click the Add a new folder button, and name the folder Slideshow.
3. Click the Import Media Files button.
The Browse media files dialog box appears.
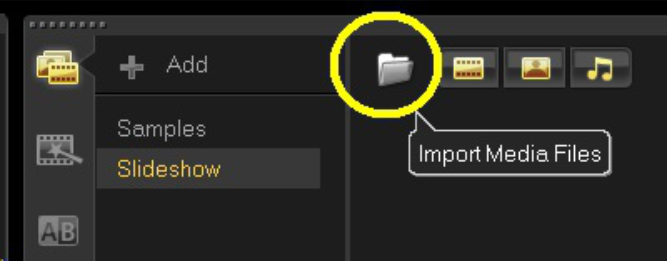
4. Select images to include in the slideshow, and click OK. Thumbnails of the images appear in the Slideshow folder.
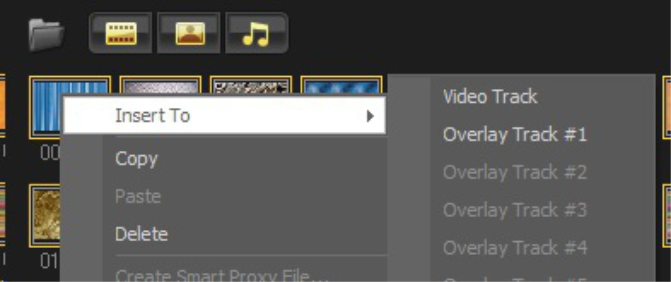
5. Position your cursor over a thumbnail, right-click, and choose Insert To Video Track.
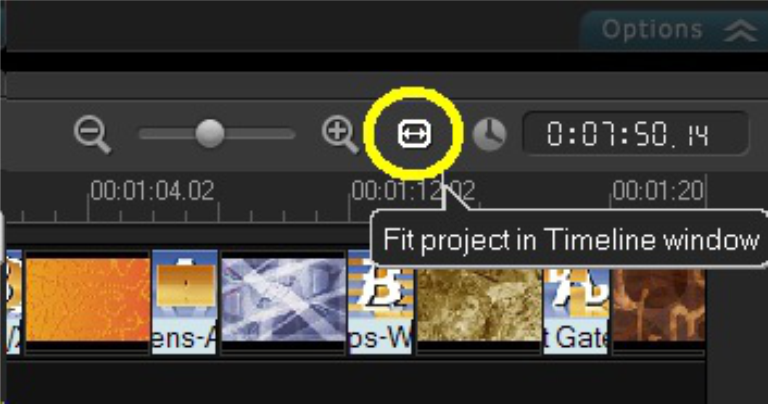
6. On the Toolbar, click the Fit project in Timeline window button. Corel VideoStudio Pro X5 applies the set clip duration and randomized transition effects to the images.
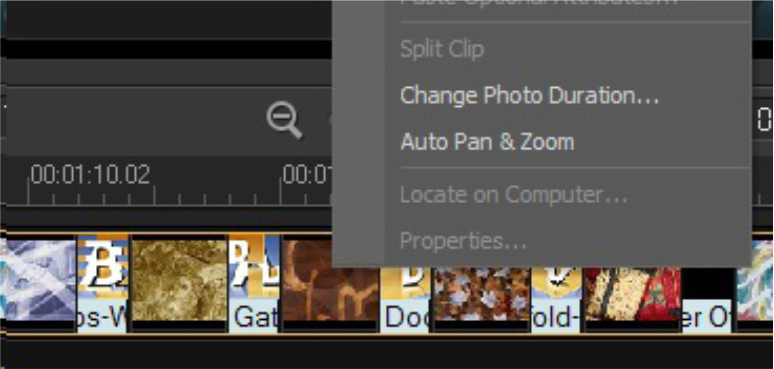
7. Click the Video Track, press Ctrl key + A to select all the images.
8. Right-click any image in the Video Track, and choose Auto Pan & Zoom. Corel VideoStudio Pro X5 applies randomized pan and zoom effects to the images.
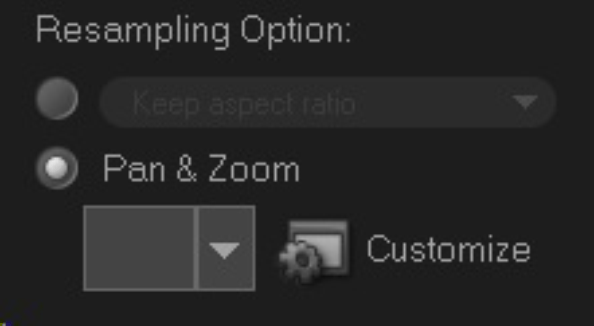
Customizing the applied effects
1. Right-click any image in the Video Track, and choose Open Options Panel.
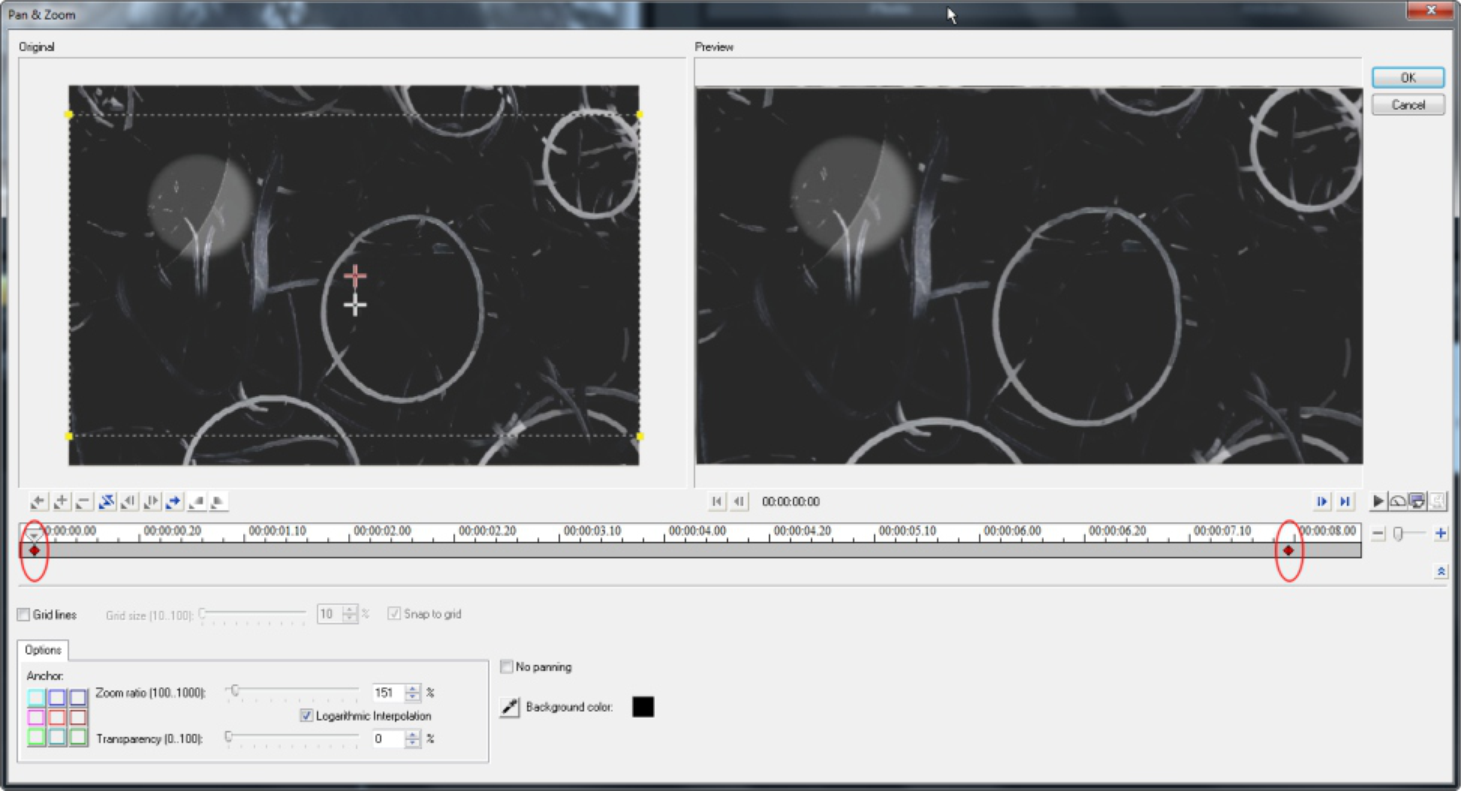
2. In the Options panel, click Customize. The Pan & Zoom dialog box appears.
3. Adjust the starting and ending key frames to customize the Pan & Zoom effect.
4. Click OK.
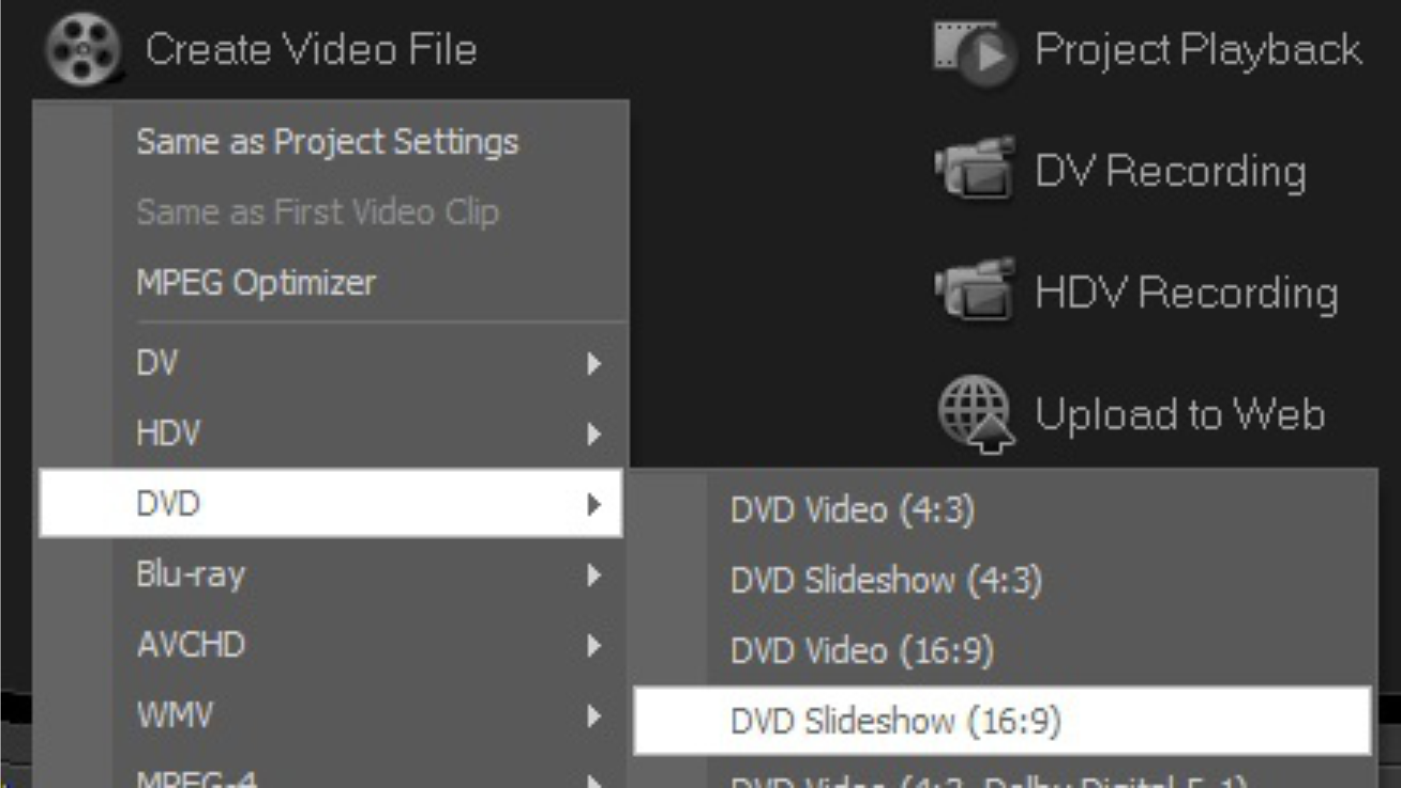
Exporting the project as a DVD slideshow
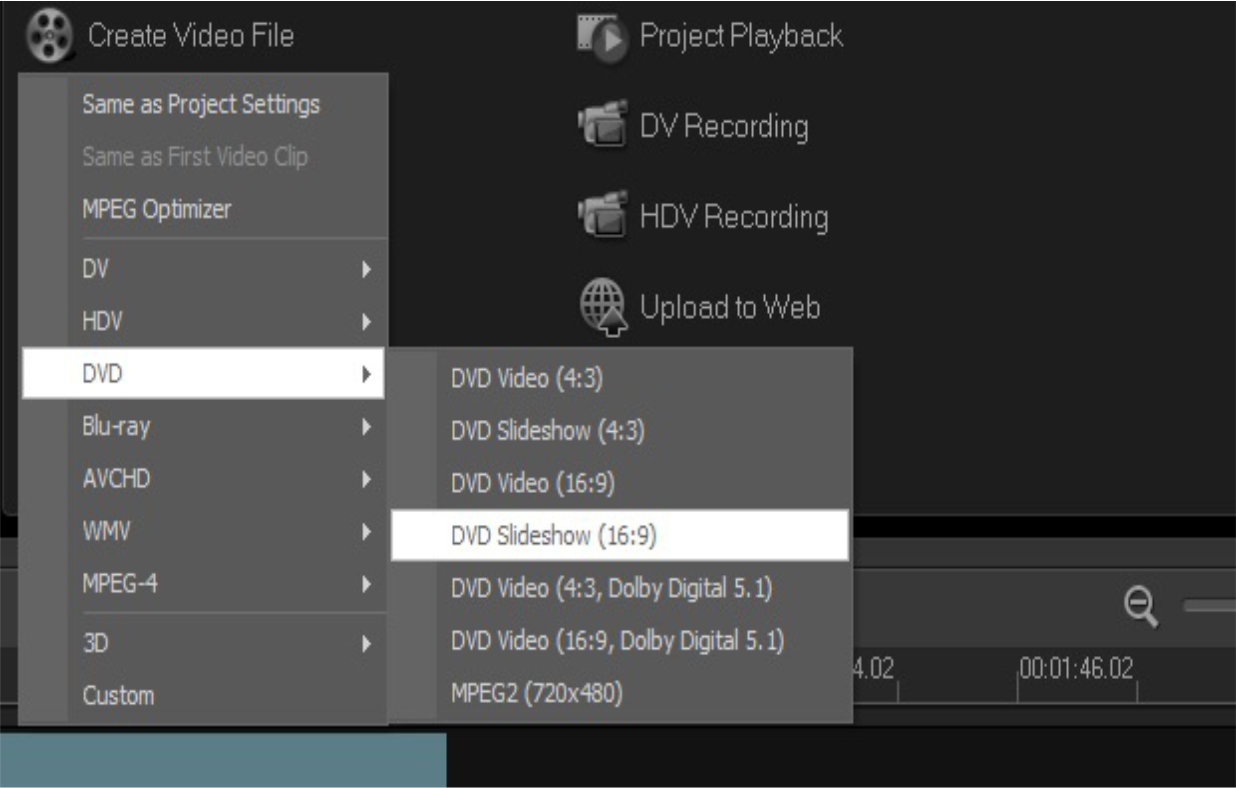
1. Click the Share tab to open the Share step panel.
2. Click Create Video File, and choose DVD Slideshow (4:3) or DVD Slideshow (4:3).
3. In the Create Video File dialog box, name the slideshow, and click Save.
If you have enjoyed this tutorial, be sure to check out the other tutorials that are available in the Discovery Center. If you have any ideas for tutorials or projects that you would like to see in the future, please leave us some Feedback.
Was this article helpful?
Tell us how we can improve it.