


Mesmerize your audience by adding some drama to your movie using the Time-lapse effect in Corel VideoStudio Pro. This technique makes your video project appear to move much faster than it was originally shot. You may use either a regular photo camera or a video camera in order to create a Time-lapse effect.
What You Will Learn:
In this video tutorial, you will learn how to:
· Shoot Time-lapse photography with a digital camera
· Process a series of photographs in Corel VideoStudio
· Render a Time-lapse project into a video format
Shooting for Time-lapse
Start by preparing the basic necessities in creating a Time-lapse such as:
· Digital camera
· A rock solid platform or tripod--to make your shooting as stable as possible;
· Memory card--to store the photos that your camera will be producing; remember that the shooting might take several minutes, hours, or even days. Your camera will try to fit hundreds or thousands of photos on your memory card so I recommend that you use a larger capacity most especially if you are planning to shoot in full RAW. Otherwise, shoot in JPEG format. RAW format shoots with the highest resolution that your camera can allow but it also produces bigger file sizes.
· And finally, fully charge your battery--so it can shoot for hours to get the result you want.
Now that you are ready to shoot, take a series of photos of an object or event over a long period of time at intermittent intervals. Some digital cameras have built-in Time-lapse shutter ability where you can set how often a picture is taken, how long the shutter stays open, and how many photos you want to take.
Importing the Photo Sequence
Next, compile your photos taken in succession in Corel VideoStudio Pro and then apply the Time-lapse effect.
1. To apply the Time-lapse effect on your photos, import them by right-clicking anywhere on the Timeline and select Insert Photo for Time-lapse/Strobe… This import process makes each photo last for only one frame which results in a playback of just a few seconds or minutes that would normally take several minutes, days, or longer.
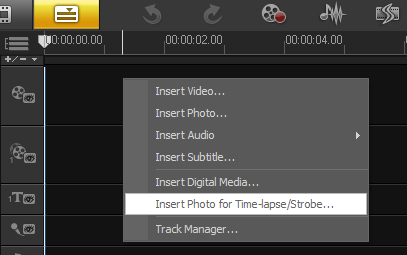
2. Browse for the series of photos you want to include in your project. I will select the photos that I took from a high-rise building that shows the traffic along the busy road of our district. PressCtrl + A to select all the photos and then click Open; the Time-lapse/Strobe dialog box will appear on your screen.
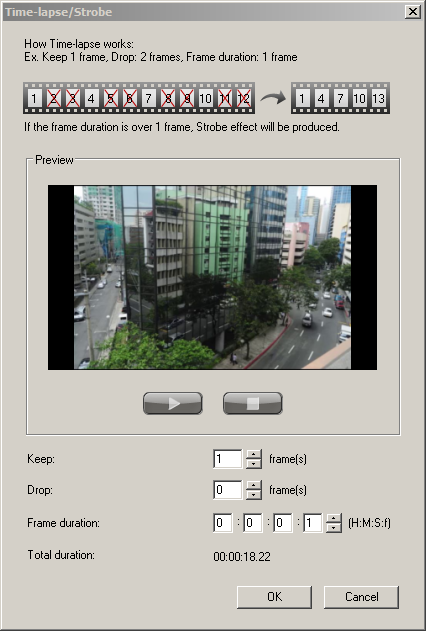
3. At the very bottom of the window above the OK button, you will see the total duration of your project, if all the photos were imported in the Timeline. Observe this number as it changes depending on the values you set in the Keep, Drop and Frame duration fields.
a. The Keep field displays the number of photos you want to import in the Timeline.
b. The Drop field displays the number of photos you don't want to import in between the photos you that want to keep.
c. The Frame Duration field sets the exposure time of each photo you import or how long each photo will last on the Timeline.
d. The Preview window allows you to see the result of the changes you made in the three fields before adding them to the Timeline.
i. If you leave the setting as is (Keep = 1, Drop = 0, Frame Duration = 0:0:0:1) and then click on the Play button, your project plays back at a normal video playback speed which is 30 frames per second.
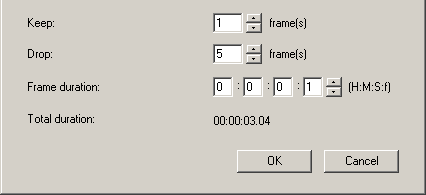
ii. If you enter a value of 1 in Keep and 5 in Drop, this will instruct the program to import 1 photo and remove the next 5 successive photos, then import the next 1 photo and remove another 5 successive photos and will be repeating this interval process of keeping and dropping throughout all of the photos that you have selected.
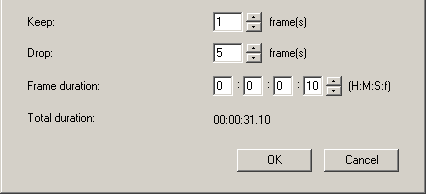
iii. Now, set the value of Frame Duration to 10 frames (0:0:0:5) and you will see that the total duration has been updated; when increasing the Frame Duration in this value, you are stretching the duration of each frame you keep to 5 frames. Thus, it creates the impression of a "strobe effect". The Strobe effect makes each frame appear in freeze motion and makes the project playback appear jumpy. The more you increase the frame duration, the more each frame stretches its duration.
4. For this example, leave the options at Keep = 1, Drop = 0 and Frame Duration = 0:0:0:1. These are the most basic options and keep all the photos you took at one frame duration each. Click OK.
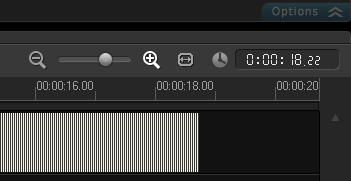
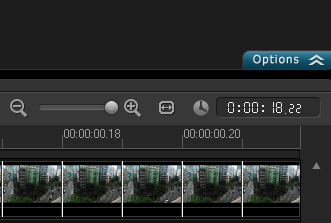
5. Fit the project in the Timeline window to see all the photos you imported; your Timeline shows a series of many, many vertical lines. Use the Zoom in control to see the individual photos.
Editing Your Time-lapse Project
To enhance all the photos at once, you have two choices:
1. Use the Copying and Pasting Attributes, to do this:
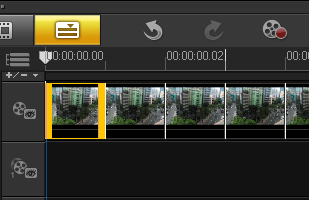
a. Zoom in further to the Timeline until you see the individual photos on the main video track and select one of the photos.
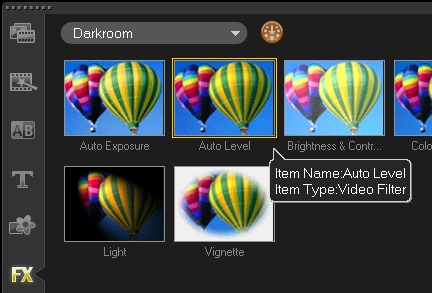
b. Go to the FX library, drag and drop an effect that you wish to apply to the photo.
i. For this example, go to FX 4 Darkroom and then drag and drop Auto Level;
c. By double-clicking the photo from which you dropped the FX filter onto, you will be able to see the Attribute tab of that photo below the Library Panel.
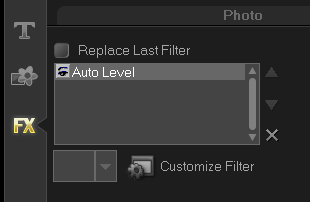
i. Alternatively, you can also right-click and then select Open Options Panel to launch the Attribute tab;
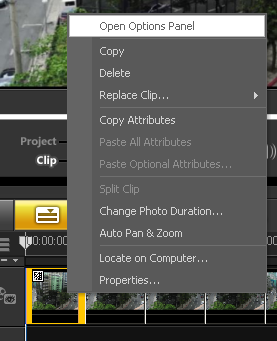
ii. Or, simply click the Options tab below the Library panel to expand it while the photo is still selected.
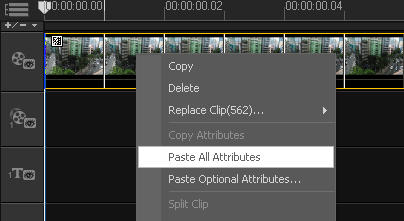
d. Now, right-click on the same photo and select Copy Attributes;
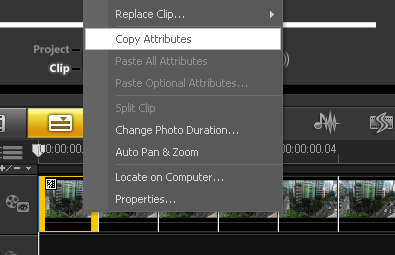
e. Press Ctrl + A key on your keyboard to highlight all the images on the Timeline and then select Paste All Attributes.
f. Press the Home key to move the cursor to the very beginning of your project and press the Play button; notice the changes of the color applied to every frame on the Timeline.
2. The second option is to save your project by going to File 4 Save.
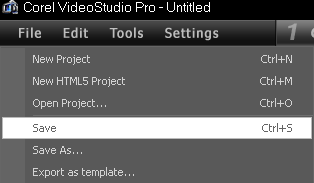
a. Give a name to your project and then click on the Save button.
b. Create a new empty project by pressing the Ctrl + N key;
c. Right-click on the Timeline and select Insert Video…
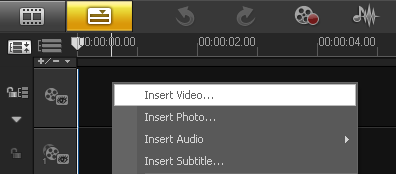
d. Browse to the location where you have saved your previous project;
e. Select the project and click on Open; and your previous project will be added to the main video track.
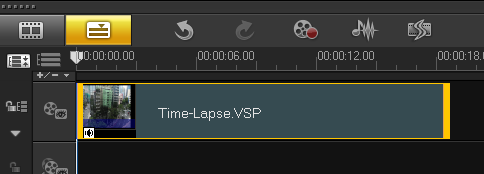
f. With the previous project still selected from the main video track, go to the FX library and add an FX filter on to it.
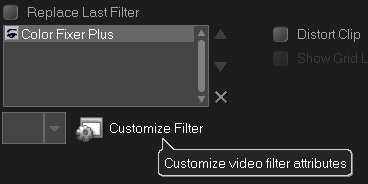
i. For this example, drag and drop the Color Fixer Plus (under NewBlue Video Essentials category) on to the Timeline.
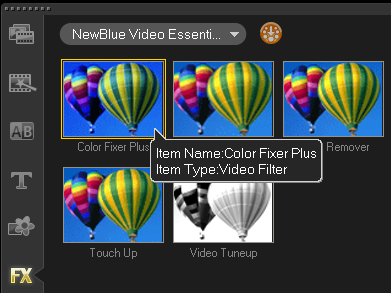
ii. In the Attribute tab, click on Customize Filter to launch the Color Fixer Plus window;
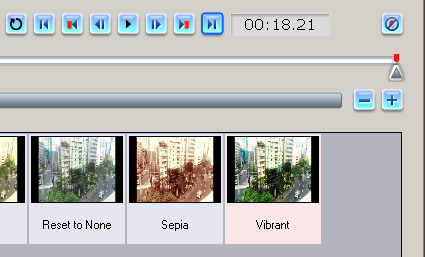
iii. Position the cursor on the Timeline to the starting key frame and select Vibrantfrom the presets;
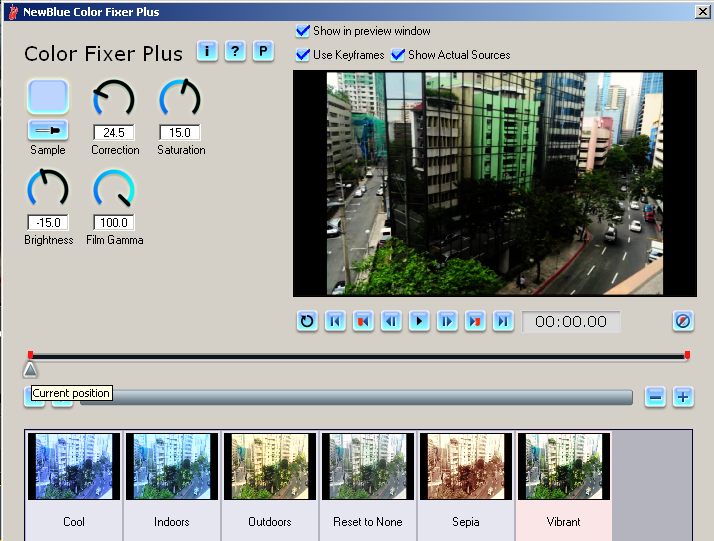
iv. Next, position the cursor on the Timeline to the ending key frame and selectVibrant again; this will constantly apply the Vibrant preset throughout the duration of this photo. Click on OK.
g. Click on the Play button and you will see that the filter you added applies throughout the project.
Rendering Your Time-lapse
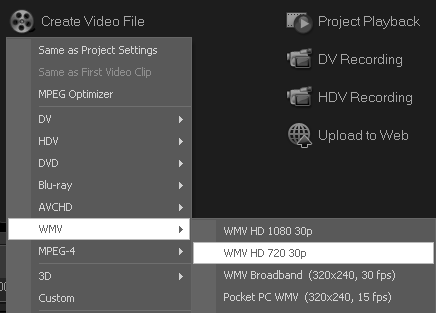
Now that you have enhanced your Time-lapse project, go to the Share step and choose the format that you would like to export your project as.
1. For this example, go to Create Video File and select WMV 4 WMV HD 720 30p.
2. Once your project has been rendered, the video will be placed in your library and starts playing in the Preview panel.
And that's how easy to create and edit a Time-lapse effect in Corel VideoStudio Pro.
If you have enjoyed this tutorial, be sure to check out the other tutorials that are available in theDiscovery Center. If you have any ideas for tutorials or projects that you would like to see in the future, please leave us some Feedback.
Was this article helpful?
Tell us how we can improve it.