


Introduction
With Corel® VideoStudio® Pro, adding weather effects such as clouds, wind, lightning and rain to your video clips is as easy as dragging and dropping a Transition effect on the Timeline. These four weather elements are customizable in a variety of ways, depending on if you're looking for a natural or a supernatural effect.
What You Will Learn
In this video tutorial, you will learn how to apply weather elements to your project such as:
· Cloud
· Wind
· Lightning
· Rain
Applying Weather Elements To Your Project
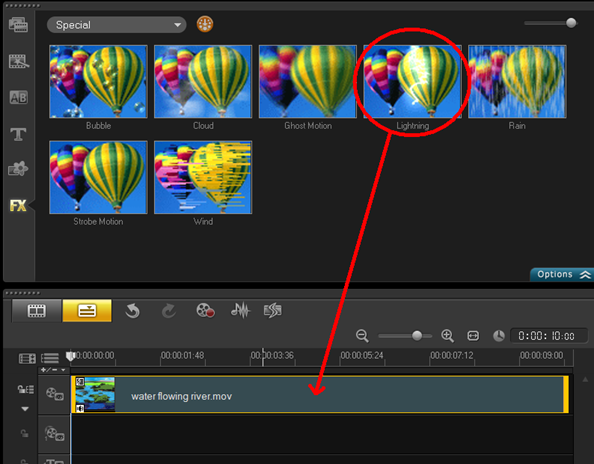
1. To begin, I will demonstrate the different weather effects using this 10-second video clip from my Library. There are four video filters that you can use to create weather elements: Cloud, Wind, Lightning, and Rain, which can also produce a snow effect. These filters are located in theFX library '4' Special.
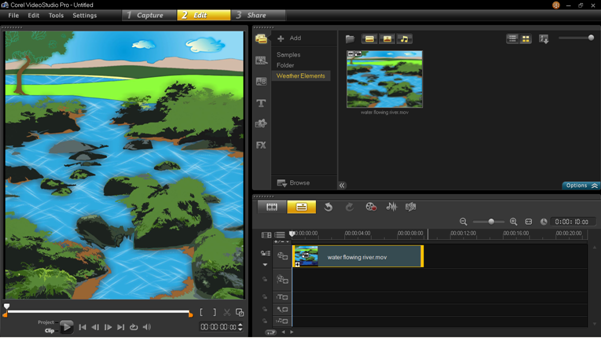
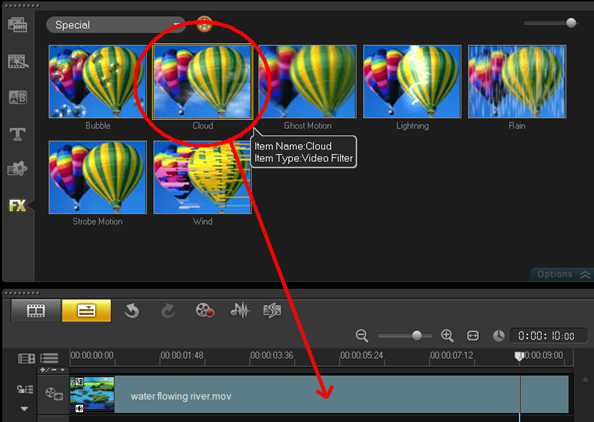
2. Once you have inserted your video clip on the Timeline, drag and drop the Cloud video filteron to it from the FX library '4' Special. This effect is usually applied on an image of the sky or anything that emits smoke.
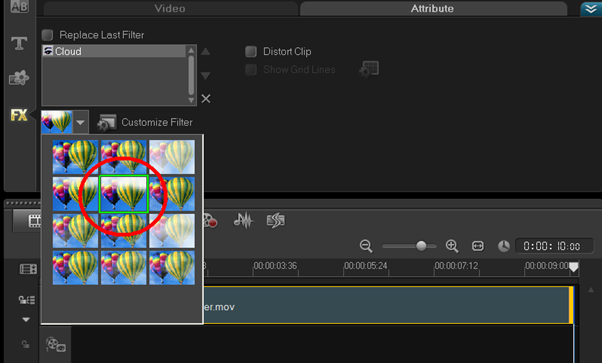
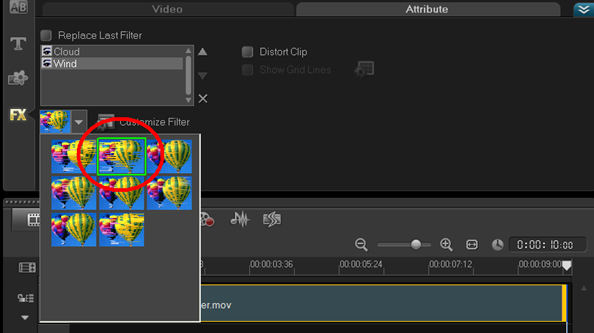
3. Double-click on the video clip and select the middle pre-set in the second row of the drop-down list from the Attribute tab. I chose this pre-set to make the clouds move in the same direction as the river.
4. Next, drag and drop the Wind filter onto the clip in the Timeline. The default Wind effect will be added to your video.
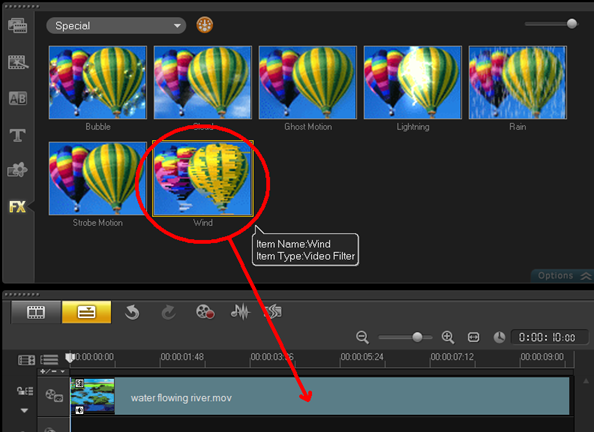
5. In the Attribute tab, select the middle pre-set in the first row of the drop-down list. This will ensure that the wind appears to blow in the same direction as the water.
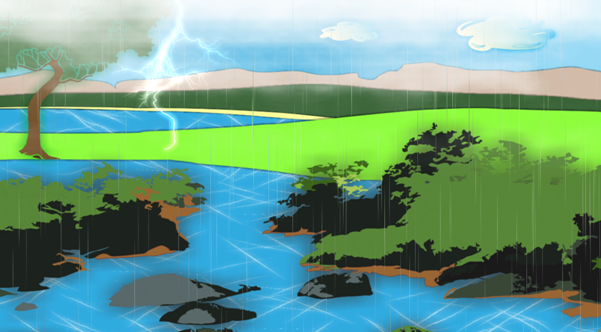
6. Now, drag and drop the Lightning filter onto the clip in the timeline. The default Lightning effect will be added to your video.
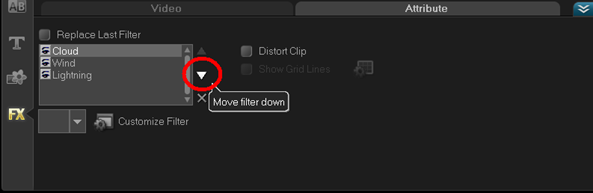
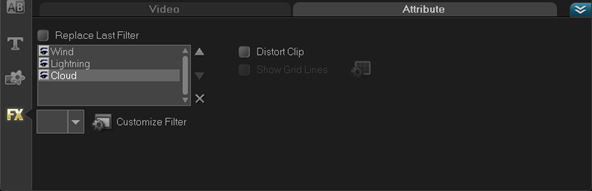
7. When there is more than one video filter applied to a clip, you can change the order of filters by clicking the Move filter up or down icon.
8. Now, click on the Lightning effect in the list of added filters and then choose the middle pre-set in the first row of the drop-down list.
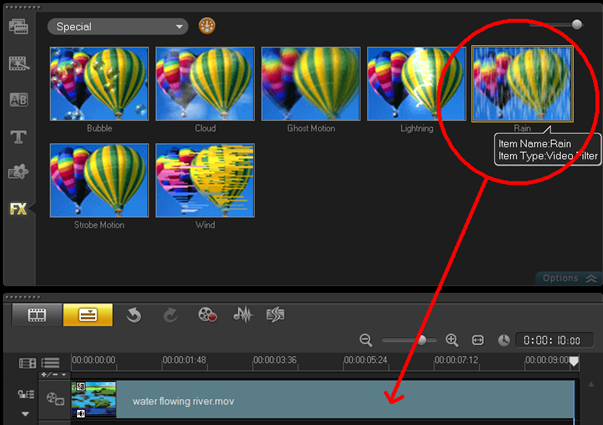
9. Next, go back to the FX library '4' Special, and then drag and drop the Rain video filter on to the video clip. The default Rain effect will be added to your video.
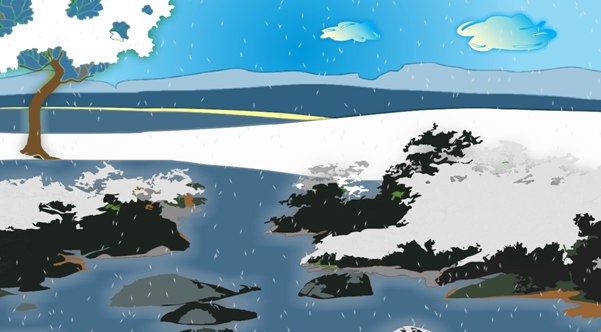
Turning the Rain filter into Snow effect
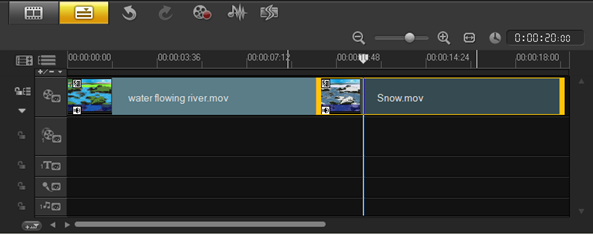
1. We can also alter the rain effect to create snow. Let's try this on our second video clip.
2. Go back to the FX library '4' Special, and then drag and drop the Rain video filter on to the second video clip.
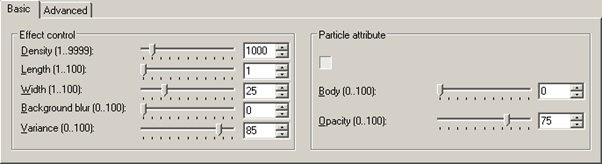
3. Now, let's simulate the winter effect by clicking on the Customize Filter button and applying these set of attributes to the starting keyframe:
a. In the Basic tab, change the Density=1000, Length=1, Width=25, Background Blur=0, Variance=85, Body=0, and Opacity=75.
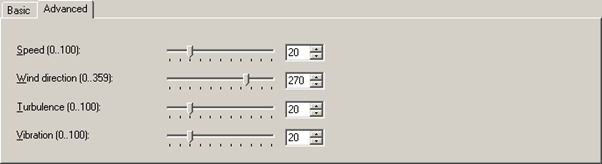
b. In the Advanced tab, change the Speed=20, Wind Direction=270, Turbulence=20, and Vibration=20. By alternating these values, you can produce a snow effect to a scene.
4. Then, move to the ending keyframe and apply the same values that you apply in the starting keyframe to this one.
5. Click on OK when done to go back to the VideoStudio Timeline editor.
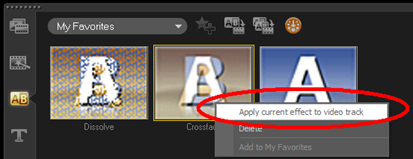
Now, go to the Transition tab, right-click on Crossfade transition effect and then select Apply current effect to video track.
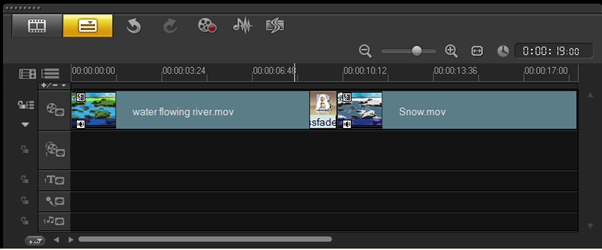
This will automatically apply the Crossfade transition between the two clips.
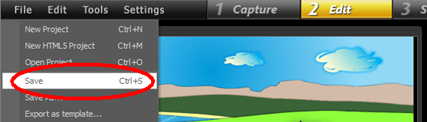
Finally, save your project to your computer; give it a name and then click on the Save button.
Click on the Play button below the Preview window to view your project.
And that's how you apply weather elements to your video clips in Corel® VideoStudio® Pro X5. Thank you for watching.
If you have enjoyed this tutorial, be sure to check out the other tutorials that are available in theDiscovery Center. If you have any ideas for tutorials or projects that you would like to see in the future, please leave us some Feedback.
Was this article helpful?
Tell us how we can improve it.