I really love to play with settings on the Real Watercolor panel. You can create very interesting brushes by adjusting the behaviour of the water, pigment, paper etc. In future blog posts, I will describe how these controls work.
But for now, I want a brush that will flow quite a bit on the paper, in order to create some flow patterns. I don't want the water and pigment to be absorbed exactly where I brushed it, I want it to move around somewhat...
Using the "Light Fringe" brush variant, I will make adjustments to make it flow more.
"Light Fringe" brush with default settings:

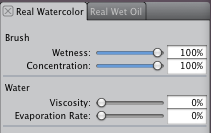
If you make the following adjustments, the brush will be more wet, the water will move more easily and will last longer (more time before it evaporates completely).
1. Brush Wetness = 100%
2. Water Viscosity = 0%
3. Water Evaporation Rate = 0%
The brush now creates this sample stroke instead:

Before moving on with this brush, I want a paper with large and interesting texture so that the water will flow according to that texture.
I can use existing papers, but I want to create a new one. Here is what I will do:
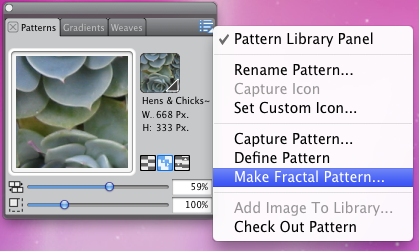
1. From the Window - Media Control Panels , select Patterns.
2. From the flyout on this panel, select Make Fractal Pattern.
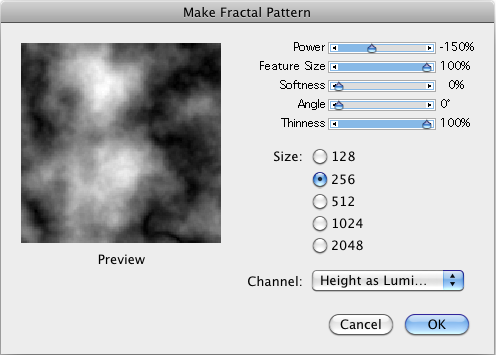
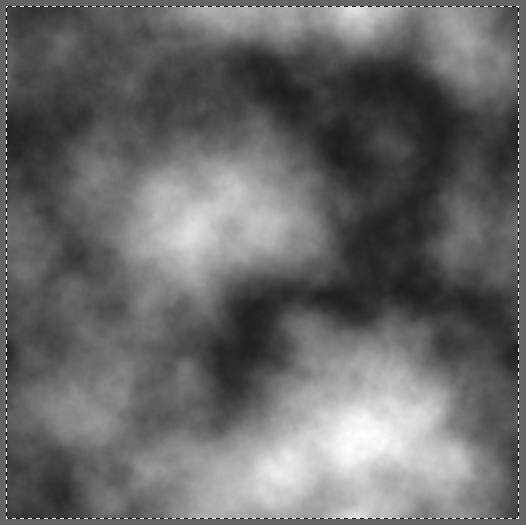
3. Select 256 for the size, then click OK to generate the pattern.
4. Select the whole canvas.
5. Capture the paper, giving it a name.
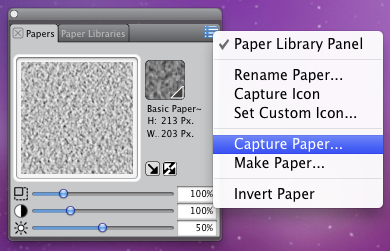
6. Finally, go back to your original document and make sure you select your newly created paper.
Ok, now I want to make my brush flow, but following the texture in the paper. I want to make the paper more rough and make the water "follow" the texture more by increasing the "resistance" of the paper texture.
Make the following adjustments to the Real Watercolor settings:
1. Paper Roughness = 100%
2. Paper Flow Resistance = 100%
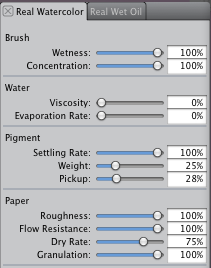
In this brush, I have adjusted the controls to "extremes" to make sure I actually get some "flow patterns". I can now make further adjustments to reduce the effect if I wanted.
I could make the simulation dry faster by re-adjusting the brush's:
- Wetness (reduce)
- Evaporation (increase)
I can also control the paper effects by adjusting the following settings to create various kinds of patterns:
- Paper Roughness
- Flow Resistance
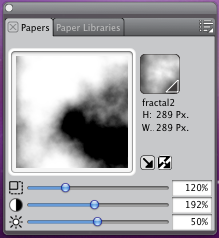
In addition, I can control the flow patterns by adjusting the paper itself on the Paper control panel with the "Scale" and "Contrast" settings:
And finally, by switching between various papers I can create very different flow patterns.
Note, most of the papers that Painter ships with are not well suited for creating flow patterns. You will want to scale most of these papers UP to create larger textures in the paper.
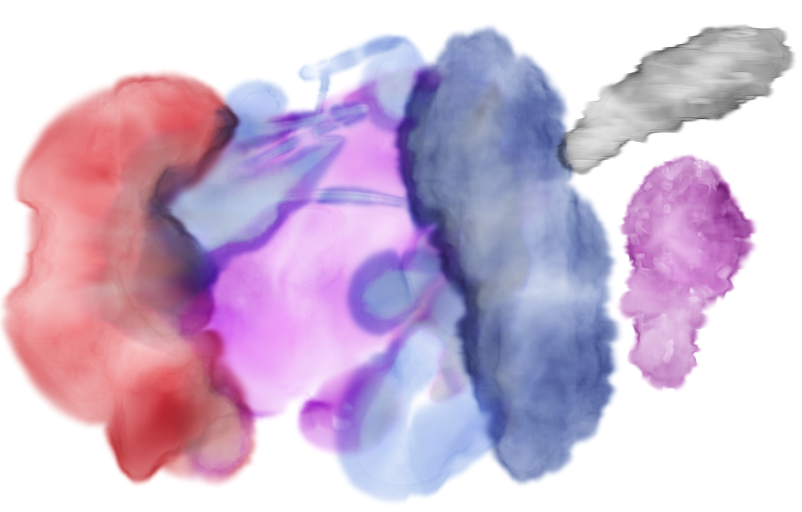
Here is a sample image, with different papers at different scale and contrast settings.
The edges in this image were created because the water was actually flowing with the texture in the paper (not because I brushed the shapes).
So in summary, you can make the Real Watercolor media create flowing patterns by making it more wet, and making it more responsive to paper textures. The paper texture that you use, and the contrast and scaling settings for that paper make a huge impact on the actual flow patterns created.
As always feedback and questions make me happy 
Was this article helpful?
Tell us how we can improve it.