

By Steve Bain
This tutorial has been written for CorelDRAW® Graphics Suite X7. While similar features might be available in previous releases, the tutorial will be fully applicable to CorelDRAW Graphics Suite X7 only.
If you've ever found the task of fine-tuning or correcting photo problems using bitmap filters to be a frustrating, trial-and-error exercise, you should take a closer look at the Image Adjustment Lab in Corel PHOTO-PAINT and CorelDRAW.
The Image Adjustment Lab saves you having to navigate through several bitmap filter dialog boxes to change the basic characteristics of an image. It’s a one-stop photo lab where you can experiment and evaluate different color tonal correction settings, and instantly recall and commit to the settings you’ve tested. No more time spent searching for the right setting, saving experimental copies, or trying to remember the slider settings you used ten minutes ago.
In this tutorial, we’ll take a tour of the Image Adjustment Lab to see how fast and easy it is to apply automatic, custom, and advanced image corrections for a few common digital-photo problems.
Opening the Image Adjustment Lab
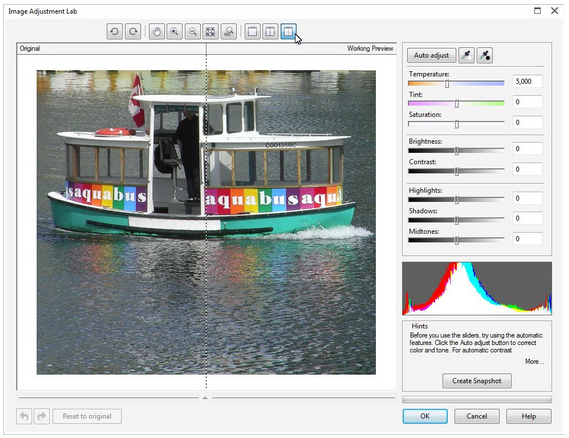
With an image open in Corel PHOTO-PAINT, just click Adjust > Image Adjustment Lab. In CorelDRAW, with a bitmap selected, click Bitmap > Image Adjustment Lab. It includes a working preview area on the left, adjustment sliders on the right, and a row of toolbar buttons across the top.
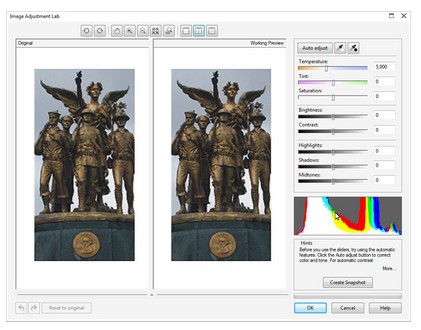
If you’ve worked with bitmap-filter dialog boxes in Corel PHOTO-PAINT, using the previewing features and classic toolbar buttons in the Image Adjustment Lab will be familiar territory. You can use the Rotate buttons for image rotation, and the Pan and Zoom tools to change the magnification level. A single click zooms in, a right-click zooms out, and dragging allows you to pan directly in the previewing area. There are also toolbar buttons for switching between Full Preview, Before and after full preview, or Before and after split preview modes.

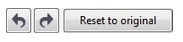
Below the preview area, you can use the Undo, Redo, or Reset to original buttons to change adjustments you’ve applied.
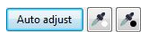
For basic quick fixes, you can use the Auto Adjust button in combination with the Select White Point and Select Black Point tools.
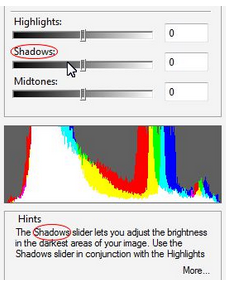
The easy-to-use sliders let you alter the color and tone of your image. Use the Temperature, Tint, and Saturation sliders to correct color casting and adjust color vividness. Use the Brightness and Contrast sliders to tweak lightness, darkness, and tonal values. Or, use the Highlights, Shadows, and Midtones sliders to adjust specific tonal ranges. Positioning the mouse pointer over each slider displays information specific to that slider in the the Hints area.
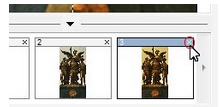
For the ultimate in experimentation tools, click the Create Snapshot button to save your current settings. A numbered thumbnail image that uses the current settings is added below the preview area each time you take a new snapshot. Clicking a thumbnail loads the preview and resets the slider controls to the applied snapshot settings. You can try out dozens — even hundreds — of different adjustment settings for evaluation. And the best part is that you don’t have to note what settings were used on each snapshot.
For some hands-on experience, let’s explore how easily you can perform both simple and advanced image correction with the Image Adjustment Lab. We’ll examine three typical types of image correction and enhancement. You can follow along and perform these adjustments, too. Start by downloading and extracting the contents of this Zip file containing three images saved in Corel PHOTO-PAINT format (CPT).
Use Auto Adjust for instant fixes
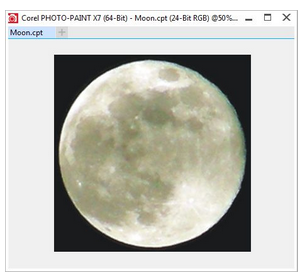
The first image, Moon.cpt, requires a simple color cast adjustment. The quickest way to accomplish this is by using the Auto Adjust feature, which can be applied without even opening the Image Adjustment Lab.
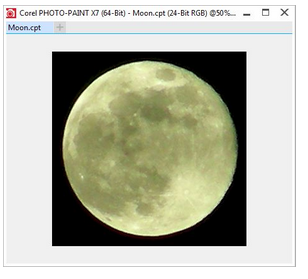
Notice the color cast in the image is making the normally bright white moon color appear yellowish. Clicking Adjust > Auto Adjust automatically whitens the image. To preview the results before they are applied, choose Adjust > Image Adjustment Lab, and click the Auto Adjust button. Regardless on the method you use, the color is corrected without the need to choose any settings at all.
Recalling and evaluating filter settings
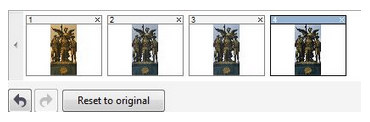
Experimenting with and comparing the subtle differences between image-correction filter settings is often an arduous task that requires experience and a keen eye. Unfortunately, it also usually involves creating and saving multiple copies of an image across multiple document windows and testing many settings through trial and error. The Snapshot feature in the Image Adjustment Lab eliminates the need for this by making it easy to recall and evaluate different settings you’ve applied. You can follow these steps to see how the Image Adjustment Lab streamlined the process of adjusting the sample image Aquabus.cpt:
1. With Aquabus.cpt open, click Adjust > Image Adjustment Lab.
2. Click the Before and after split preview button.
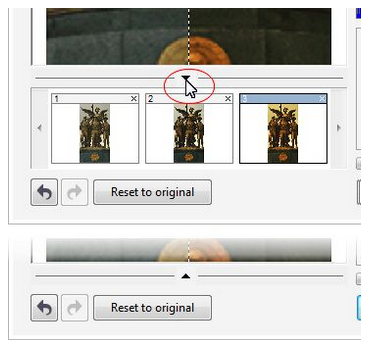
3. Adjust the Brightness and Contrast sliders to 30, and click the Create Snapshot button.
Notice a new thumbnail of the current settings now appears below the preview.
4. Adjust the Saturation slider to 30, and click the Create Snapshot button.
A second thumbnail appears in the list.
5. Adjust the Midtones slider to 30, and click the Create Snapshot button.
A third thumbnail appears in the list.
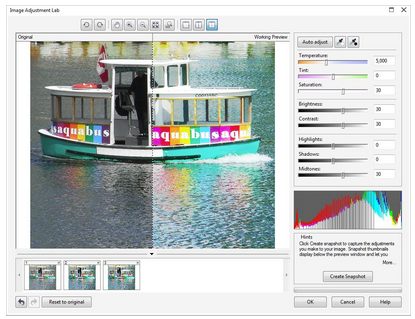
6. Click the Reset to Original button to clear the current settings from your image preview, and then click directly on one of the thumbnails.
Notice the preview is recalled and the sliders are set to the settings applied when the snapshot was taken. Click a different thumbnail to recall the preview and settings applied to a different snapshot.
7. Select what you feel is the best snapshot in the list, and click OK to apply the settings to the image and close the Image Adjustment Lab.
Applying advanced selection-based adjustments
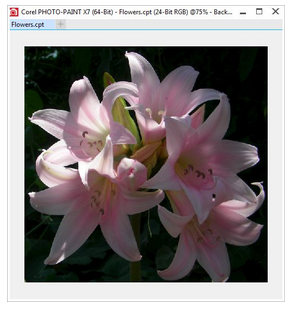
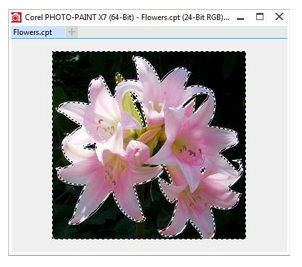
The filter effects you can apply with the Image Adjustment Lab are selection based. This means you can make adjustments to specifically selected portions of an image, reducing the time it takes to perform advanced image-correction operations. Our next photo needs different Image Adjustment Lab settings applied to specific areas, making it the perfect candidate. Follow these steps to apply different settings to selected areas in the sample image Flowers.cpt:
1. Open Flowers.cpt in Corel PHOTO-PAINT. Notice the flowers in the foreground of this image need only a slight adjustment while the background needs a more aggressive treatment. To speed the process, I’ve created and saved a separate mask for each of these areas as channels embedded in the CPT file.
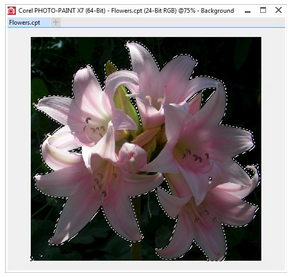
2. Select the flowers in the foreground by clicking Mask > Load > Background Masked.
A mask now covers the background leaving the flowers exposed.
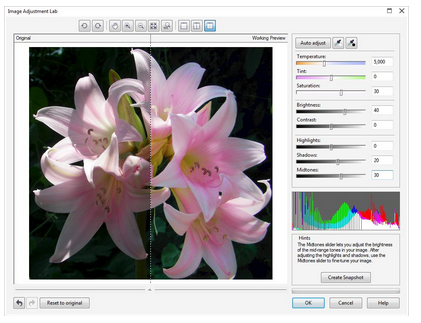
3. Click Adjust > Image Adjustment Lab, and adjust the sliders to the following settings:
Saturation = 30; Brightness = 40; Shadows = 20; and Midtones = 30.
Notice the flower petals become slightly more colorful. Although the preview shows that adjustments are applied to the entire image, only the exposed areas will be affected in the final result. If you wish, experiment with your own settings, or click OK to apply the changes and close the Image Adjustment Lab.
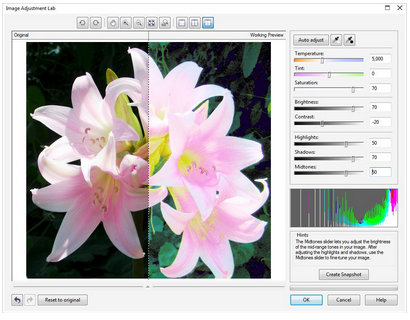
4. Remove the current mask selection (Ctrl + R), and load the other saved mask by clicking Mask > Load > Flowers masked. A mask now covers the flower petals leaving the background exposed.
5. Click Adjust > Image Adjustment Lab, and adjust the sliders to the following settings:
Saturation = 70; Brightness = 70; Contrast = -20; Highlights = 50; Shadows = 70; and Midtones = 50.
6. Open the Image Adjustment Lab again and set the sliders to the following settings:
Saturation = 70; Brightness = 70; Contrast = -20; Highlights = 50; Shadows = 70, and Midtones = 50. Notice the background in the preview now becomes visible and more colorful. Again, the preview indicates the entire image is affected, but only the selected area will ultimately be affected.
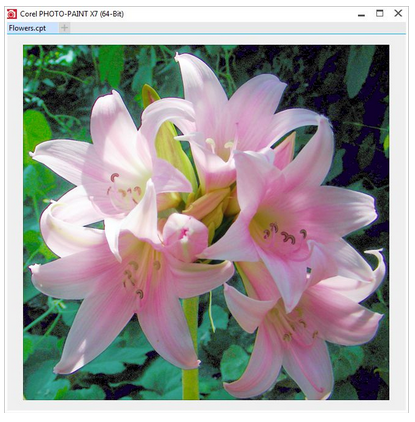
7. Experiment with your own settings, or click OK to apply the changes and close the Image Adjustment Lab. Remove the selection (Ctrl + R) to see the dramatic improvements by using just two Image Adjustment Lab operations.
Tips and tricks
Here are a few tips for getting better results using the Image Adjustment Lab.
Cropping before correcting
Before using the Image Adjustment Lab, make sure you apply any final cropping to your image. Automated image adjustment values are determined by the entire contents of the image. If your image includes dark, bright, or vividly colorful areas that you plan to eliminate, crop first to avoid these affecting the automatic adjustment levels.
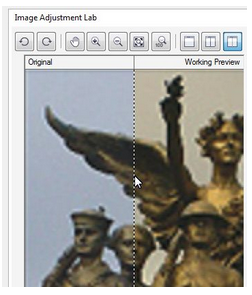
Using split preview
Use the Image Adjustment Lab's Before and after split preview mode to evaluate subtle changes in filter settings. If necessary, you can drag the split position to the left or right to see more or less of the preview.
Hiding, showing, or deleting snapshots
While working in the Image Adjustment Lab, click the arrow button above the snapshot thumbnail list to show or hide your current snapshots.
The Image Adjustment Lab in Corel PHOTO-PAINT and CorelDRAW is just the ticket you need to save time when performing either automated or customized image enhancements.
Steve Bain is an award-winning illustrator and designer, and an author of nearly a dozen books, including CorelDRAW: The Official Guide.
Was this article helpful?
Tell us how we can improve it.