

by Anand Dixit
Layers provide an effective way to organize the objects you create with CorelDRAW. By using layers, you can reduce your work time, make it easier to handle the job at hand, and increase the accuracy of your designs.
What types of jobs are suitable for layers?
- Multipage jobs -- Certain objects appear on all pages, while others appear only on individual pages. For example, in a wall calendar, the masthead will be common to all pages but the dates will change on each page.
- Single-page jobs -- For example, multiple bank cheques for a client company will have a common background, but also elements unique to each bank, such as the name, bank account, contact information, etc. I use layers when designing my clients' cheques for multiple banks in their distribution of dividend warrants among their shareholders.
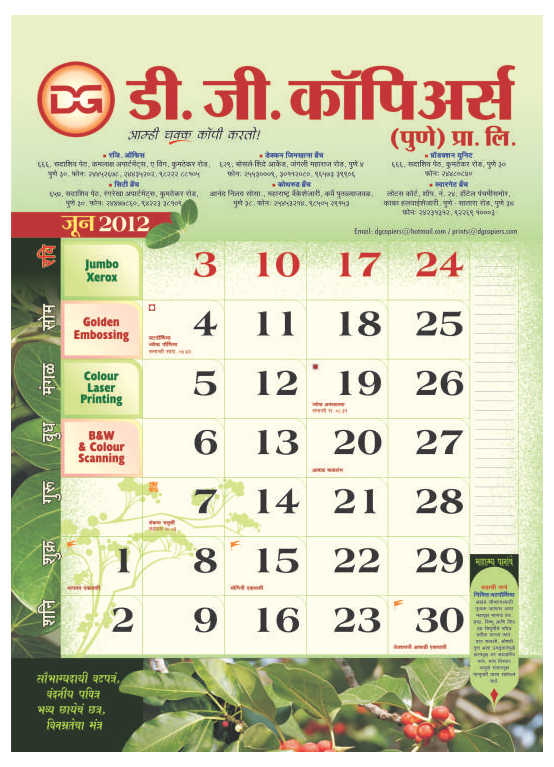
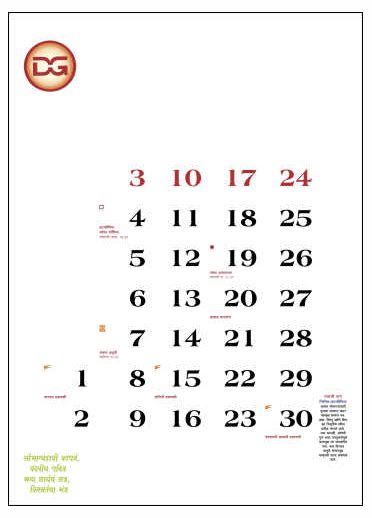
In this tutorial, we will focus on a multipage job -- creating a calendar (Figure 1).
Understanding the Object Manager docker
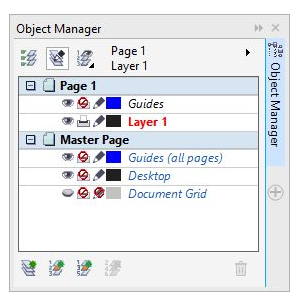
The Object Manager docker (Figure 2) displays the current status of the document structure, making it easy to manage the layers and objects. It displays all pages in the active document with all the layers on each page, and all the objects placed on every layer of each page.
The buttons at the top of the docker let you view and manage the layers and objects.
- Show Object Properties -- lets you view the properties of each object on the layer. Clicking the + icon next to the page name displays all the objects' details.
- Edit Across Layers -- lets you work on any object regardless of whether the object is located on the active layer. If the button is disabled, you will have to make a layer active in order to work on the objects on that layer, while all objects on the other layers will be temporarily locked.
- Layer Manager View -- lets you manage the layer hierarchy and change the sequence of layers on the active page. You can drag the layers to any desired position in the hierarchy.
The buttons at the bottom of the docker let you create and delete layers.
- New Layer -- creates a new layer on the active page.
- New Master Layer (all pages) -- creates a new master layer on the Master Page. The objects placed on that layer will appear on all pages of the document.
- New Master Layer (odd pages) -- creates a new master layer on the Master Page. The objects placed on that layer will appear on all odd-numbered pages of the document.
- New Master Layer (even pages) -- creates a new master layer on the Master Page. The objects placed on that layer will appear on all even-numbered pages of the document.
- Delete Layer -- deletes the selected layer together with all objects on that layer. The default master layers (Guides, Desktop, and Document Grid) cannot be deleted.
By default, CorelDRAW names the layers sequentially. For example, Layer 2, Layer 3, and so on. You can rename the layers for convenience and to make them more easily identifiable while you work.
The layer property buttons next to the name of each layer let you manage the properties of that layer.
- Eye icon -- indicates the visibility of the layer. Enabling the eye icon makes the layer objects visible; disabling it hides the objects on that layer.
- Printer icon -- toggles the printability of the layer. Enabling the printer icon lets you print and export the objects on the layer; disabling it blocks all objects on that layer from being printed and exported.
- Pencil icon -- toggles the editability of the layer. Enabling the pencil icon lets you select and edit the objects on the layer; disabling it locks the objects and prevents them from being selected or edited.
Tip: Normally, the visibility and printability should be enabled or disabled together. Remember, a visible layer cannot be printed or exported if printability is disabled, and a non-visible layer can be printed and exported if printability is enabled. A layer that is visible but non-printable can be used to keep notes with the file. I use such a layer to keep the print details and other job information, so that I can refer to them at any time.
Preparing to start a job with layers
The design of a layered document requires some pre-planning before you start a blank CorelDRAW document. I prefer to scribble out the job design and the placement of objects on the artwork.
Creating a multipage layered document
The first step is to set the page size for the job by starting a new document (File > New). By default, CorelDRAW starts a new document with one default layer named "Layer 1." After you start a new document, make sure that the Object Manager docker is open (if not, click Window > Dockers > Object Manager).
For the calendar job, I've used two master layers and four local layers. To create a master layer, click the New Master Layer (all pages) button at the bottom of the Object Manager docker. Objects placed on this master layer will appear on all pages of your design. Then, create the required number of regular or local layers (in this case, four) by clicking the New Layer button. You now have one page ready.
Tip: CorelDRAW creates new layers above the previous layer. Remember to create the layers in the correct sequence.
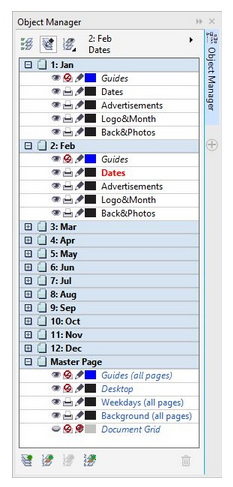
For the calendar project, you will need 12 pages -- one for each month of the year. You can create multiple pages by duplicating the first page (with all its layers). Before you do that, however, you can rename the layers on Page 1, so that when you duplicate the page and its layers, the names of the layers are duplicated on the other pages as well. For example, I have given the layers intuitive names that indicate the type of content that I will place on each layer: Dates, Advertisements, Logo&Month, and Back&Photos. When you have renamed the layers on the first page, duplicate the page by right-clicking the Page 1 tab at the bottom of the application window and choosing Duplicate Page from the pop-up menu. Since you haven't added any objects to the page yet, you can accept the default options in the Duplicate Page dialog box and click OK. Repeat this process to create all 12 pages of the calendar. You can now rename the pages with the corresponding names of the months (Figure 3).
Note: Adding new pages by clicking Layout > Insert Page results in adding pages with the default single layer. In such a case, all the required layers will have to be added on all pages separately, which could be time-consuming.
Adding objects to layers
Now you can add objects to the master layers and the local layers.
Master layers
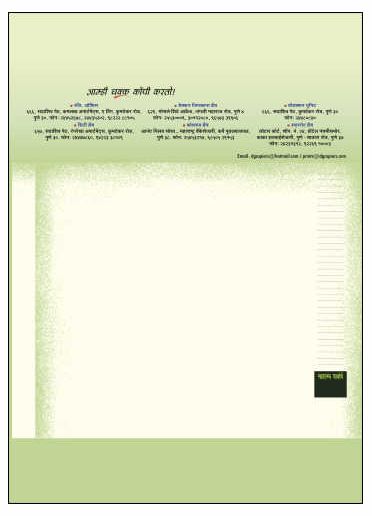
On the master background layer, you will place all objects that are part of the background, which is common to all pages. In the sequence of layers, the background layer is the first from the bottom. All other layers are stacked above it (Figure 4).
Another master layer is created for the names of the weekdays, which are also common to all pages. The sequential position of the background and the weekdays is different, which is why two master layers are needed. The weekdays layer is sixth from the bottom in the sequence of layers. This master layer must be placed on top of all layers (Figure 9).
Local layers
I used four layers on each page to add background and photos, the logo and the month, advertisements, and the dates of each month.
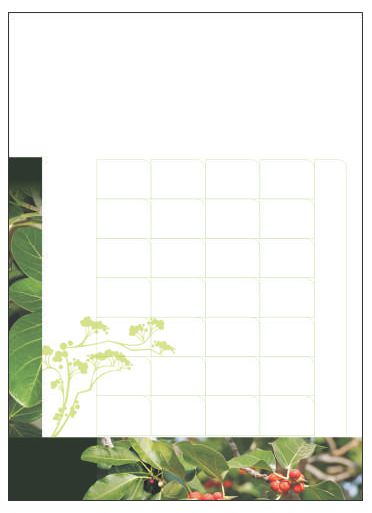
- Back & Photos: The photographs and the objects used to create the background for each page are placed on this layer (Figure 5). Each page requires different photographs and objects, so this local layer is created for each page. This layer is second from the bottom in the layer sequence (above the master background layer).
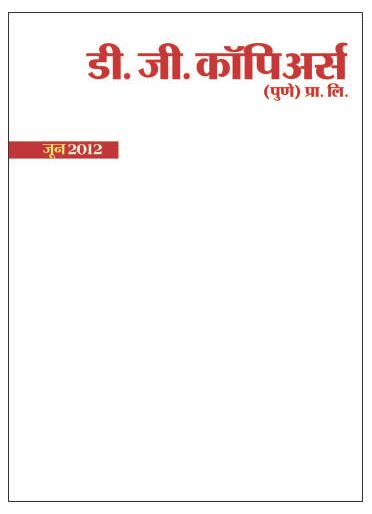
- Logo & Month: The masthead and the name of the month are placed on this layer. This layer is third from the bottom in the layer sequence. Each page has a different month and different color for the company name (Figure 6).
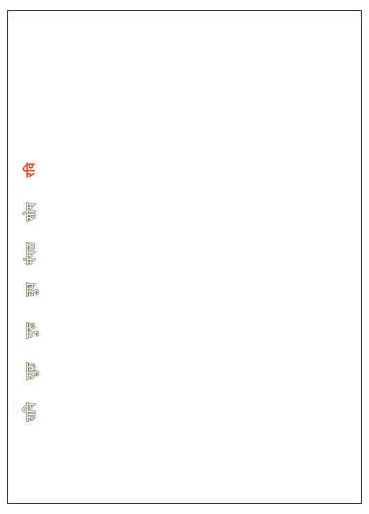
- Advertisements: Small advertisements that fill up the blank squares among the dates are placed on this layer. This layer is fourth from the bottom in the sequence of layers. Each page has different services highlighted. The positions of the services has to be changed on each page (Figure 7).
- Dates: Each page has different dates, depending on the month of the year. This layer is fifth from the bottom in the sequence of layers (Figure 8).

Was this article helpful?
Tell us how we can improve it.