


What You Will Learn
- How to use the Calendar Macro to create one of many different styles of calendars.
- How to import an image into CorelDRAW.
- How to use the PowerClip in CorelDRAW Graphics Suite X6 and previous versions of CorelDRAW.
Preparing the Document
The hardest part about creating a calendar in CorelDRAW is deciding on the document size. Once you set the page size, the script will take care of the rest, whether it is for the back of a business card or a 4-feet panel highlighting monthly specials.
The script that is included with CorelDRAW is capable of creating a calendar almost any size that you may require; it is just a matter of setting the page size and then configuring the proper settings.

3. When the Run Macro dialog box opens, from the Macros in: drop-down (at the bottom of the dialog), select CalendarWizard(CalendarWizard.gms) and click Run.
Using the Calendar Macro
4. Looking at the interface, the top left corner lets you select the year and the specific months. Click the All button in the upper right if you want to create an entire year. Below this is the Language drop-down menu.
5. Under Layout, you will see a number of different layouts. Experiment for a moment and then select Year: Image + 12 Small [Bottom Bottom].
6. On the Page Layout tab, click the button that reads Adjust Fonts. This will automatically adjust the fonts to fit within the various regions. Alternatively, you can select the Small: Header and Small: Body tabs and manually adjust them. You also have the ability to select the color of the text.
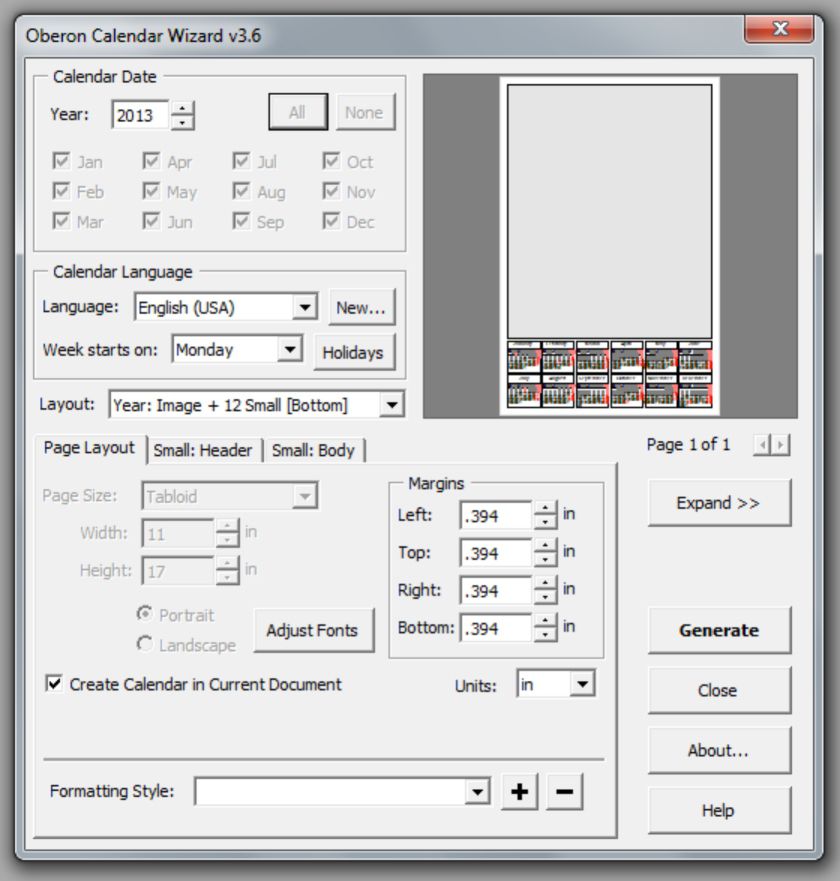
7. After you are happy with the settings, click the Generate button. It will probably take no more than about 15 seconds until you see the message Finished Generating Calendar; then click OK and select Close.
Creating a PowerClip
8. Now it is time to dress it up. Resize the larger gray rectangle to 10" by 8" using the Pick tool and place it toward the top of the page. This will leave space to add your logo, address, and the year.
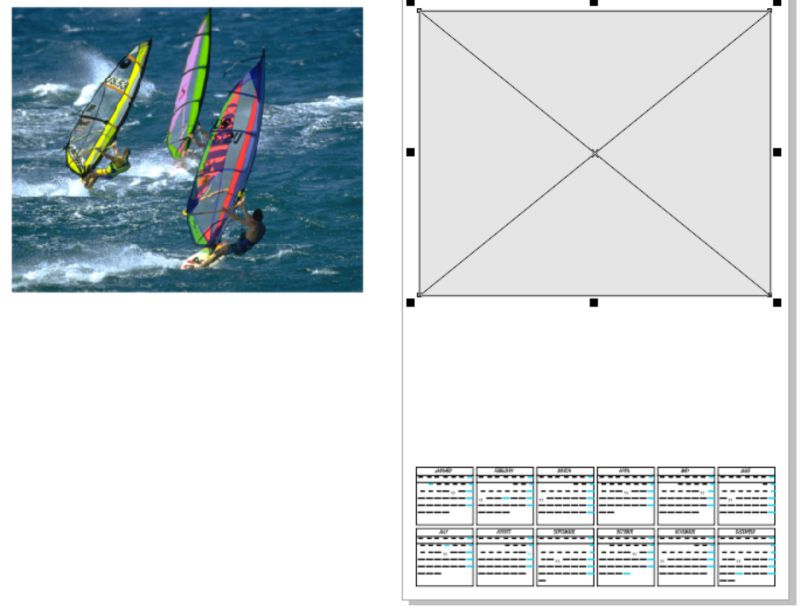
12. Select the bitmap and select Effects > PowerClip > Place Inside Container. Use the large black arrow to click on the gray rectangle.
13. If your image seems to disappear and you see an empty frame, do not worry. A Powerclip is like a porthole where you can hide items behind it. If the image does not sit in the middle of the porthole, you wont be able to see it.
14. With the frame selected, from the Effects menu, select PowerClip > Edit Contents. Now you will be able to see the image and the PowerClip frame. Drag to position and size the image where you would like it and then from the Effects menu, select PowerClip > Finish Editing This Level.
Adding a Background
15. Once your image is inside the PowerClip and centered where you want it, the final step is to add a background.
16. By double-clicking on the Rectangle tool, you will create a page frame the size of the page that will be placed behind other objects in the document. Select the Eyedropper tool from the toolbox and pick a color from within the image and then click the rectangle that you just created. You can also give your calendar a title or import a company address and logo to use in the space below the image.
17. Now, its now just a matter of printing out a proof, and if everything is OK, send it off to the printers or copy center.

If you have enjoyed this tutorial, be sure to check out the other tutorials that are available in the Discovery Center. If you have any ideas for tutorials or projects that you would like to see in the future, please leave us some Feedback.
Was this article helpful?
Tell us how we can improve it.