

Create Perfect Photo Composites with the Cutout Lab in Corel PHOTO-PAINT
By Steve Bain
This tutorial has been written for CorelDRAW® Graphics Suite X7. While similar features might be available in previous releases, the tutorial will be fully applicable to CorelDRAW Graphics Suite X7 only.
The Cutout Lab in Corel PHOTO-PAINT® lets you to extract or copy photo elements from any digital image with precision and ease. Much more than just a quick selection tool, the Cutout Lab accurately detects almost any shape and preserves the fine details of an image. It automatically applies transparent edge-feathering, and it enables you to decide whether your cutout will be an object without a background, an object on top of the original image, or a clip mask attached to the original image.
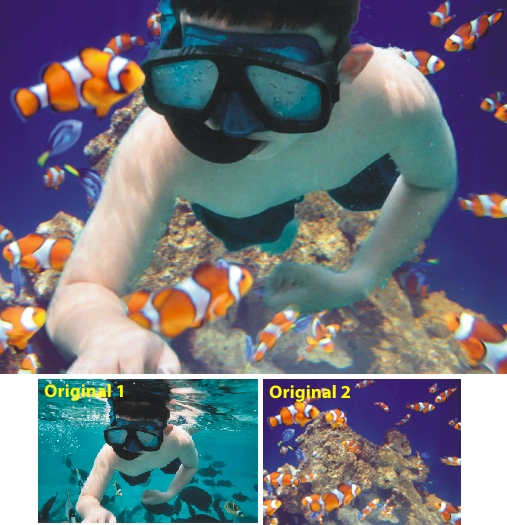
The complex masking functionality of the Cutout Lab allows you to create high-quality photo composites. After a photo element has been cut out, you can manipulate it as you would any floating object. For example, you can mix it with other picture elements to create custom photo compositions. In the image below, the picture of the swimmer was easily isolated and inserted into a different scene, with realistic results.
The Cutout Lab is essentially a plug-in application that has been integrated into Corel PHOTO-PAINT. All controls are contained in one dialog box that’s divided into two basic areas.
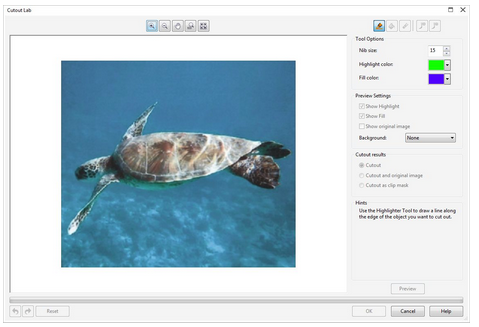
Browsing the available tools
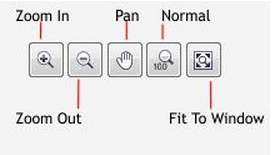
The Cutout Lab has a well-equipped toolset that includes a roomy preview window, zooming and cutout toolbars, and previewing and cutout options. The zooming and panning tools are found on the left side of the Cutout Lab, enabling you to control the view of your selected image.
The Zoom In (F2) and Zoom Out (F3) tools allow for incremental magnification changes in the preview window. The versatile Pan tool (H) also doubles as a zooming tool, and Normal (Ctrl+1) and Fit To Window (F4) buttons let you reset zoom settings to specific levels.
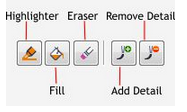
On the right side of the Cutout Lab, you'll find the tools used for highlighting, filling, and erasing the defined edges of the picture element that you want to cut out. These tools are supplemented by detailing tools for refining the edges of your cutout.
After you define your picture element, you can click the Preview button (Ctrl+P) to see how the final results will appear.
By using the previewing options, you can switch between displays of the Highlight, Fill, and Original Image areas of the picture that you're working on in the preview window. When previewing an area of a cutout, you can view the results against a grayscale, white matte, or black matte background, which enables you to examine, evaluate, or refine the cutout results before you commit to changing your image.
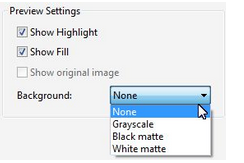
If the picture element you're cutting out is so intricately shaped that defining its edges requires more than a few strokes with the Highlighter tool, you'll appreciate the Undo, Redo, and Reset buttons in the lower-left corner of the Cutout Lab. Clicking the Undo button (Ctrl+Z) or the Redo button (Ctrl+Shift+Z) enables you to navigate forward or backward through your most recent actions. In addition, you can restart the entire operation by clicking the Reset button (Ctrl+R).

When you're satisfied with the edge definition of the cutout, you can use the Cutout Results options to choose how to prepare the cutout area based on the edges that you've defined. You can use the default Cutout option to create a new floating object of your defined area. For trickier cutout operations, you can choose one of the other two options:Cutout and original image, or Cutout as clip mask.
Let's first create a typical cutout. You'll see how fast and easy it is to use the tools in the Cutout Lab.
Cutting out a picture element
If you've never used the Cutout Lab before and you're wondering what the fuss is all about, you can join me for a walk through a typical cutout operation. If you want to follow along with your own digital image, choose a quality image that includes a picture element with well-defined edges.
- With your digital photo open in Corel PHOTO-PAINT, click Image > Cutout Lab.
The Cutout Lab opens and displays a full-window preview of your digital photo.
- Choose the Highlight tool (F5) from the Cutout toolbar.
Notice that a circular pointer appears when you point to the image.
- Pointer size diameter is controlled by the nib size and is measured in pixels. To define the edges of your picture element more easily, adjust the pointer diameter by using the Nib Size box. This option also controls the pointer size of the Eraser tool (X).

- To help improve the visibility of your Highlighter strokes, choose a custom color from the Highlight color picker. The highlight color does not alter the color of your picture element or the picture background.
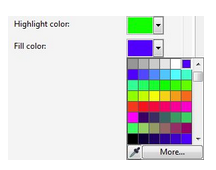
- Using the Highlight tool, trace the picture element that you want to cut out. Trace the edges so that the stroke straddles the edges of your picture element, and enclose it. One way to tell if you’ve successfully defined the entire edge of your picture element so that it forms an enclosed area is to check if the Fill tool (F) is available. It’s only active after you've defined an enclosed area.
If the picture element you've selected includes negative spaces in which the background shows through, trace these edges too. If needed, you can use the Eraser tool (X) to tidy up any strokes that didn’t turn out as you hoped. In the example below, the edges of the swimmer are highlighted.
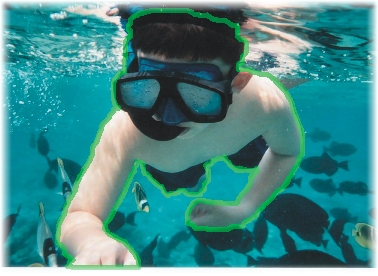
- Determine which side of the edge boundary to cut out, inside or outside, and do one of the following:
- To choose the enclosed area of your picture element as the cutout area, click inside the edge boundary with the Fill tool.
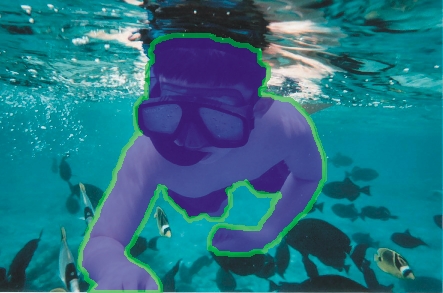
- To choose the area outside of the enclosed area of your picture element as the cutout area, click outside the edge boundary with the Fill tool.
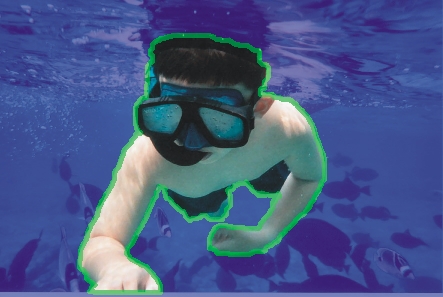
- You can refine the edge or fill areas by reusing the Highlighter, Fill, or Erasertools. These tools become unavailable when you preview the cutout in the next step.
- Click the Preview button (Ctrl+P) to view the cutout progress in the preview window. Use the Zoom and Pan tools to examine the results of the cutout operation. You'll notice that a transparent feathering effect is automatically applied to the defined edges.
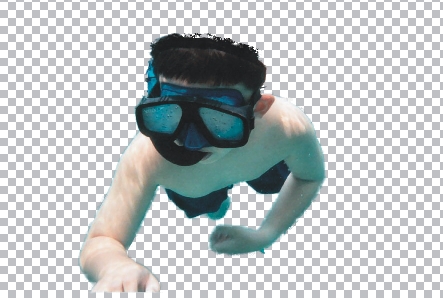
- If an exact boundary edge cannot be detected, use the Add Detail tool (A) or the Remove Detail tool (R) to perform minor fine-tuning. An undetectable boundary can occur when the defined edges are significantly out of focus, are intensely white, or have very low color-intensity values. Both these tools apply transparent feathering.
- With your cutout area finalized, keep the Cutout option enabled in the Cutout Results area, and click OK to return your document window, where the cutout area appears as a floating object. From there, you can use the cutout picture element however you choose.
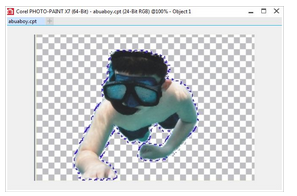
Understanding cutout options
Of course, the Cutout Lab enables you to do much more than just create a basic floating object of your picture element or the background surrounding it. You can use the Cutout Results options to choose how you would like your cutout to be prepared when you exit the Cutout Lab.
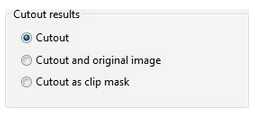
Choosing the Cutout option produces a new floating object of your cutout and deletes the original picture. You can save an original, unaltered version of the image using the File > Save As command. Alternatively, you can copy and paste the floating picture element directly to a destination document, such as a composite photo, and then close the original without saving the changes.
Choosing the Cutout and Original Image option produces a new floating picture element object, but preserves the original image. When you return to the document window, the cutout copy is positioned and ordered directly over the area from which it was cut.
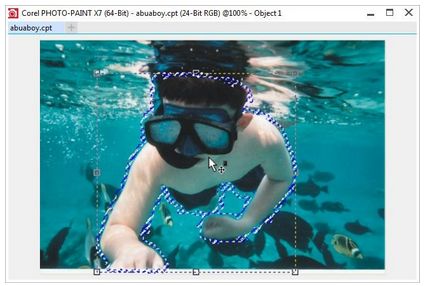
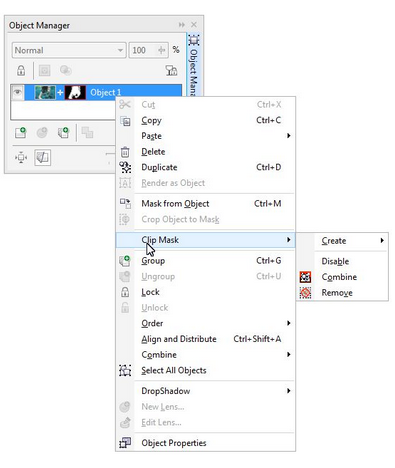
If you choose the third option, Cutout as Clip Mask, a new object is created with a clip mask over the hidden area. This option preserves the originally masked area, allowing you to create other complex effects by manipulating or deleting the clip mask. Corel PHOTO-PAINT enables you to alter clip mask properties by using the Object Manager docker or by right-clicking the mask to access commands in a context menu.
The Cutout Lab offers you intuitive control and creative freedom for isolating intricate picture elements and preserving details, saving you valuable editing time and producing much better results.
Steve Bain is an award-winning illustrator and designer, and an author of nearly a dozen books, including CorelDRAW®: The Official Guide.
Was this article helpful?
Tell us how we can improve it.