Using the Blend Tool and Power Clip in CorelDRAW
This tip has been written for CorelDRAW Graphics Suite X3. While similar features might be available in previous releases the tip will be fully applicable to CorelDRAW Graphics Suite X3 and newer versions only.
In the following tip, you will see how the Blend Tool and the PowerClip tool were used to create a business card and logo for a locksmith service.
- Select a key shape from the Transportation symbol font (symbol 061).
- Select the key and convert it to curves (Ctrl+Q) or Arrange/Convert to Curves.
- Remove the fill from the key and select a heavy (6 - 7 pt) stroke outline color of your choice.
- Copy and paste the key (Ctrl+C and Ctrl+V, or Edit/Copy and Edit/Paste). Make the stroke on this duplicated key lighter (.2 pt) and make the outline color white.
- Select the white key, then select the Blend tool and drag to the larger stroked key.

- Select the Interactive Drop Shadow tool and add a drop shadow to the blended keys.

- Create a box to represent the size of the business card you want and fill it with a radial, gradient fill. Select your key and PowerClip it to the box (Effects/PowerClip/Place Inside Container). You can also edit the positioning of the key by selecting Effects/PowerClip/Edit Contents/Finish Editing This Level.
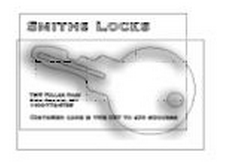
- Select the Text tool and add your text.

You're done!


Was this article helpful?
Tell us how we can improve it.