

by Suzanne Smith
Color styles can be combined into groups called harmonies. A harmony allows you to link color styles into hue-based relationships and modify them together as a set. By editing color styles in a harmony, you can quickly create a variety of alternate color schemes by shifting the colors together, or you can alter the color composition of your artwork in one step.
You can create a color harmony from scratch or from the colors of an existing object.
This tutorial will teach you:
- how to create new color harmonies from color swatches
- how to associate the colors in a color harmony with objects within the document
- how to create color harmonies from existing objects
- how to edit the colors within a color harmony
- how to exclude colors from a color harmony
- how to create a gradient color harmony
- how to export your color styles and harmony folders as a CorelDRAW style sheet for future use
For additional information on color harmonies, see “Creating and applying color styles” in the Help.
Creating a color harmony from scratch
To create color styles and color harmonies you must first open the Color Styles docker by clicking Window > Dockers > Color Styles (Ctrl + F6).
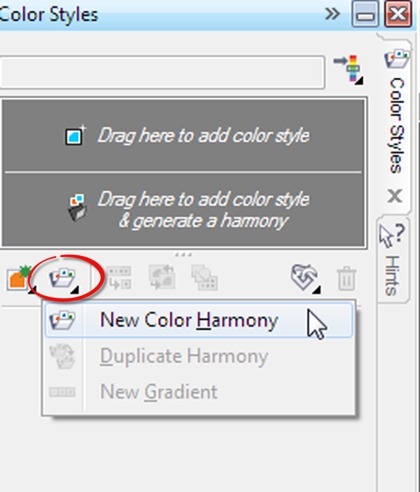
In the Color Styles docker, click the New color harmony button and choose New Color Harmony.
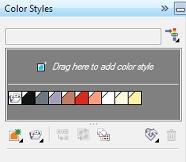
A folder icon for the color harmony appears in the bottom part of the gray area.
Drag any color swatches or color style swatches to the harmony folder.
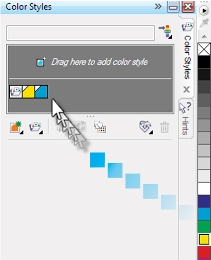
To continue adding colors to the harmony folder that you just created, drag additional color swatches directly onto the harmony folder icon.
Note: Dragging color swatches to the lower panel, but not onto the harmony folder icons, creates additional harmony folders.
Associating colors from the new color harmony with objects in your document
Choose a color swatch from the harmony folder and drag it to one or more objects. This links the harmony color with that object, so that it will be automatically updated whenever you edit the harmony colors.
Creating a color harmony from existing objects
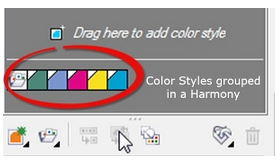
1. Drag an object to the bottom part of the gray area in the Color Styles docker.
2. In the Create Color Styles dialog box, enable the Group color styles into harmonies check box and drag the slider all the way to the left until 1 appears in the box.
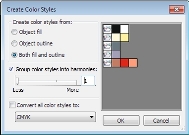
3. This will generate color styles from the object’s colors and group the color styles into a single harmony folder.
Editing a color harmony
When you edit a color harmony, you can change all color styles simultaneously by preserving the relationship between them, or you can modify individual color styles within the harmony.
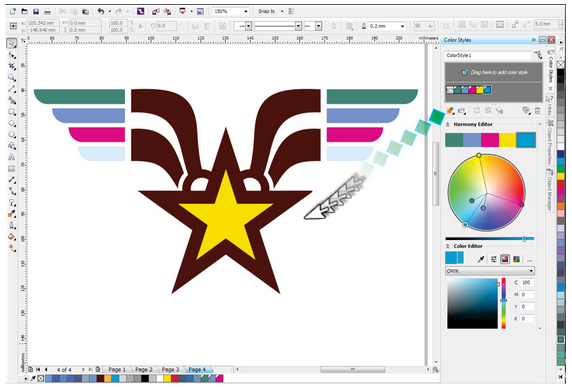
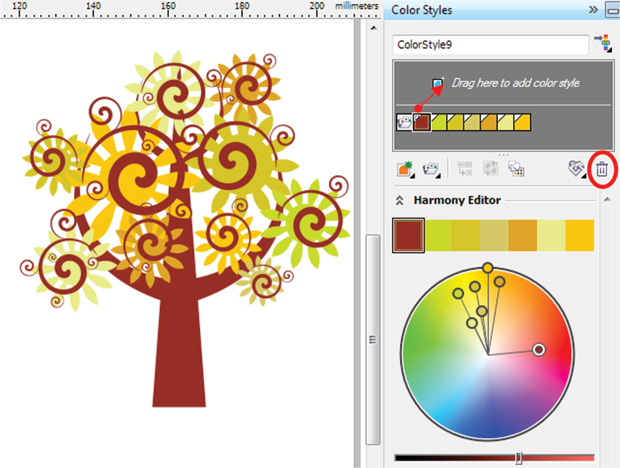
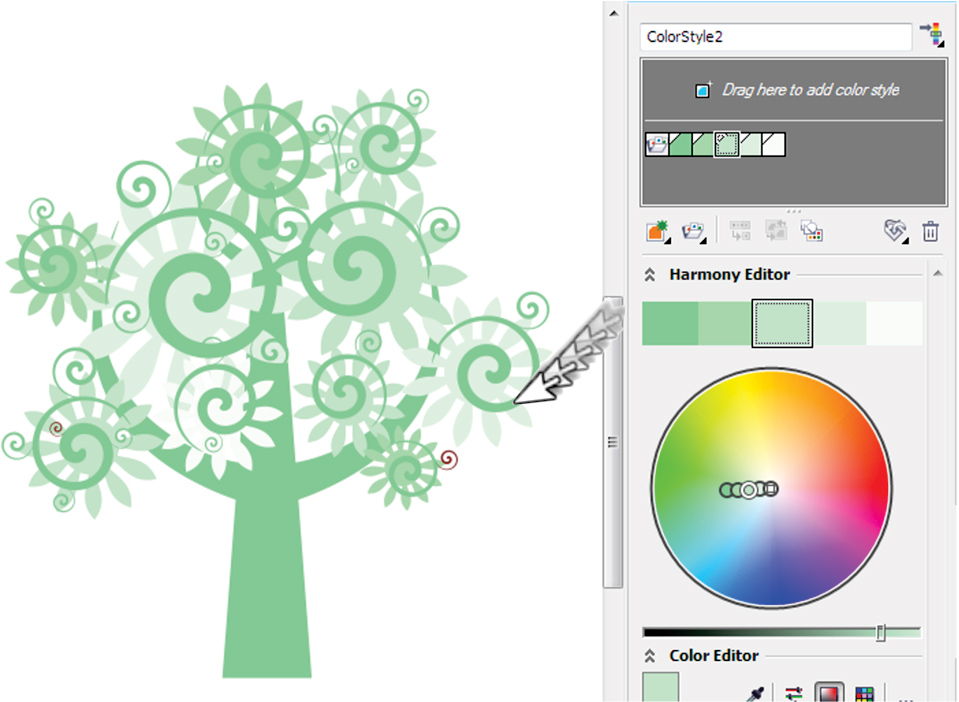
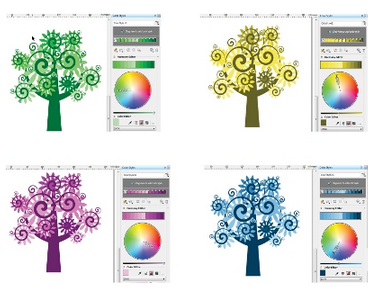
This color harmony was created by dragging a clipart object from the document window to the color harmony folder (the bottom part of the gray area) in the Color Styles docker.
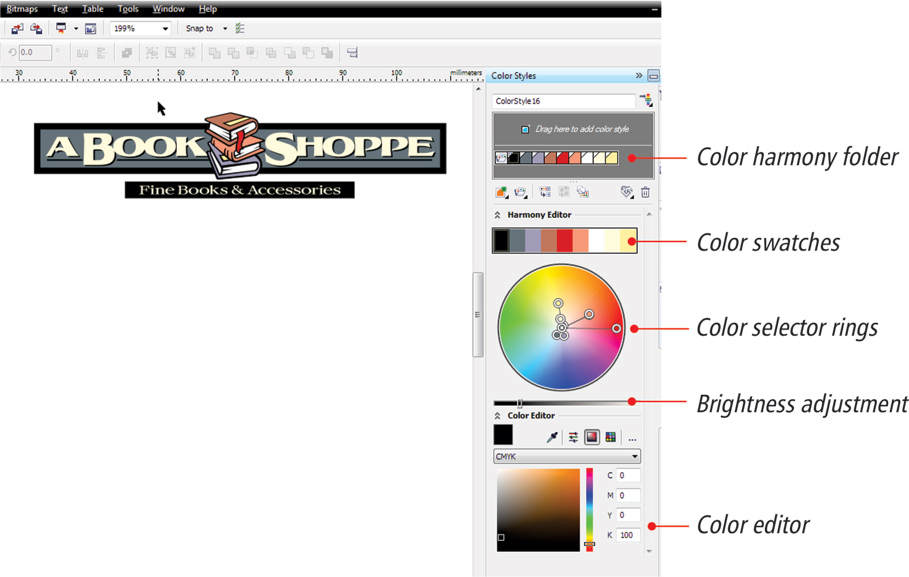
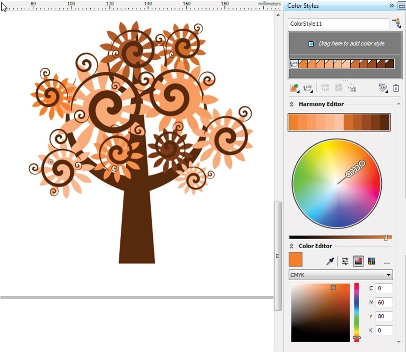
To modify the colors in a harmony, click on any of the color selector rings, and rotate the rings in the color wheel.
To change the value of only one color, click on a color selector swatch (in either the color harmony folder or the Harmony Editor). The corresponding color selector ring will become highlighted in the color wheel so that you can adjust the color.
To select all colors again, just click an area outside of the color wheel.
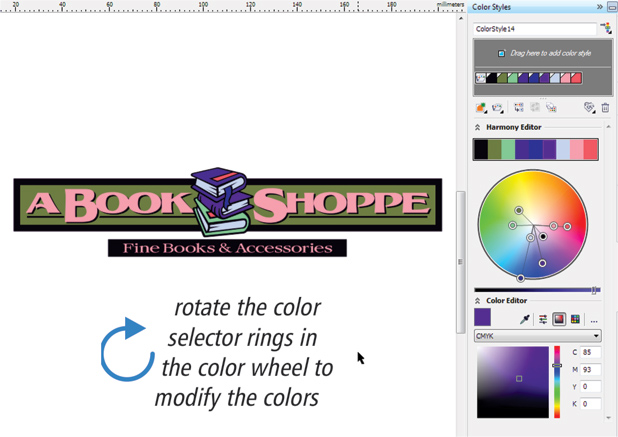
Using the Harmony Editor, you can experiment with different color schemes. By changing one color, you can also find other colors that go well with that color.
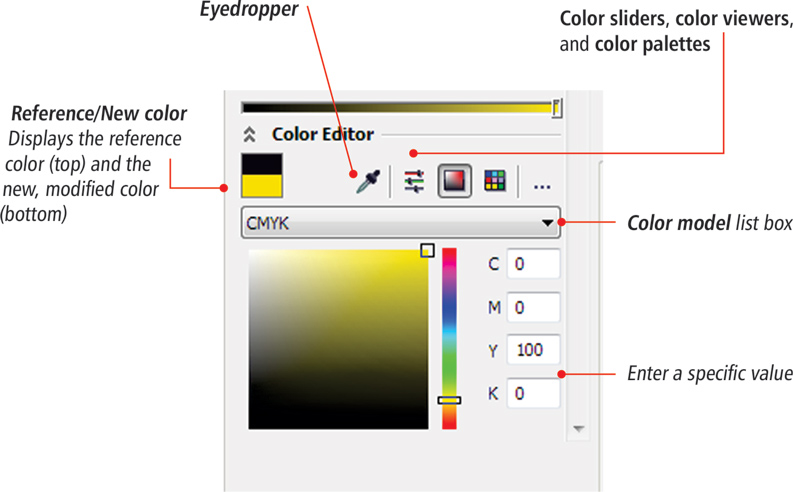
Applying precise color values to a harmony color style
After selecting a specific color from the harmony folder, the Color Editor provides several options for editing the color. You can use the Eyedropper tool to sample a new color from within the CorelDRAW workspace, or from the desktop. You can also use any of the color sliders, color viewers, and color palettes to pick a precise color.
Excluding colors from a color harmony folder
There might be situations where you want to ensure certain object colors do not get changed.
For example, you might want to protect the brown color of the tree trunk, but modify the remaining leaf colors in a color harmony folder. There are two ways to do this:
- Drag the swatch of the color that you want to protect to the top part of the gray area in the Color Styles docker, which removes the color from the harmony folder and creates an individual color style.
- Select the swatch of the color that you want to protect, and click on the Delete button, which to completely removes the color from the color harmony folder.
Creating gradient color harmonies
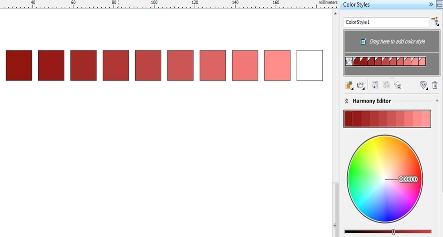
CorelDRAW allows you to create a special type of color harmony called a gradient. A gradient consists of a master color style and a number of shades of that color. In most of the available color models and palettes, the derivative styles share the same hue as the master color style, but have different saturation and brightness levels.
Note: In the PANTONE MATCHING SYSTEM and custom spot color palettes, the master color style and the derivative styles are linked to one another but have different tint levels.
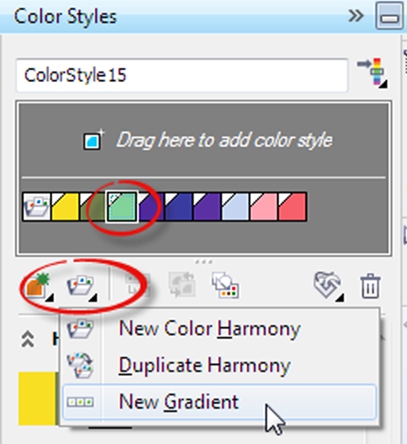
1. In the Color Styles docker, select a color style swatch (or drag a color swatch from an open palette to the bottom part of the gray area in the docker).
2. Click the New color harmony button and choose New Gradient.
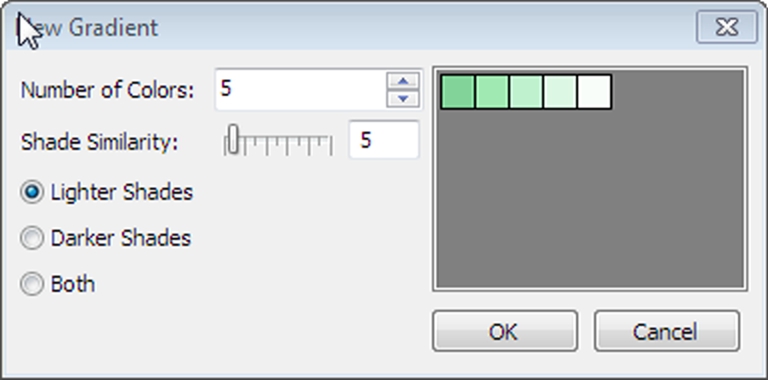
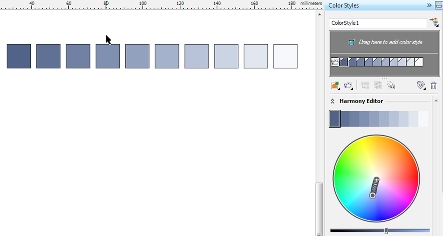
3. In the New Gradient dialog box, accept the default settings, and click OK. The New Gradient dialog box allows you to specify the number and type of shades that you want to create from the selected master color style.
When you change the hue of the master color style in a gradient, you automatically update the related color styles, based on the new hue and the original saturation and brightness values.
Assigning gradient color harmonies to objects
After you create a gradient, you can apply it to the design elements in your document by simply dragging a color swatch from the harmony folder to an object .
Saving color styles and harmony folders as CorelDRAW style sheets
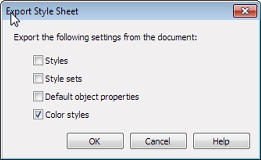
You can make styles and style sets available for use in other documents by exporting them to a CorelDRAW styles sheet (.cdss) file. A style sheet contains all the object styles, style sets, color styles, and default object properties in the active document.
1. In the Color Styles docker, click the Import, export or save defaults button, and choose Export Style Sheet.
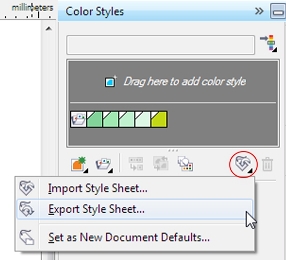
2. In the Export Style Sheet dialog box, type a name for your style sheet in the File name box, and click Export.

You can also use styles and style sets from other documents by importing the style sheet to which they were saved.
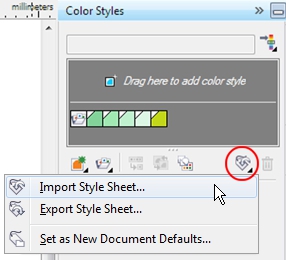
1. In the Color Styles docker, click the Import, export or save defaults button, and choose Import Style Sheet.
2. In the Import Style Sheet dialog box, navigate to the folder in which the style was saved, select it, and click Import.
Notes: You can share your harmony folders and color styles with other CorelDRAW X7 users, or import them on another machine. Simply email the stylesheet.cdss file and import it into CorelDRAW X7.
You can also import styles and style sets from an existing CorelDRAW file by selecting the file in the Import Style Sheet dialog box and clicking Import.
Was this article helpful?
Tell us how we can improve it.