This tip has been written for CorelDRAW® Graphics Suite X3. While similar features might be available in previous releases the tip will be fully applicable to CorelDRAW Graphics Suite X3 and newer versions only.
Whether you are working with a drawing or an imported bitmap, the new Crop tool lets you remove portions of your graphic quickly and easily. You no longer need to ungroup objects, break linked groups apart, or convert objects to curves to remove unwanted areas in a graphic.
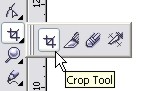
The Crop tool is located in the toolbox, on the Crop tool flyout.
To crop objects, you define a rectangular area (cropping area) that you want to keep. Portions of the graphic outside the cropping area will be removed. You can specify the exact position and size of the cropping area, and you can rotate and resize it.


To crop a graphic
1. Open the Crop tool flyout  , and click the Crop tool
  .
.
Important note: If an object or bitmap is selected, only the selected item will be cropped. If no objects are selected, the entire graphic will be cropped.
2. Drag to define a cropping area.
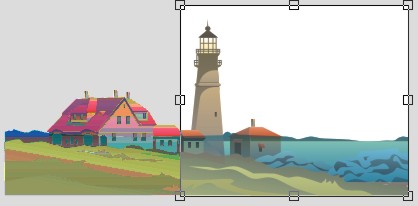
3. If you need to adjust the cropping area, perform any of the following tasks:
- To move the cropping area, click inside the cropping area and drag it to a new position. If you want to specify the exact position of the cropping area, type values in the Position boxes on the property bar.
- To resize the cropping area, drag any of its handles. If you want to specify the exact size of the cropping area, type values in the Size boxes on the property bar.
- To rotate the cropping area, click inside, and drag a rotation handle. You can also type values in the Angle of rotation box on the property bar.

4. Double-click inside the cropping area.
Cropped objects, including text objects, are automatically converted to curves.

Was this article helpful?
Tell us how we can improve it.