

Using the Cutout Lab
This tip has been written for CorelDRAW Graphics Suite X3. While similar features might be available in previous releases the tip will be fully applicable to CorelDRAW Graphics Suite X3 and newer versions only.
The Cutout Lab in Corel PHOTO-PAINT is designed to improve accuracy and simplify the process of cutting out image areas, making it ideal when you're trying to isolate part of a photo with a soft edge, such as fur, hair, or leaves.
The Cutout Lab includes the Add Detail and Remove Detail tools to help you easily refine the cutout area. For easy reference when defining the cutout area, you can preview your cutout against the original image, or transparent, white, gray, or black backgrounds. For maximum flexibility, you can choose to save the cutout object and discard the original image, save the cutout object and keep the original image, or save the cutout object as a clip mask added to the original image.
You can easily tweak the edges of the cutout area. In addition, the Cutout Lab includes Undo and Redo buttons so that you can quickly correct any mistakes.
To isolate image areas with the Cutout Lab
1. StartCorel PHOTO-PAINT, and open an image.
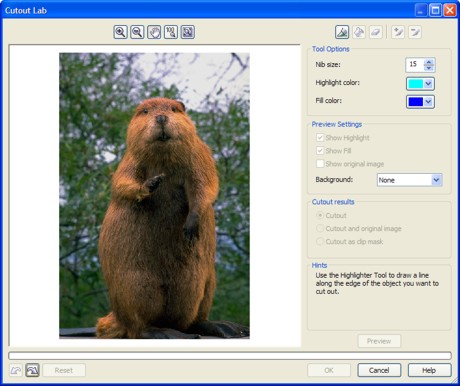
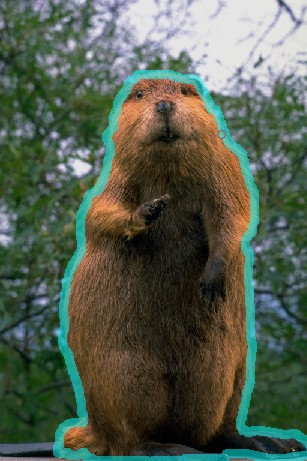
2. ClickImage > Cutout Lab. 3. In the Cutout Lab dialog box, click theHighlighter tool. 4. In the preview window, draw a line along the edges of the image area that you want to cut out.
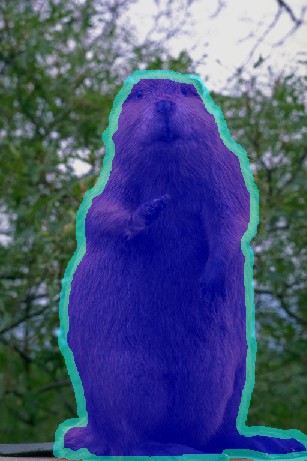
5. Click theInside Fill tool, and click inside the area you want to cut out.
6. ClickPreview.
7. If necessary, use theAdd Detail andRemove Detail
 tools to refine your cutout object.
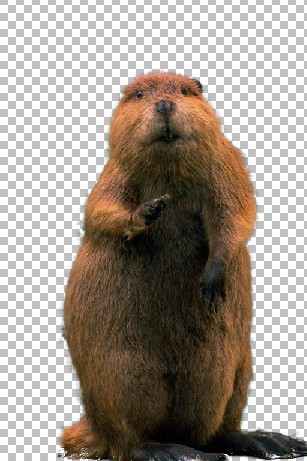
8. From theCutout Resultsarea, choose any of the following options:
- Cutout creates a cutout object and discards the original
- Cutout and original creates a cutout object and preserves the original
- Cutout as clip mask creates a clip mask attached to original
To modify the edges of the cutout area
- Click theEraser
 tool, and drag over the highlight and fill that you want to delete.
The Eraser tool is available before you click Preview.
To undo and redo actions
- Click theUndo
 orRedo
 button.
You can revert to the original image by clickingRevert.
Was this article helpful?
Tell us how we can improve it.