

High Dynamic Range or HDR Exposure Merge lets you combine two or more photos of the same scene that were taken with different exposure settings.
For high-contrast scenes, such as sunsets or other backlit situations, it means that you can pull the perfect exposure for the foreground, mid-ground, and background into one image. Taking photos for HDR processing takes a little planning, but the results are worth it.
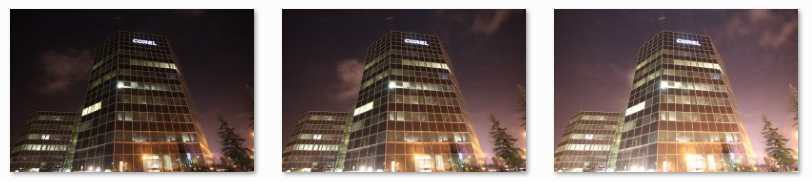
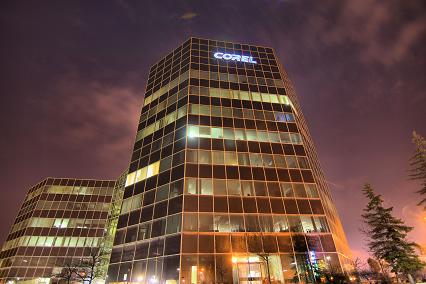
In this example I have 3 raw images of a building, taken at night using a tripod. I'll be combining them into a single image that captures the most dynamic components of each exposure.
1. First, launch AfterShot Pro. If you have the 64bit version installed, it is preferable to run that one, as it will perform faster with larger resolution files.
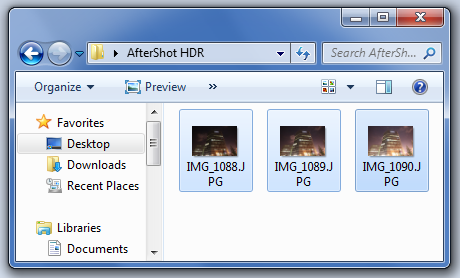
2. Next, from the File menu, open the images that you will be working with. To import multiple photos at once, hold the Ctrl key down on the keyboard while selecting the images, and then click Open.
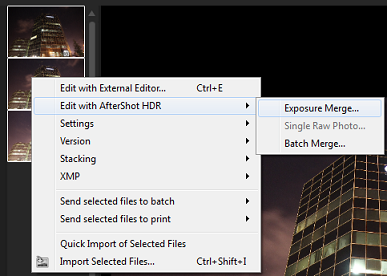
3. Hold down the shift key, select all three images, right click over the images and choose Edit with AfterShot HDR and then Exposure Merge. This will launch the Merge application.
If this is the first time you’ve used HDR Merge, the Getting Started window will pop up and provide a brief overview of how to use the feature.
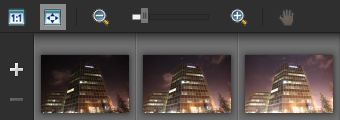
4. If the merge application has loaded photos you don’t want you use, you can remove them from the tray by selecting them and then clicking the minus sign.

5. To add photos, click on the Plus sign and then browse to the folder containing your images.

6. The image thumbnails will appear at the bottom of the screen in the tray.
7. Next, highlight all the photos by clicking each one while holding down the Ctrl key on the keyboard and then select the alignment option. Even if a tripod was used, sometimes the slightest movement is noticeable when combining multiple shots.
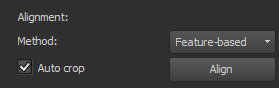
In this example I will select Feature-based, this way AfterShot Pro will look at a lot of the main components of each photo to get an idea of how to line them up.
8. Check Auto crop, and the software will automatically clean up the edges after aligning the subjects of the photo.
9. Next, click on the Align button. After the process is complete, the images will match.
10. To begin the merge, click Process in the bottom left corner of the screen.

11. When the processing is complete the HDR Adjustment window will pop up and display a large version of the merged photo on the right, and thumbnails of various presets on the left, which you can use to give your image an artistic touch. In this example I will select Default 2.
12. Scroll down through the list of adjustments to make changes to other aspects of the Presets such as Temperature, Contrast and Shadows.
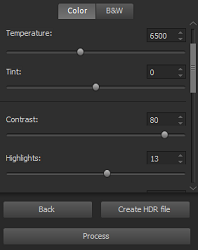
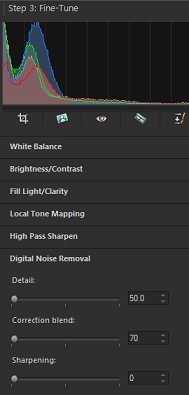
13. Next, click the Process button again to complete the merge.Now a larger list of options will appear for you to continue editing the HDR photo.
14. You can make further adjustments to the brightness and shadows in this window as well.
In this example, I will also apply Digital Noise Removal to smooth out the sky area. This is often needed for photos that were taken at night with high ISO.
15. When you're satisfied with the result here, click Save and Close to save your project.
16. When you have completed the editing, go to File > Save As and select JPEG.
If you have enjoyed this tutorial, be sure to check out the other tutorials that are available in the Discovery Center. If you have any ideas for tutorials or projects that you would like to see in the future, please leave us some Feedback.
Was this article helpful?
Tell us how we can improve it.