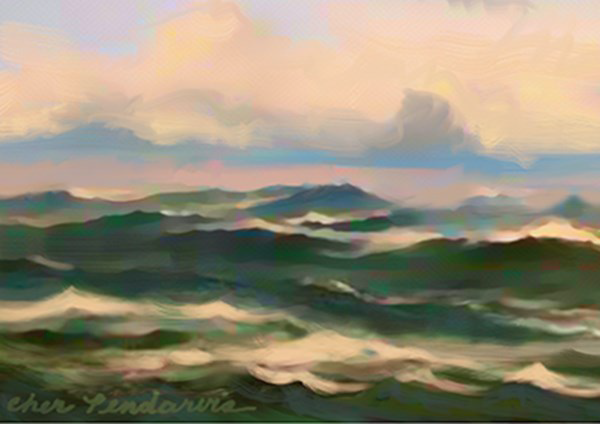
The Fetch by Cher Pendarvis
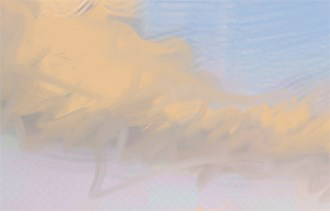
A detail of the clouds showing brushwork painted with the Opaque Acrylic
Corel Painter stands out above all other imaging programs because of its brushes. Painter boasts hundreds of realistic brushes. In this piece, we investigate one of the Acrylics brushes, the Opaque Acrylic. After trying out the brush, we’ll dive in to the Brush Controls to learn more.
The Opaque Acrylic brush was wonderful for painting areas of the water and sky in my study for The Fetch. A detail of the study is shown above. The brush lays down color quickly over broad areas, and can also paint expressive detailed strokes.
1. Choosing the brush and painting strokes. In the Brush Selector, choose the Acrylics category, and then choose the Opaque Acrylic from the variants menu. Open a new file, and paint a few practice strokes. Notice the realistic brush marks that the brush paints. The natural brush hairs that you see in the brush marks are due to the brush’s Static Bristle dab type, and its special bristle settings.

The Brush Selector with the Opaque Acrylic brush chosen

Stroke painted with the Opaque Acrylics variant of Acrylics
2. Diving in to the brush controls. Next, open the Brush Controls.Choose Window > Brush Control panels > General. In the General panel, notice that the dab type is set to Static Bristle. The Static Bristle Dab type allows you to create a wide variety of bristly looks. The Stroke Type is set to Single, which is the most efficient when using the Static Bristle Dab Type. The Method is set to Cover, which allows you to have good coverage when painting light colors over dark ones. The Soft Cover Subcategory gives a softer edge to the brush marks. For improved brushing performance when using a multicore computer, enable the Multicore checkbox on the General panel.
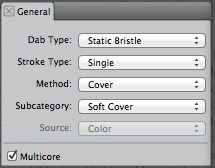
The General panel shows the Dab Type, Stroke Type, Method, Subcategory and Source
Open the Dab Preview panel by clicking its tab in the Brush Controls. The Dab Preview shows the bristly dab type when the Preview Brush Dab button is enabled, as shown in the illustration.
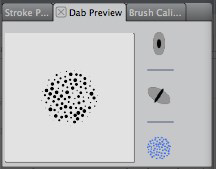
The Dab Preview shows the bristly dab type when the Preview Brush Dab button is enabled
Next, click the Size tab to open its panel. The Size slider shows the adjustment of the Size (diameter), Min Size slider (minimum diameter), and the Expression pop-up menu which is set to Pressure, allowing the brush to paint thick-to-thin strokes based on the pressure applied.
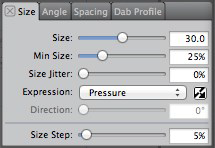
The Size panel shows the adjustment of the Size (diameter), Min Size (minimum diameter), and the Expression pop-up menu which is set to Pressure, allowing the brush to paint thick-to-thin strokes based on the pressure applied.
Open the Well panel by clicking its tab. The Resaturation slider controls how much paint flows through the brush and the Bleed slider controls how much the pigment with mix, or bleed into other colors on your image. This is an opaque brush that is not designed to blend, so Resaturation is set to 100% and Bleed is set to 0%.

The Well panel. The Resaturation slider controls how much paint flows through the brush and the Bleed slider controls how much the pigment will mix, or bleed into other colors.
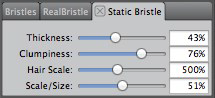
The Static Bristle panel shows the adjustment of the Thickness, Clumpiness, Hair Scale and Scale/Size of the bristles
Now, click the Static Bristle tab to open its panel. The Static Bristle panel features the Thickness, Clumpiness, Hair Scale and Scale/Size of the bristles, which give the Opaque Acrylic brush much of its personality. The Static Bristle sliders control the size of the bristles, their spacing, and how the bristles interact with one another, for instance, if they are more evenly spaced, or clumpier. The Thickness determines the density of the brush bristles, Clumpiness controls how bristles adhere to one another, and Hair Scale determines the size of the brush hairs. Scale/Size interacts with Hair Scale, a lower setting builds thicker bristles, and a higher setting builds thinner bristles. Experiment with each slider in the Static Bristle panel and paint a stroke, and you will see different bristle looks, as shown in the illustration below. Before each experiment, restore the default brush by choosing Brushes > Restore Default Variant. The brush experiment settings that I used are: Default, then Thickness decreased to 10; default, then Clumpiness increased to 100; default, then Hair Scale increased to 100; default, then Scale / Size increased to 96.
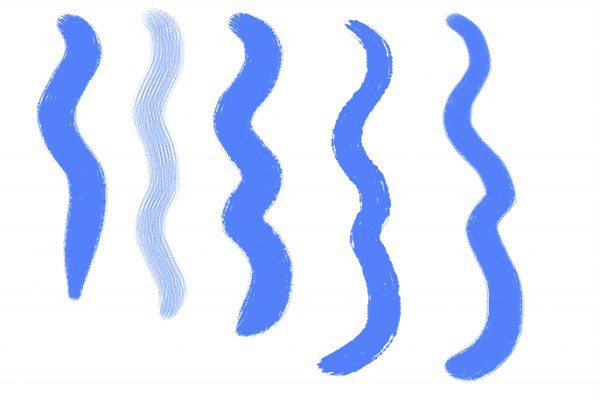
Brushstrokes left to right: The default Opaque Acrylic, Thickness decreased to 10; default settings, then Clumpiness increased to 100; default settings, then Hair Scale increased to 100; default settings, then Scale / Size is increased to 96.
Happy painting!

Was this article helpful?
Tell us how we can improve it.