Cause
There are some instances where the need to change the default output device is warranted, in order to hear audio from your application. Below are various methods of changing the default device.
Method 1: Using the Sound flyout
The simplest way to change your playback device in Windows is to select it from the Sound flyout. Click or tap on the sound volume icon from the system tray, and then click/tap on the current playback device.
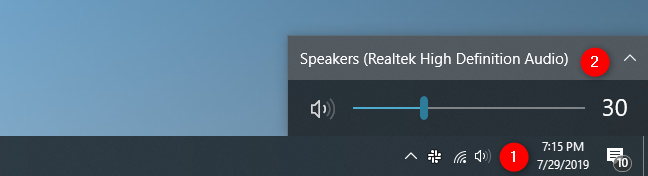
The Sound flyout then shows you all the playback audio devices that are available for you to use. All you have to do is to select the one you prefer from the list.

Method 2: Using the Settings app
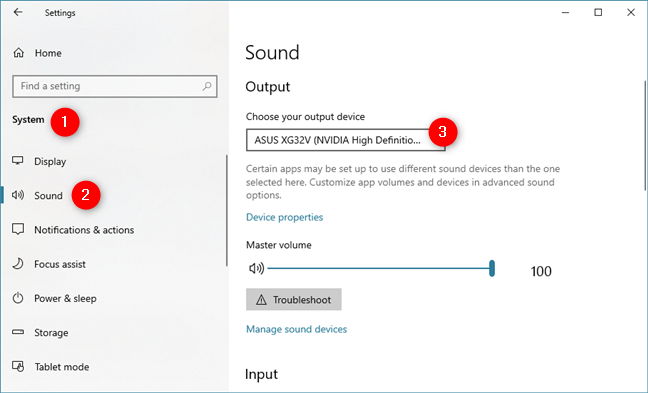
Similarly, you can also choose what audio device you prefer to use for playback, from the Settings app. However, this method involves a few more steps. Start by opening the Settings app: a fast way is to click or tap on its button from the Start Menu.
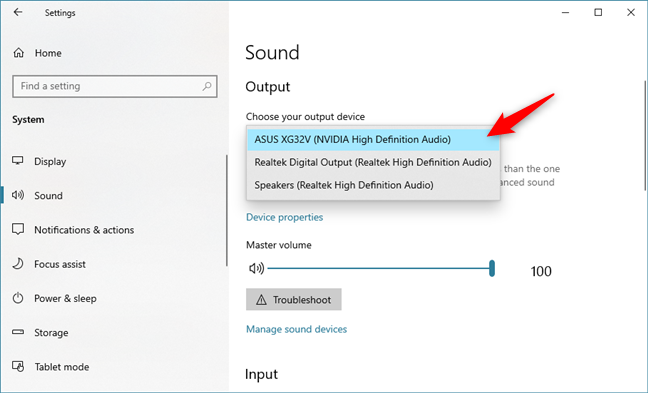
In the Settings app, navigate to System, and then to Sound. On the right side of the window, click or tap on the currently selected playback device under "Choose your output device."
The Settings app should show you a list of all the audio playback devices available on your system. Select the one you prefer.
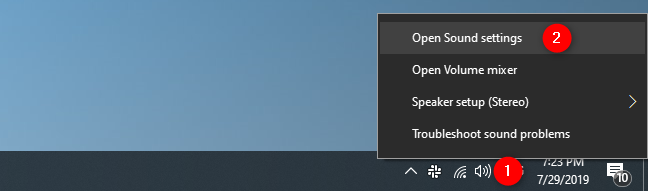
NOTE: There are also slightly faster ways to get to the Sound section from the Settings app. For instance, you can use the search, or you can right-click or press and hold on the sound volume icon from the system tray, and then click or tap on "Open Sound settings."
A faster way to open the Sound settings in Windows 10
Method 3: Using the Sound settings from the Control Panel
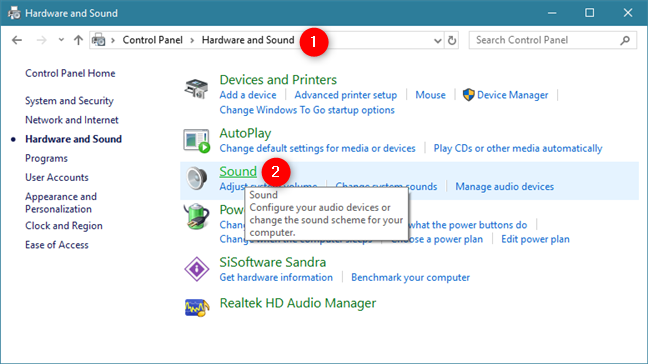
You can also use the classic Sound window to change the default playback device on your Windows 10 system. However, getting to it is a bit more cumbersome than it used to be in the past. Open the Control Panel, navigate to Hardware and Sound, and click or tap on Sound.
This action opens the Sound window, where you set your default audio devices.
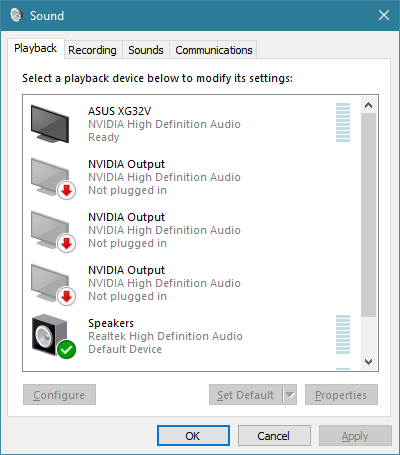
In the Playback tab, you are shown all the playback devices that are available on your Windows computer. Each system is different, and what you see reflects that. You can also see which devices are actually available. Some devices might not be plugged in, so they are greyed out. A green checkmark indicates the current default device.
To choose another audio device as your default playback device, click or tap on it, and then the Set Default button.
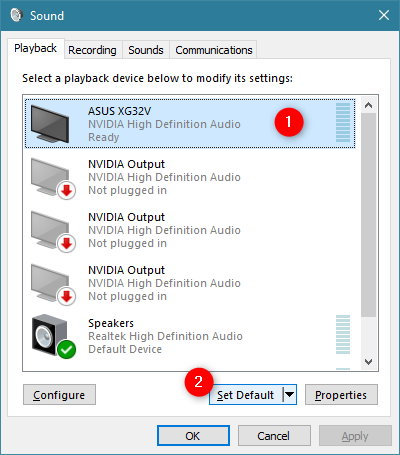
The selected device is now your default playback device in Windows. All playback audio is now routed through that device.
The Sound flyout then shows you all the playback audio devices that are available for you to use. All you have to do is to select the one you prefer from the list.
Was this article helpful?
Tell us how we can improve it.