A mixed mode CD is a compact disc that contains both data and audio. Data is always stored in track 1, while audio is stored in the remaining tracks. Most audio CD players will know to skip track 1 that contains data and play the rest of the tracks that contain the music tracks. Older audio CD players, on the other hand, may attempt to play the Data in track 1, which will come out as screeching sounds - this could be damaging to speakers. It is important to check your CD player's documentation to see if it supports mixed mode CDs.
Purpose
The purpose of a mixed audio CD, among other things, is to be able to provide text or html files containing interesting information about the music tracks included in the audio CD. Mixed mode CDs were originally intended to add CD-quality audio and music to video games on CDs. Later uses included interactive educational CDs where audio played along with images or text displayed on the screen.
Procedure
Below are the steps to follow to burn your first mixed mode CD in Creator NXT:
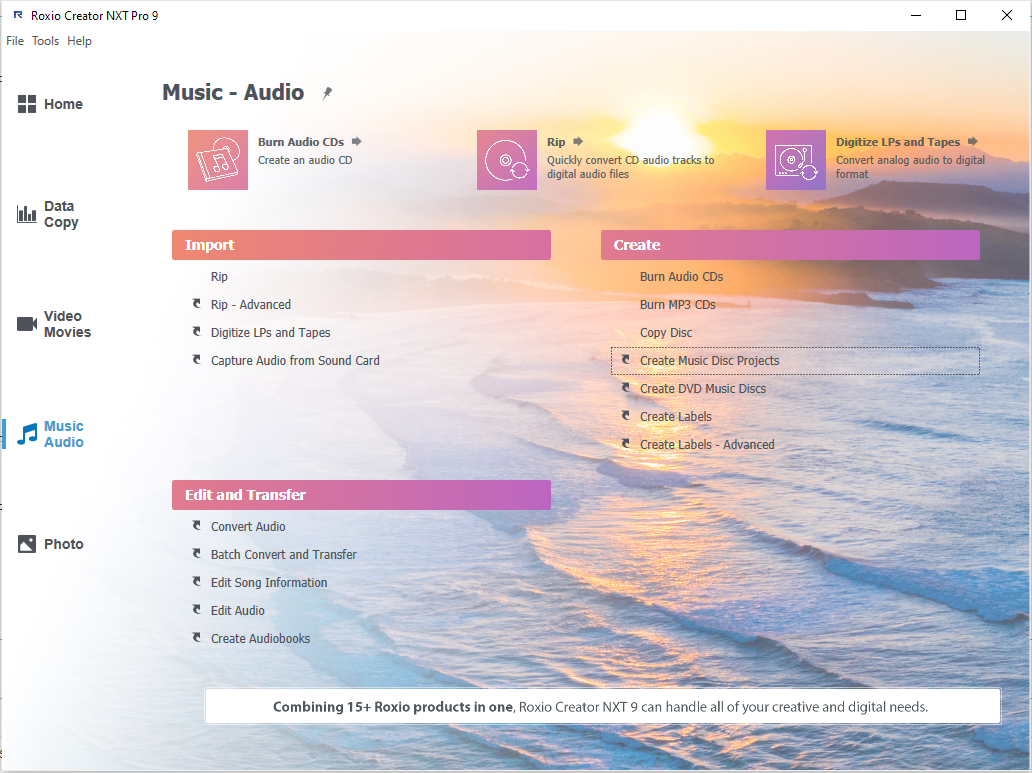
- Launch your Creator NXT program and select "Create Music Disc Projects".
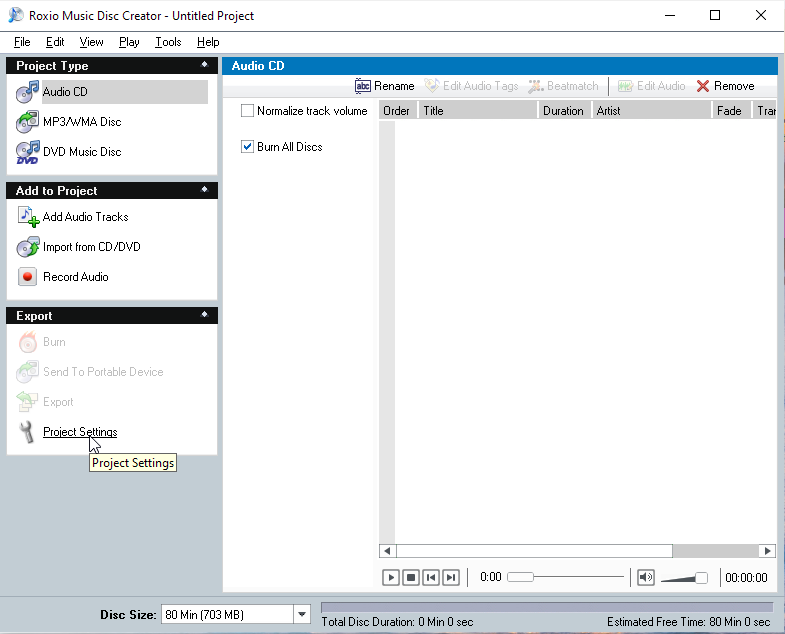
- The Roxio Music Disc Creator application window will come up on your screen. Click on Project Settings on the left-hand pane.
- The AudioCD Project Settings dialog box will come up. Fill out all the necessary information and make sure you tick the box next to "Add data folder to disc".
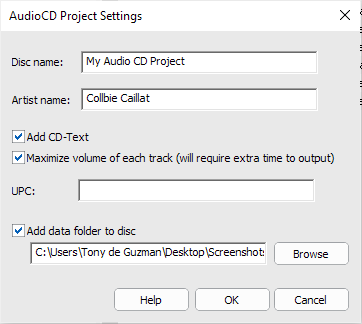
The "Add data folder to disc" is what will make this a mixed mode CD. Click the Browse button, navigate to and add your Data folder. Click the OK button to close the dialog box.
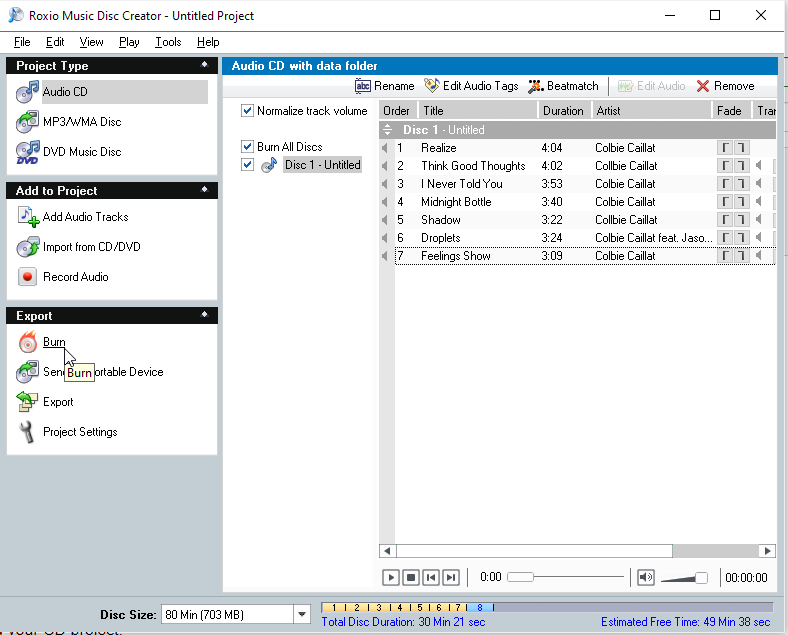
- Back in the Music Disc Creator window, add your music tracks by clicking on the "Add Audio Tracks" button. Click on the "Burn" button to start setting up your project for burning.
- The Audio CD Burn Setup dialog box will now come up. Select the CD burner you would like to use for this session if you have more than one and make sure a blank recordable CD is inserted.
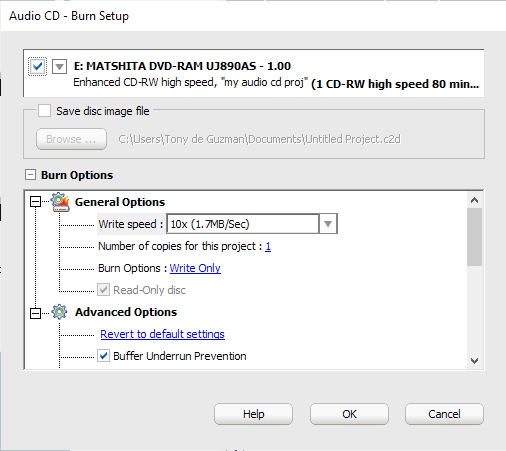
- Click the OK button to start burning. A progress box will show you the completion percentage.
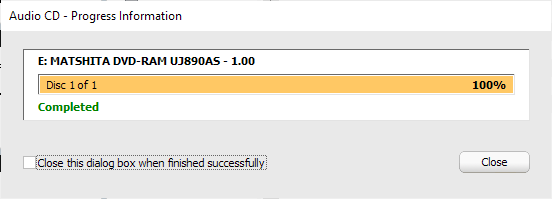
The progress bar will show 100% and the status "Completed" below it once the burn process is finished.
You're Done!
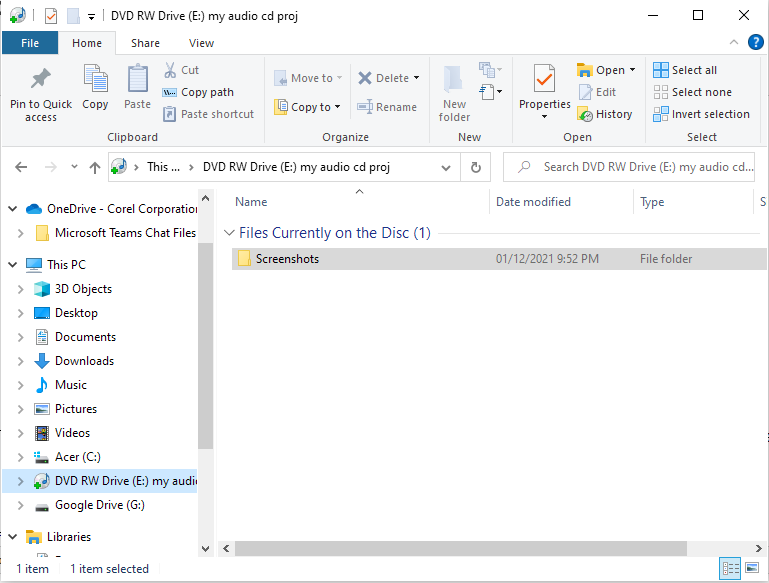
That's it. You now have a mixed mode CD. You can access the data portion of the CD by opening the disc in a File Explorer window.
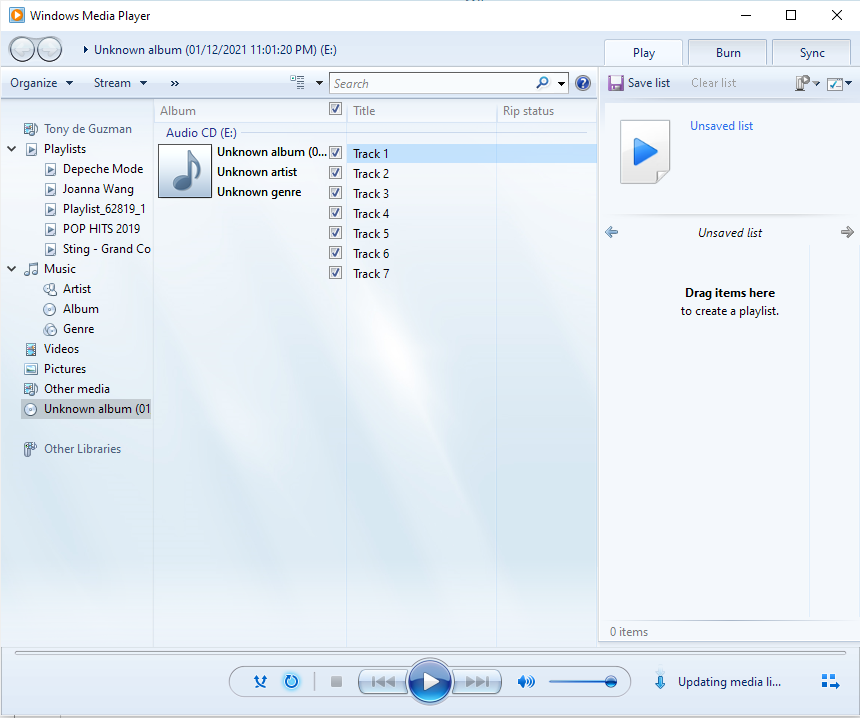
If you insert the CD in your CD player, it will appear like any other audio CD showing the music tracks.
#- INTERNAL (content below this line is not visible in published article) -
Was this article helpful?
Tell us how we can improve it.