The Menu Template Designer
One of the new features introduced with Toast 20 is called the Menu Template Designer. Using this new tool, you can create custom disc menu templates in Toast 20 to give your disc projects that polished look. Custom menu templates let you choose the background imagery (static photos or video clips) for your menus, arrange the elements on your menu pages, choose the navigation icons, select the music, and more.
The Template Designer workspace
The template designer workspace consists of the following components:
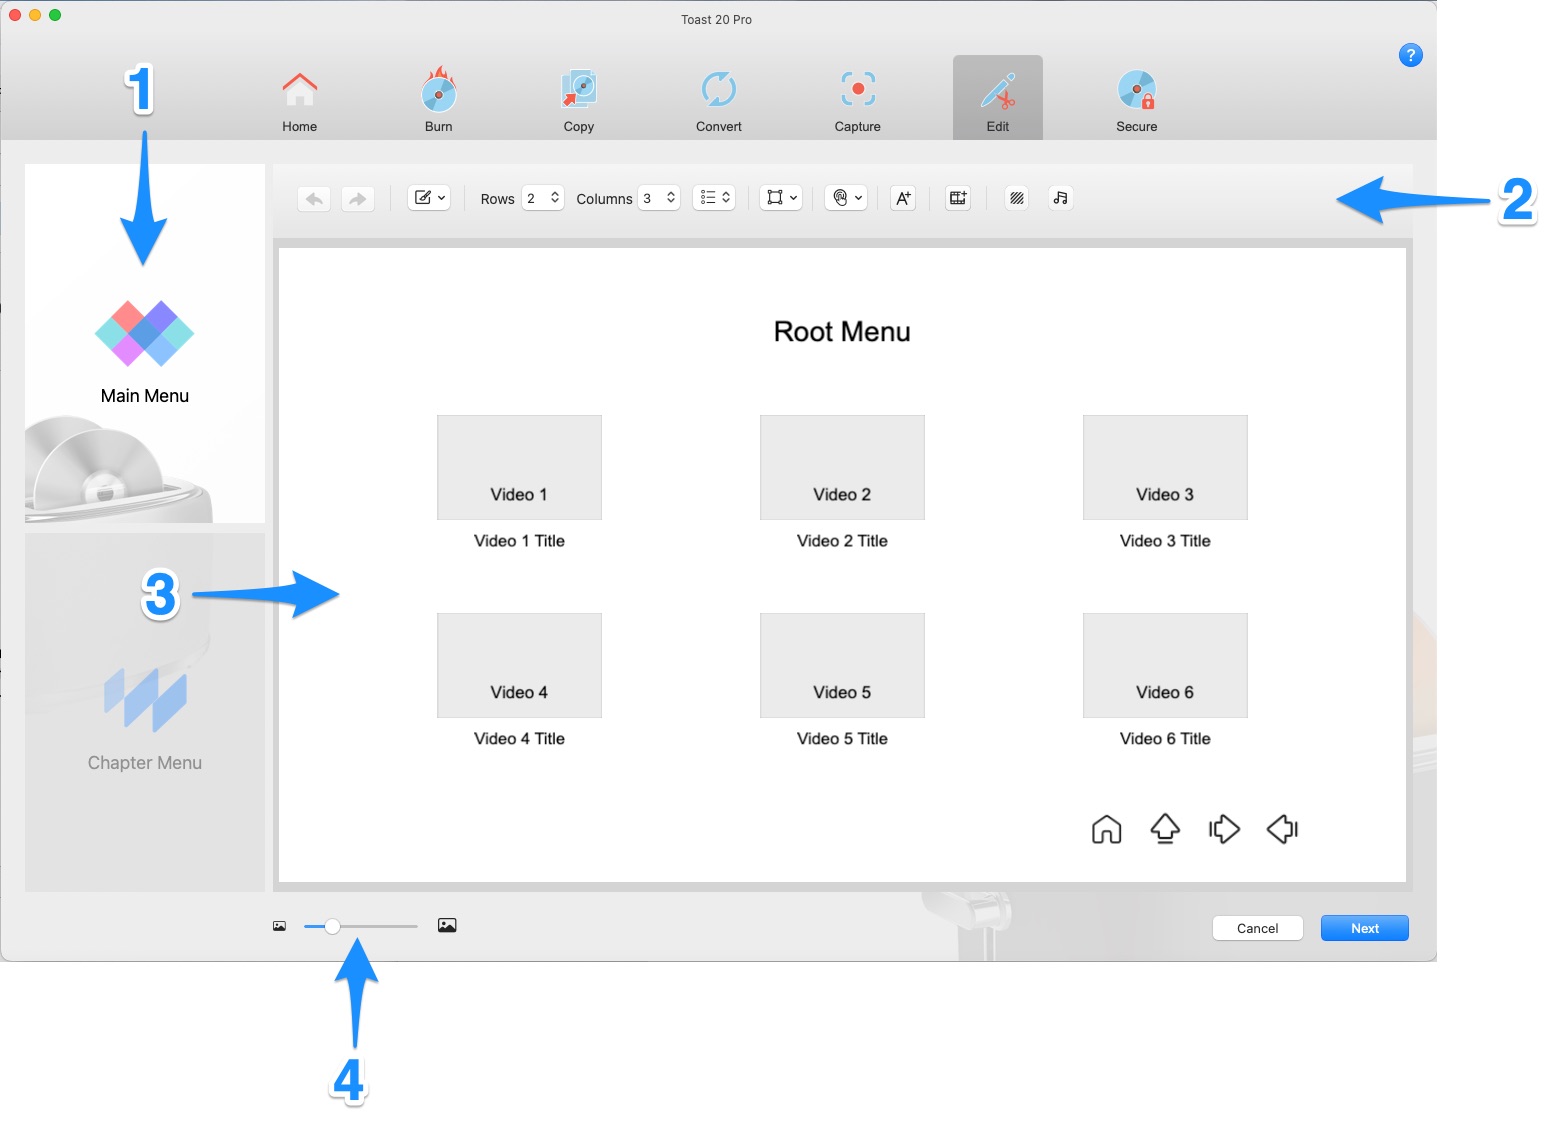
- Main Menu/Chapter Menu: This area lets you choose between designing the main menu and the individual chapter menus.
- Property bar: Lets you access and choose custom settings for your design. Some settings are presented in a drop-list, while others let you navigate to an asset you want. In addition, some options open a settings panel. For example, if you add new text or click on text in the preview area, a panel with text formatting options displays to the right of the preview area.
- Preview area: The preview area lets you see what your menu looks like. It is also interactive—you can click to select any element on the menu and either adjust the corresponding settings or drag the element to reposition it. Guidelines appear to help you align elements that you drag.
- Zoom level: You can zoom in or zoom out of the preview as you perfect your design.
Creating a menu template with a video background
To design a video disc menu template and use a video clip as your background, follow these simple steps:
- In Toast start a Burn Video project.
- Ensure the Theme button (left upper corner) is enabled.
- Click the plus sign below Design new template.
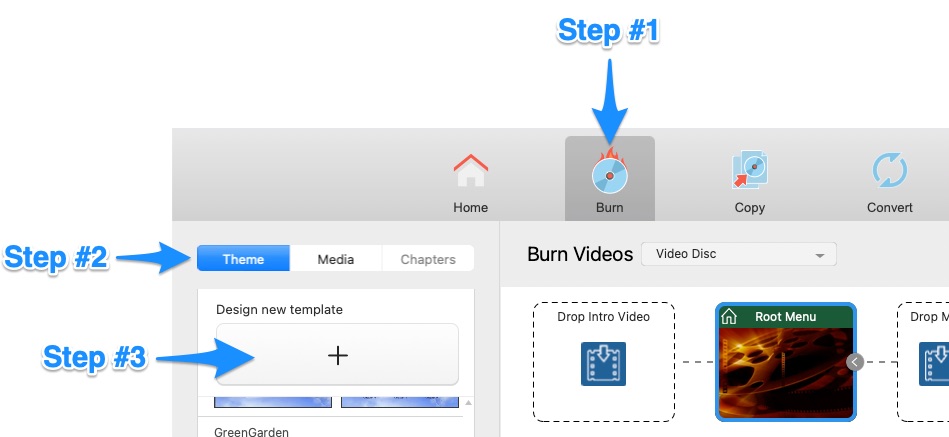
- Click Main Menu (on the left).
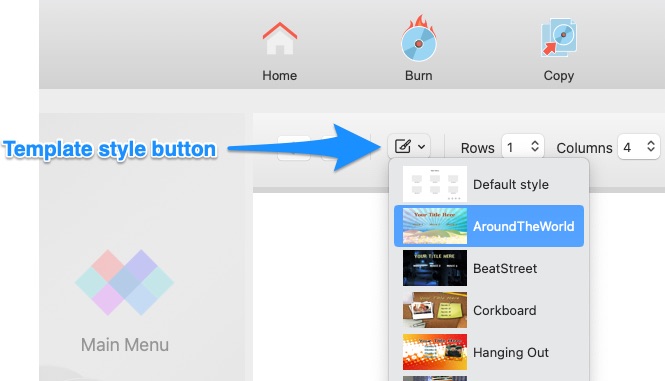
- Click the Template style button, and choose a preset style as a starting point.
Note: hover your mouse pointer for 1 to 2 seconds over each of the buttons on the property bar to get a tool tip of the button name.
- If you want to change the layout, do one of the following:
- Click the "Change the layout of contents" button.
- Change the values for the Rows or Columns
- In the preview area, click an element that you want to change, and drag it to a new position.
- If your template has preview thumbnails and you want to change their border style, click the "Change the border style of previews" button. You can choose from None (no border), Preset (choose from the list), Color (apply a color from the Colors window), or Custom (import a frame).
- If you want to change the style of the navigation icons, click the "Change the button style" button, and choose Preset (choose from the list) or Custom (choose an individual button from the list and import the image that you want to use).
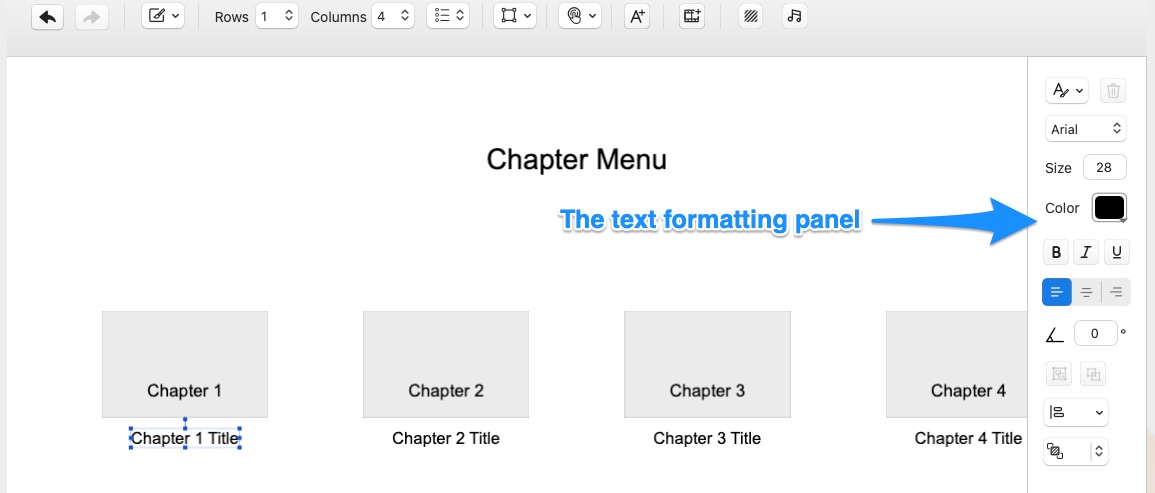
- To format text, in the preview area, click the placeholder text that you want to format. In the text formatting panel that appears on the right, choose the settings that you want. If you want to add new text, click the Add text button (added to the center of the preview area by default), position the text where you want it, then format the new text.
- If you want to add media, such as photos, to your template, click the Insert media button, open the media you want (added to the center of the preview area by default), position and size the media in the preview area and adjust any settings you want using the panel on the right.
- To use a video clip as your menu background, click the "Edit the background" button. In the panel that displays, click the "Add a video or photo as a background" button and open the video file you want.
If your video clip is longer than 30 seconds, you will be prompted to trim the clip.
Note: To avoid any compatibility issues with your video, make sure it is an AVC/h.264 video in either .mp4 or .mov format or an MPEG video. Video files in MKV or WMV formats are not supported.

Your video clip fills the menu area automatically. You can use the Crop tool if you want to show only a specific area.

- To change the music, click the Edit the music button, and in the panel that appears, click the Add audio as music button, and open the file you want. If the clip is longer than 30 seconds, you will be prompted to trim it. You can then adjust the volume and apply a fade (optional).
- Click Chapter Menu (on the left), and repeat steps 5-12 to customize the chapter menu.
- When you are finished creating your template, click the Next button (lower right corner), and click Export.
- If you want to save a project file (so you can edit your template later), type a project name when prompted. When the Save window appears, type a name for your template and save. The template will take a few moments to export.
So there you have it! You have now made your first disc menu template with an animated background using a video clip of your choosing.
Was this article helpful?
Tell us how we can improve it.