Time Stretching
Time stretching is one of the effects tools available in Roxio Sound Editor that allows you to change the tempo of a musical piece, be it an instrumental or vocal track. In other words, it lets you compress or extend the duration of a clip or section of a clip with or without affecting the pitch of the audio.
Preserving audio pitch
The Time Stretching tool gives you the option to leave the audio pitch unchanged when you slow down or speed up the tempo of an audio clip. Leaving the Preserve audio pitch enabled lets you avoid such problems as the chipmunk effect when an audio clip is sped up.
How to apply time stretching effect
- Launch Creator NXT or Easy CD & DVD Burning;
- From the Home screen, select the Music | Audio tab on the left-hand side;
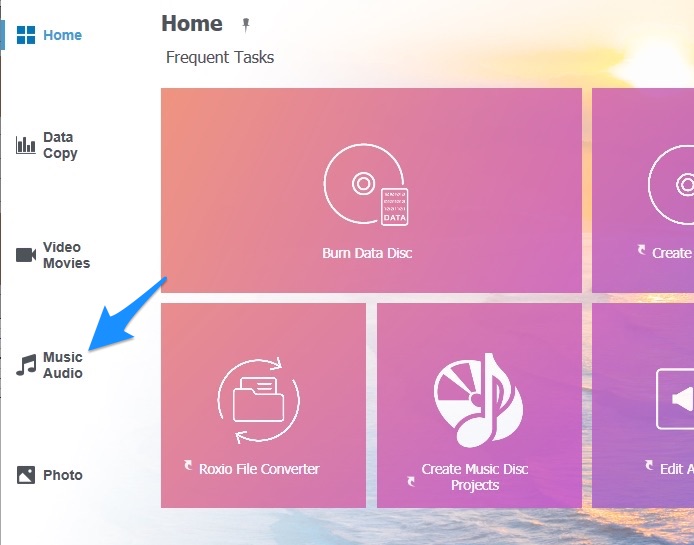
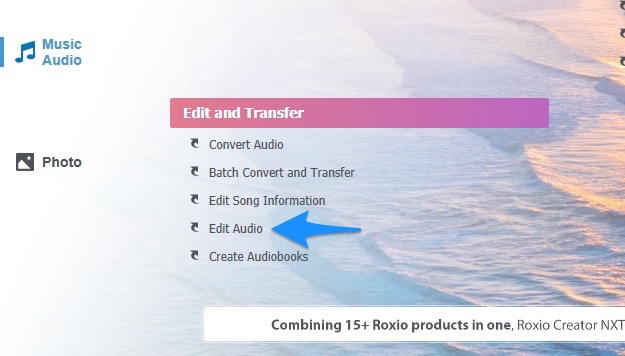
- Under the Edit and Transfer section, select Edit Audio. This opens the Roxio Sound Editor program
- From the Add to Project task pane on the left-hand side, click on Add Audio File;
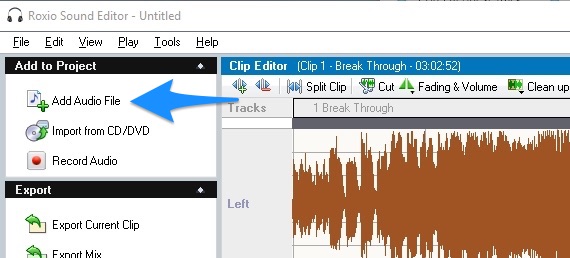
- Search for your audio clip from the Media Selector window that comes up;
- Click the OK button to add your audio clip;
Note: You can also drag and drop your audio file from a File Explorer window into the clip editor window - You can apply the time stretching effect to the entire clip or just certain portions of it:
- Click and drag your mouse across a selected portion of the clip. The selection will be highlighted in gray.
- Press Ctrl + A on your keyboard to select the entire audio clip. Or go to the Edit menu, and click on Select All.
- Right-click on the audio clip and select Effects > Time Stretching... ;
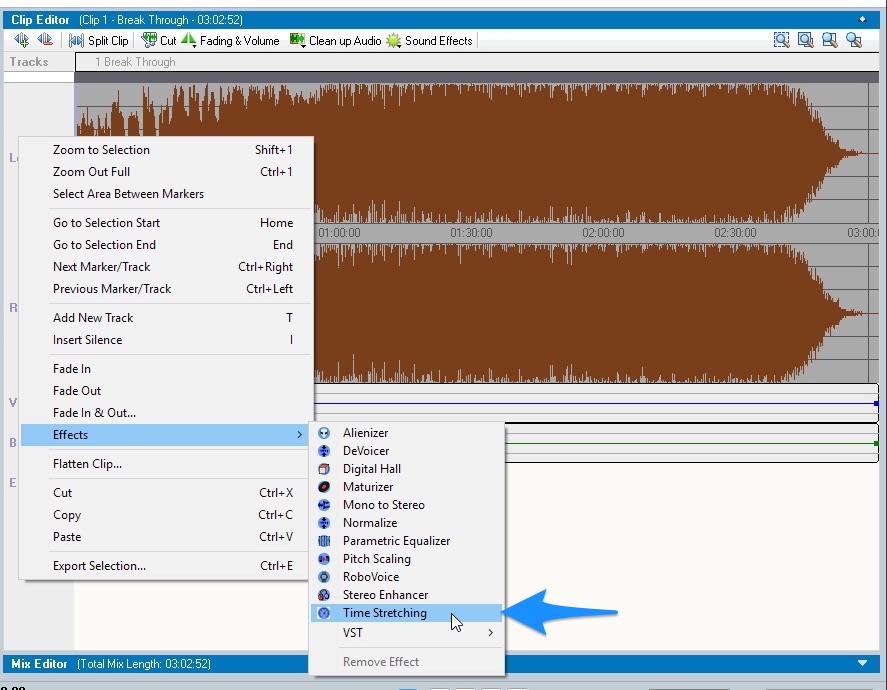
- In the Time Stretching window, simply drag the slider bar up or down to speed up or slow down the clip;
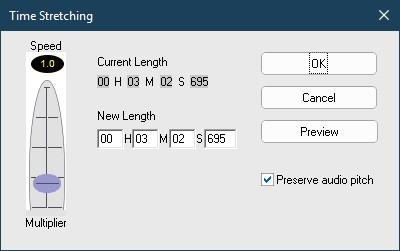
Note: The window shows you the current length of the audio clip vs the new length as you drag the slider; - You can preview the change before applying it by clicking on the Preview button;
- To leave the audio pitch unchanged, make sure the box next to Preserve audio pitch is checked;
- Once you are pleased with the change, apply it by clicking on OK;
Now, you are done! You can export the audio clip, along with any changes you've applied, to a file for sharing or uploading, or add to a music disc project for burning.
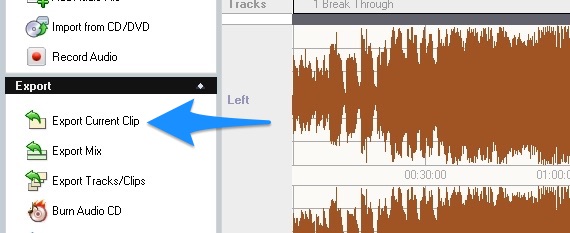
You do this by clicking on Export Current Clip in the Export task pane on the left-hand panel.
Was this article helpful?
Tell us how we can improve it.